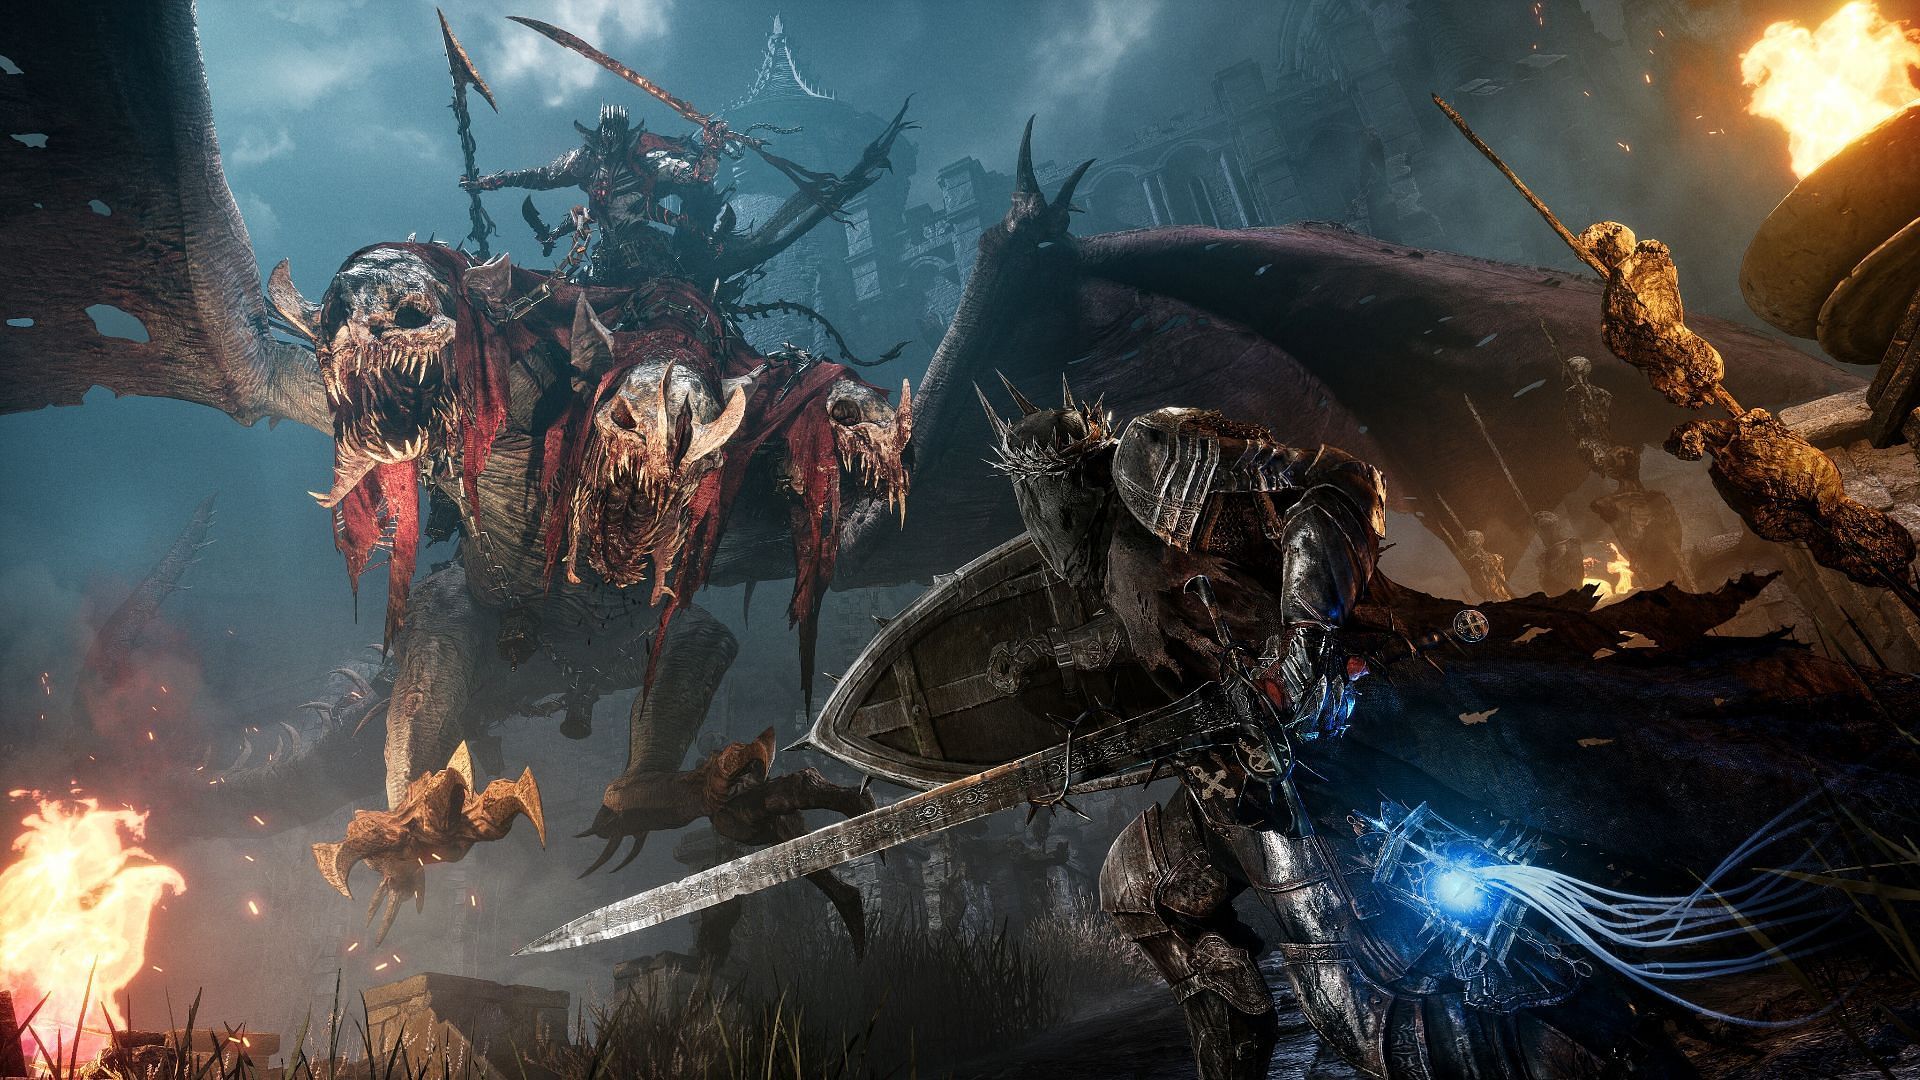
Lords of the Fallen is the latest drop in a long line of souls-like action RPGs. As with most souls-like games, they have some hard-hitting, complicated bosses in Lords of the Fallen. Chances are, you might need some help progressing through, and that’s where we come in! We’re here to give you some tips and walk you through these bosses with ease.
The bosses listed in this list are in order of appearance, so you don’t have to worry about scrolling and scrambling around to find a specific boss. We’ve even listed which ones are optional. Now, let’s get started!
General Tip:
The game implements ‘Wither Damage’ or ‘Withered Health’, where your health bar will turn grey when you block attacks. If you manage to land an attack after blocking without getting hit, then you can regain your health. But if you get hit, you will lose all your health in grey.
Additionally, this impacts your enemy’s posture, which is the circle that appears around them. The more you attack them, the more it whittles away, and you can deal more damage. When the circle turns red, you can deal a Grevious Strike, which will deal a huge amount of damage.
1. Holy Bulwark Otto
Location: Abandoned Redcopse near the Vestige of Ranik
Rewards: None
Since this is the first fight you’ll encounter in the game, it also works as a tutorial on how the game and boss fights work. Specifically, it will focus on teaching you how to block and parry. Hence, it is one of the easiest bosses in Lords of the Fallen.
The moment you enter the arena, Holy Bulwark Otto will charge at you, so either prepare yourself to dodge or block his attack. This boss has a two-handed weapon and has slow movements as well as attacks, so you should be fine if you pay attention.
Some moves to watch out for include an overhead slam, where he lifts his weapon into the air and slams it into the ground as well as a side swing. You can practice your blocking and parrying here but do keep in mind that these attacks will deal bleed damage if you get hit. A bleed bar will appear above your health bar and when it is maxed out, you will bleed out, which affects your health continuously until you recover.
Additionally, he has a move where he spins and slams his mace with a forward lunge, so dodge him and move in for an attack while he is busy trying to get his weapon out of the ground. Otto also has a move where he lifts his hand and lunges at you to grab you by the throat. This is deadly as he will slam his weapon right into you.
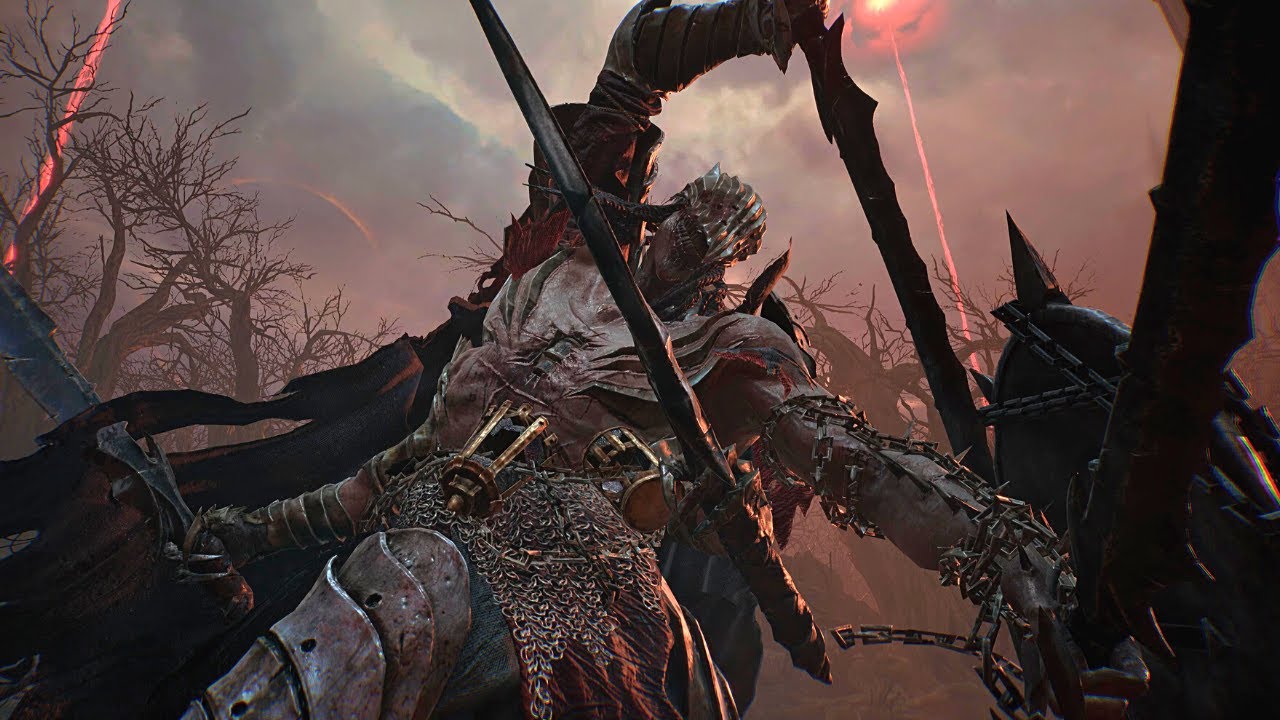
2. The Lightreaper
Location: Appears for the first time after defeating Holy Bulwark Otto at the Abandoned Redcopse.
Rewards: None
The Lightreaper plays an important part in the story, and you will encounter him more than once in battle as he tries to get the Umbral Lamp from you. If this is your first playthrough, there’s no way you can beat this overpowered boss.
Your best bet is to give him a good fight and just get defeated by him. Don’t worry about it, you won’t lose anything. A cutscene will play, and you’ll awaken at the nearest Vestige. As such, there are not many pointers we can give you. Practice your dodging, blocking, and parrying, then succumb to defeat so you can move on to the next fight.
If you do end up beating him, the same cutscene will still play.
3. Pieta, She of Blessed Renewal
Location: The Abandoned Redcopse Windmill Vestige.
Rewards: Remembrance of Pieta (in Umbral), She of Blessed Renewal, Umbral Scouring (in Umbral) x 2
In your encounter with Pieta, she takes on a more guarded approach that only uses her long-range attacks. She has Radiance beam attacks and far-reaching sword attacks that will escalate to multiple swings at a time. You can either parry, block, or dodge these attacks as you see fit. Pieta does take a break after 2 to 3 swings, so you can get in an attack or two then.
One of her attacks to watch out for is when she leaps and swings her sword before slamming to the ground, as she takes a longer break here, making her vulnerable. There’s also a sword attack that follows you, so beware of that.
As for her Radiant beams, she takes a moment to charge them up, so it is easy to spot. When she holds her sword straight with a light glowing around it, that’s how you know she’s charging a beam up.
Phase 2:
As she gets weakened, Pieta will fly to the other end of the battlefield and hover in the air as she prepares for an attack. She will dash forward with a radiant arc that slices anything in her way while golden arrows rain from above. Hence, avoid the middle of the arena and stick to a path away from her.
As you progress, she will either repeat this attack or do some variation of it where she replicates golden versions of herself. When this happens, stick to the one path that is not occupied by her or her golden versions.
4. Scourged Sister, Delyth

Location: Climbing ladders near the Sanctuary Vestige in Pilgrim’s Perch.
Rewards: Vestige Seedling, The Scourged Sister Flail, The Scourged Sister Helm
As you walk closer to the stairs, you will be approached by Delyth. Her health bar will remain blue until she gets to the top of the stairs, and you can’t attack her unless you kill the parasite on the right side of the screen. This is a common occurrence with bosses in Lords of the Fallen, which you will encounter more of later. Then, you can get in a few ranged shots while she slowly approaches.
Delyth starts off her fights with a tornado that can deal Radiant and Bleed damage as it aims straight for you and explodes upon impact. Watch out for her mace as she winds it up, then get behind something like a pillar to avoid any damage. She can also deal out multiple quick hits with her mace, so either block, parry, or dodge out of the way. As she recovers, you can get in some attacks.
Phase 2:
As her health bar depletes about a quarter to halfway mark, she will transform and create a radiant ring around her. This time, her attacks will come faster and deal more damage. She will utilize her quick dashes to get in multiple successive attacks that are hard to predict. Delyth will also spin around or do a 360 attack in addition to her previous attacks that are now heightened.
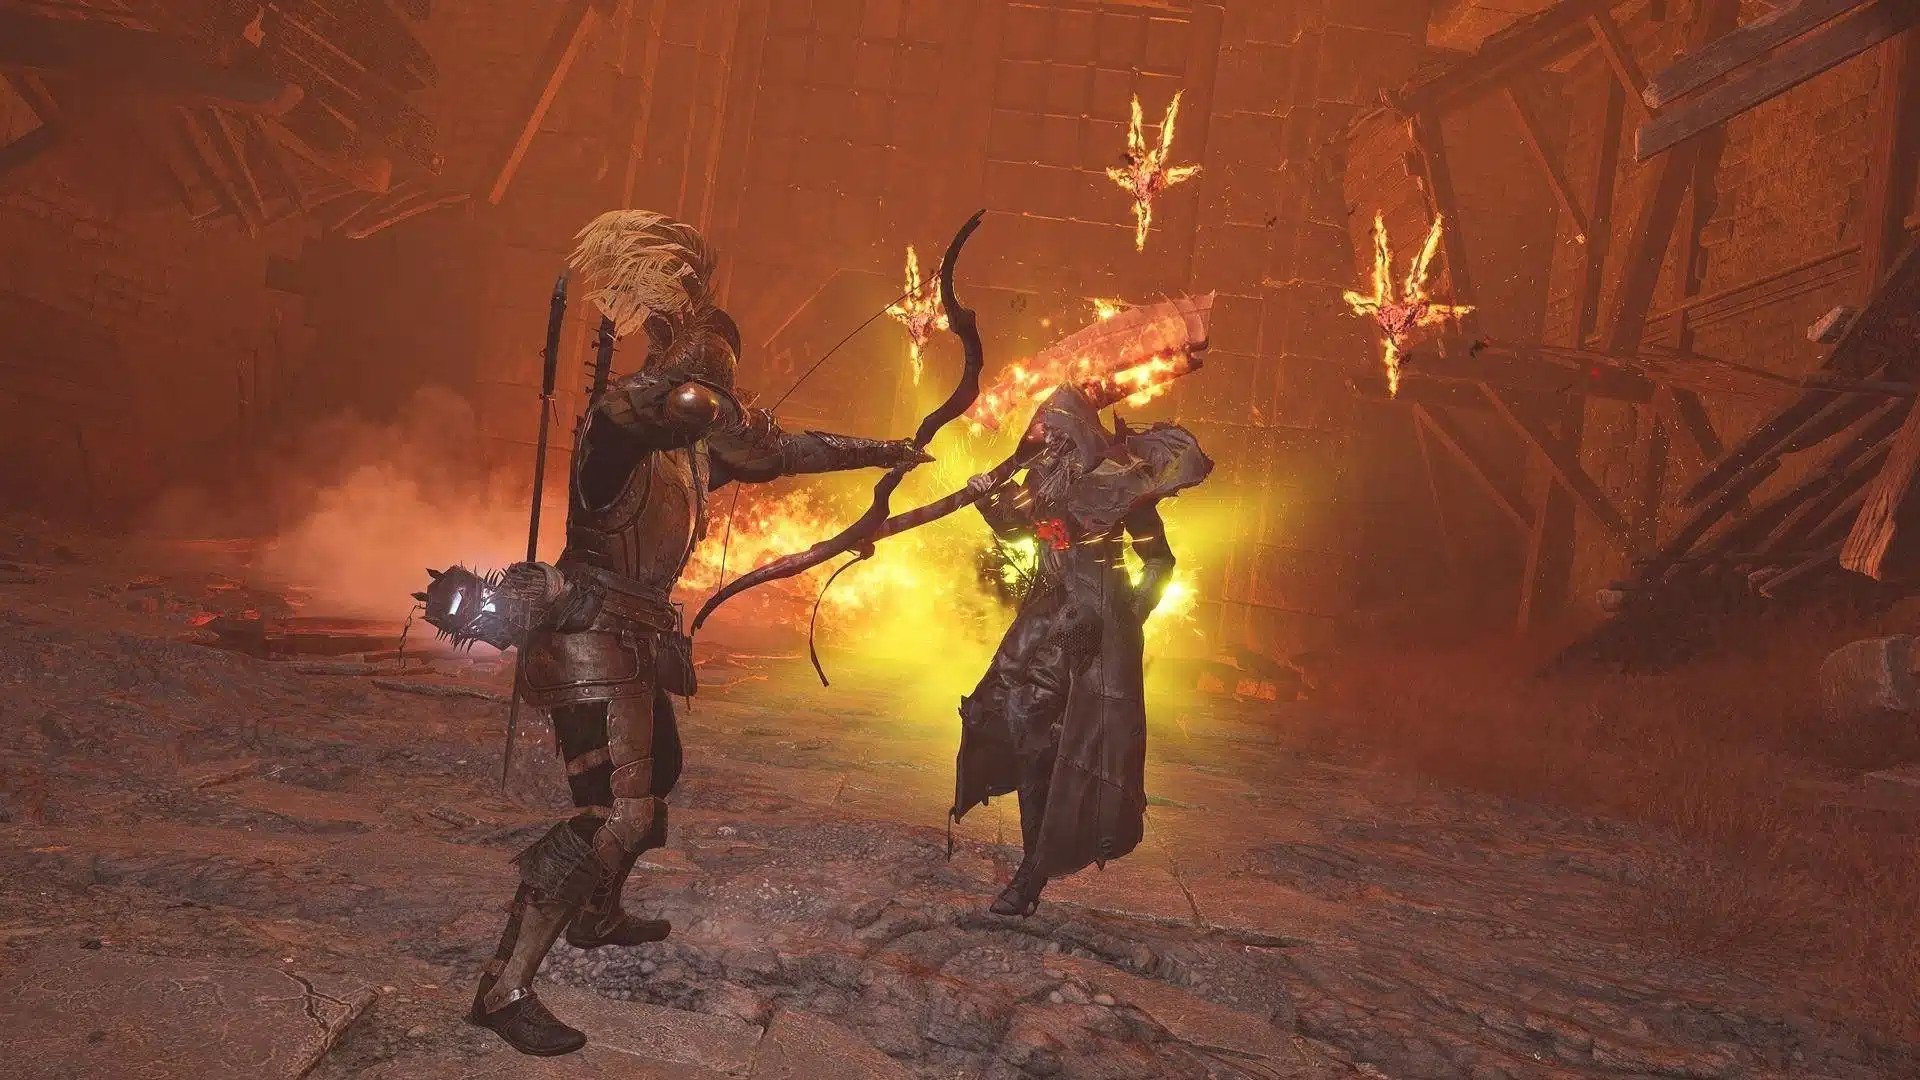
5. Gentle Gaverus, Mistress of Hounds
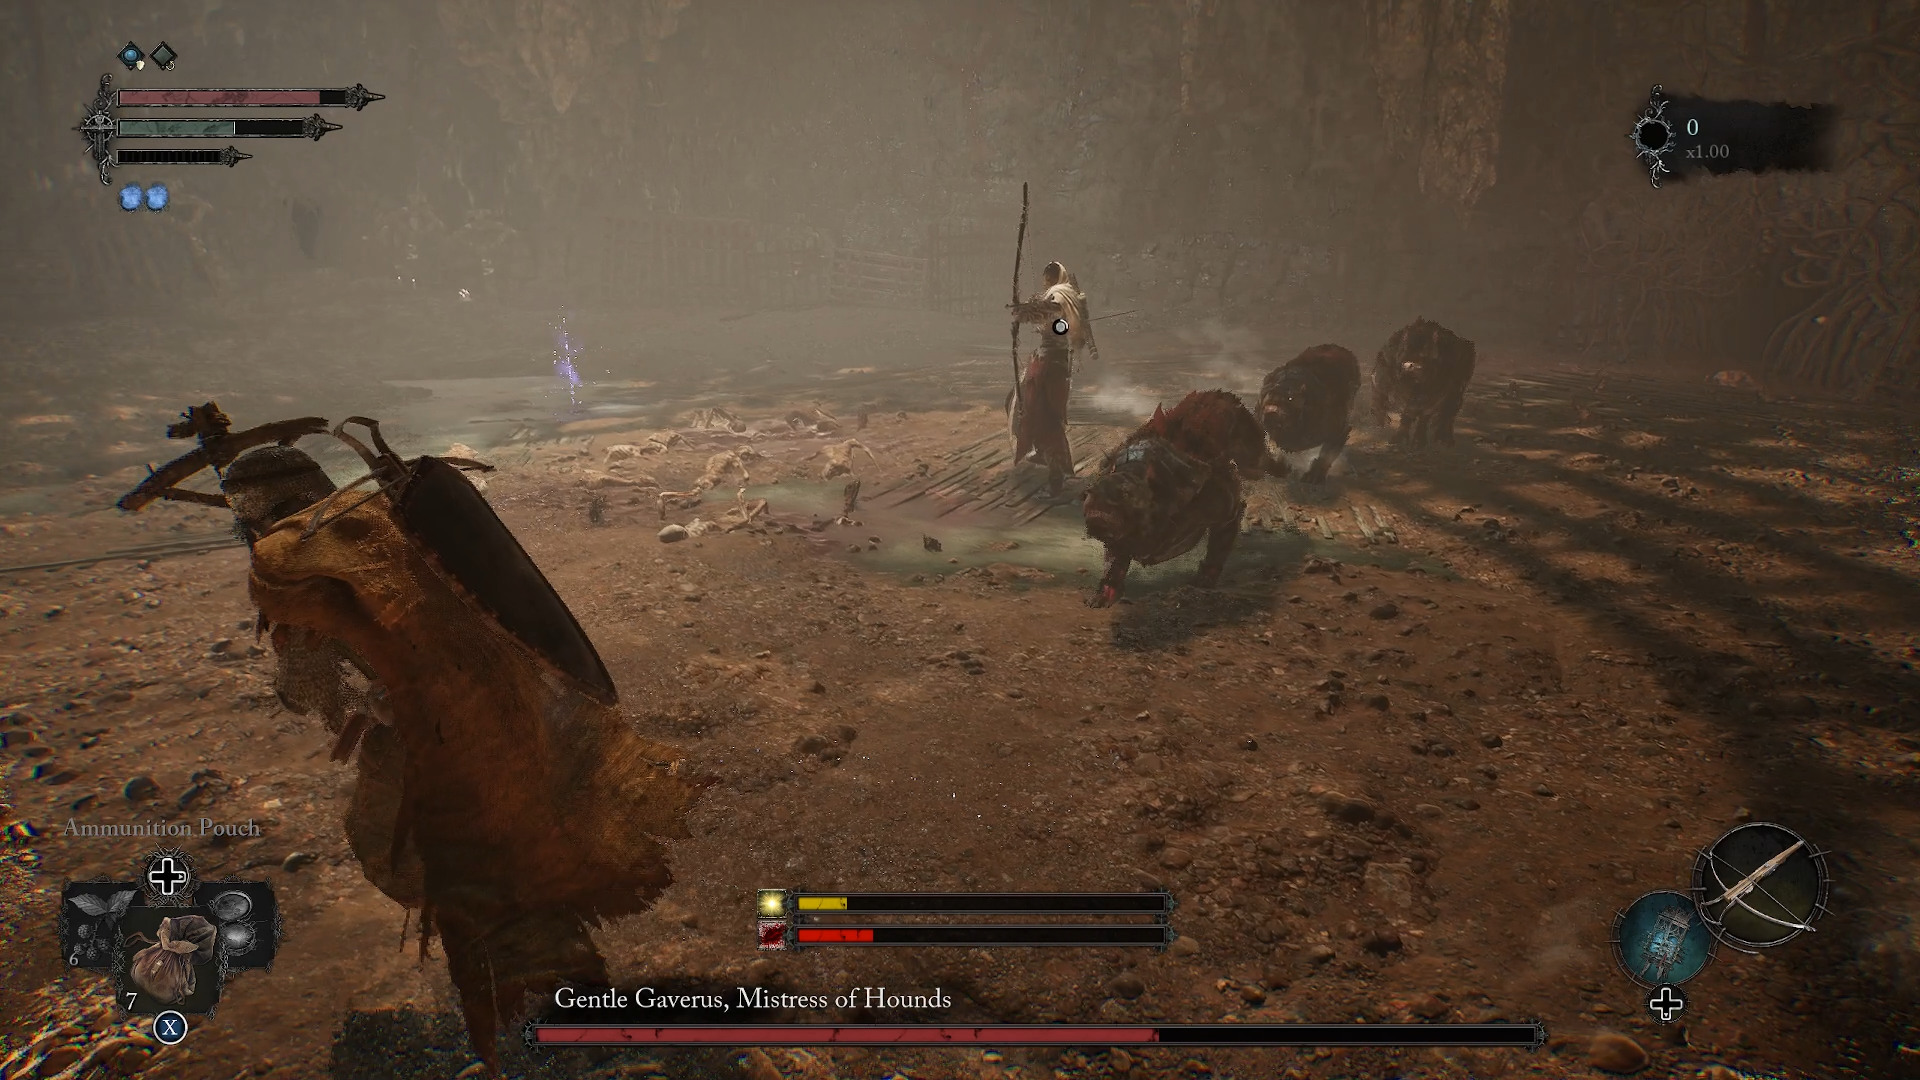
Location: Use the elevator near the Pilgrim’s Perch Bellroom Vestige to the lowest level.
Rewards: Vestige Seed, Ammunition Satchel, Sin-Piercer Sword, Sin-Piercer Sleeves
Gentle Gaverus focuses mostly on ranged attacks with her fire arrows, which she occasionally imbues with Radiance which will cause more damage. However, if you get too close to her, she will switch to quick sword attacks instead. She will try to hit you twice with her sword, and if it doesn’t work due to your parrying, blocking, or dodging, she will switch back to her arrows.
If you continue to stick by her, she will throw a smoke bomb and then teleport to a different place in the arena. She does take a while to return to her weapon after a long lunge, so be sure to attack her while she’s vulnerable. Any long-range attacks here might do the trick.
Additionally, she has a couple of hounds that will chase you around the arena. For these hounds, you will have to hit them once to destroy their armor and start to deal damage. The good thing is it only takes a couple of hits to take them down. Once taken down, you can focus on Gentle Gaverus. Although, they will respawn as the fight goes on.
Ignoring the hounds can be annoying as you have to ensure you don’t get bitten, so try to plan your attacks well. If it is possible to group the hounds and Gaverus, you may be able to attack them all at once with a melee weapon.
6. The Congregator of Flesh

Location: Entering the Forsaken Fen and activating the Vestige of Olleren.
Rewards: Vestige Seed, Umbral Scouring x 8, Remembrance of the Congregator of Flesh (in Umbral after Soulflay)
This fight is slightly more challenging compared to the previous bosses in Lords of the Fallen, as you will be stuck in a small area with a huge enemy. Furthermore, there’s a parasite that you have to destroy before moving on to the actual boss. Otherwise, the monster will be too tough to defeat. This is indicated by its blue health bar.
Our first tip is to target the monster’s body and back leg. Attacking the monster’s back leg will make it hit the ground and roll over more often, giving you more chances to attack its body. Additionally, do equip anything that allows you to be more resistant to Poison or removes Poison effects. This monster has some attacks that release clouds of poisonous gas.
Contrary to its size, the Congregator of Flesh can move rapidly. It also has some moves that allow it to move quickly towards you. Note that it also has a bigger arm on its right side which ensures a wider reach. There are moments when the monster will move forward quickly and slam this arm down in an attempt to catch you. It will also swipe the arm from side to side to hit you.
As such, it is best you stay away from the creature and use ranged attacks instead. When its health reaches the halfway mark, it will get more frustrated. The monster will jump up and down angrily, which will knock you back. Poison clouds and arm swipes get more frequent and aggressive as well. Be prepared to dodge more as the monster continues to jump around.
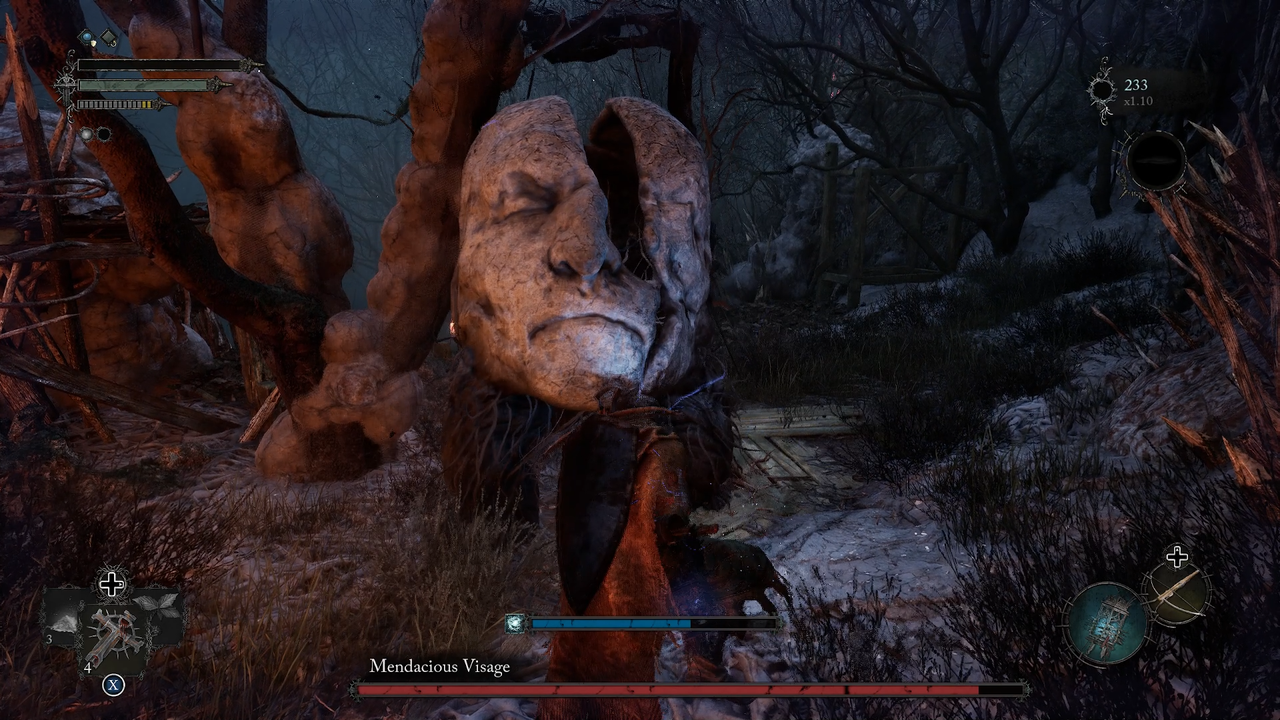
7. Mendacious Visage (Optional)
Location: Near the Vestige of Valade in Forsaken Fen within the Umbral Realm.
Rewards: Vestige Seed, Mask of Wrath, Precision Hammer
Mendacious Visage is an optional boss, and this won’t be the last time they appear as well. You can find them in various moments throughout the game within the Umbral Realm. The general aim of this fight is to get the Mendacious Visage to open its face and reveal the ghoul inside. Its face is its protective shield, and when the ghoul is revealed, it is vulnerable.
To accomplish this, there are two things you can do:
- Use your Umbral Lamp and Soulflay it. Do this twice, then deliver a Grievous Strike. To replenish your Soulflay charges, there are blisters located around the arena.
- Simply wait until it has completed a string of attacks.
As for its attacks, there are numerous types, depending on whether its face is open or closed.
For closed-face attacks:
- Run attacks, where it charges at you. You can dodge this and attack its weak spot while it runs into something else in its way.
- Ranged fist slams that you can wither your health if hit. Simply dodge this.
- Leap and jump, which creates AoE damage when it lands. This also damages the dome around the Mendacious Visage.
Open-faced attacks include:
- Throwing glowing, explosive slugs that will crawl and follow you wherever you go. These will explode upon touch and wither your health, but if you avoid them for a certain amount of time, they will simply explode and disappear on their own.
- Wither attack, which looks like several orbs flying out of the Visage’s face chasing after you. These can come out as smaller little orbs or as one big group in an attempt to hit you.
- Face shut trap, where it slams its face shut with you caught in it. Hence, don’t get too close to it, even if you are attacking it in close combat. If you’re caught, the fight ends.
- A leap and jump attack which is the same as the closed-face attack previously mentioned above.
Note that if you get hit with any wither attacks, there are enemies around the arena you can hit and regain your health. They do appear at different times, so take advantage of them when you can to avoid using your Sanguinarix.
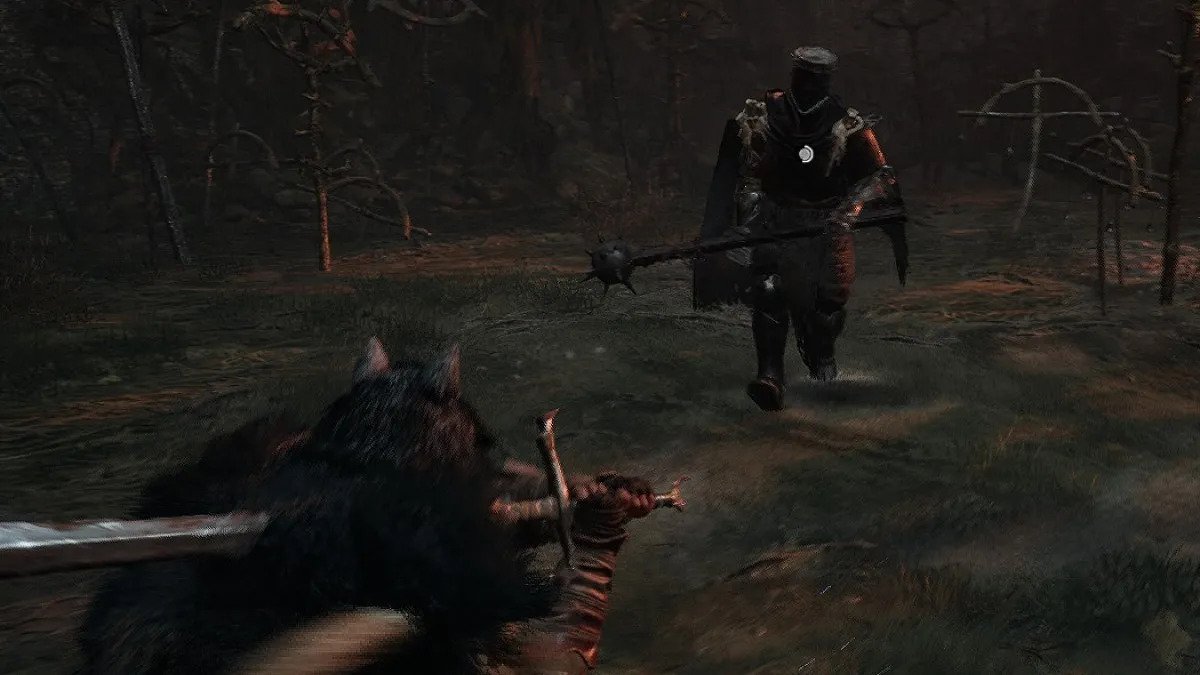
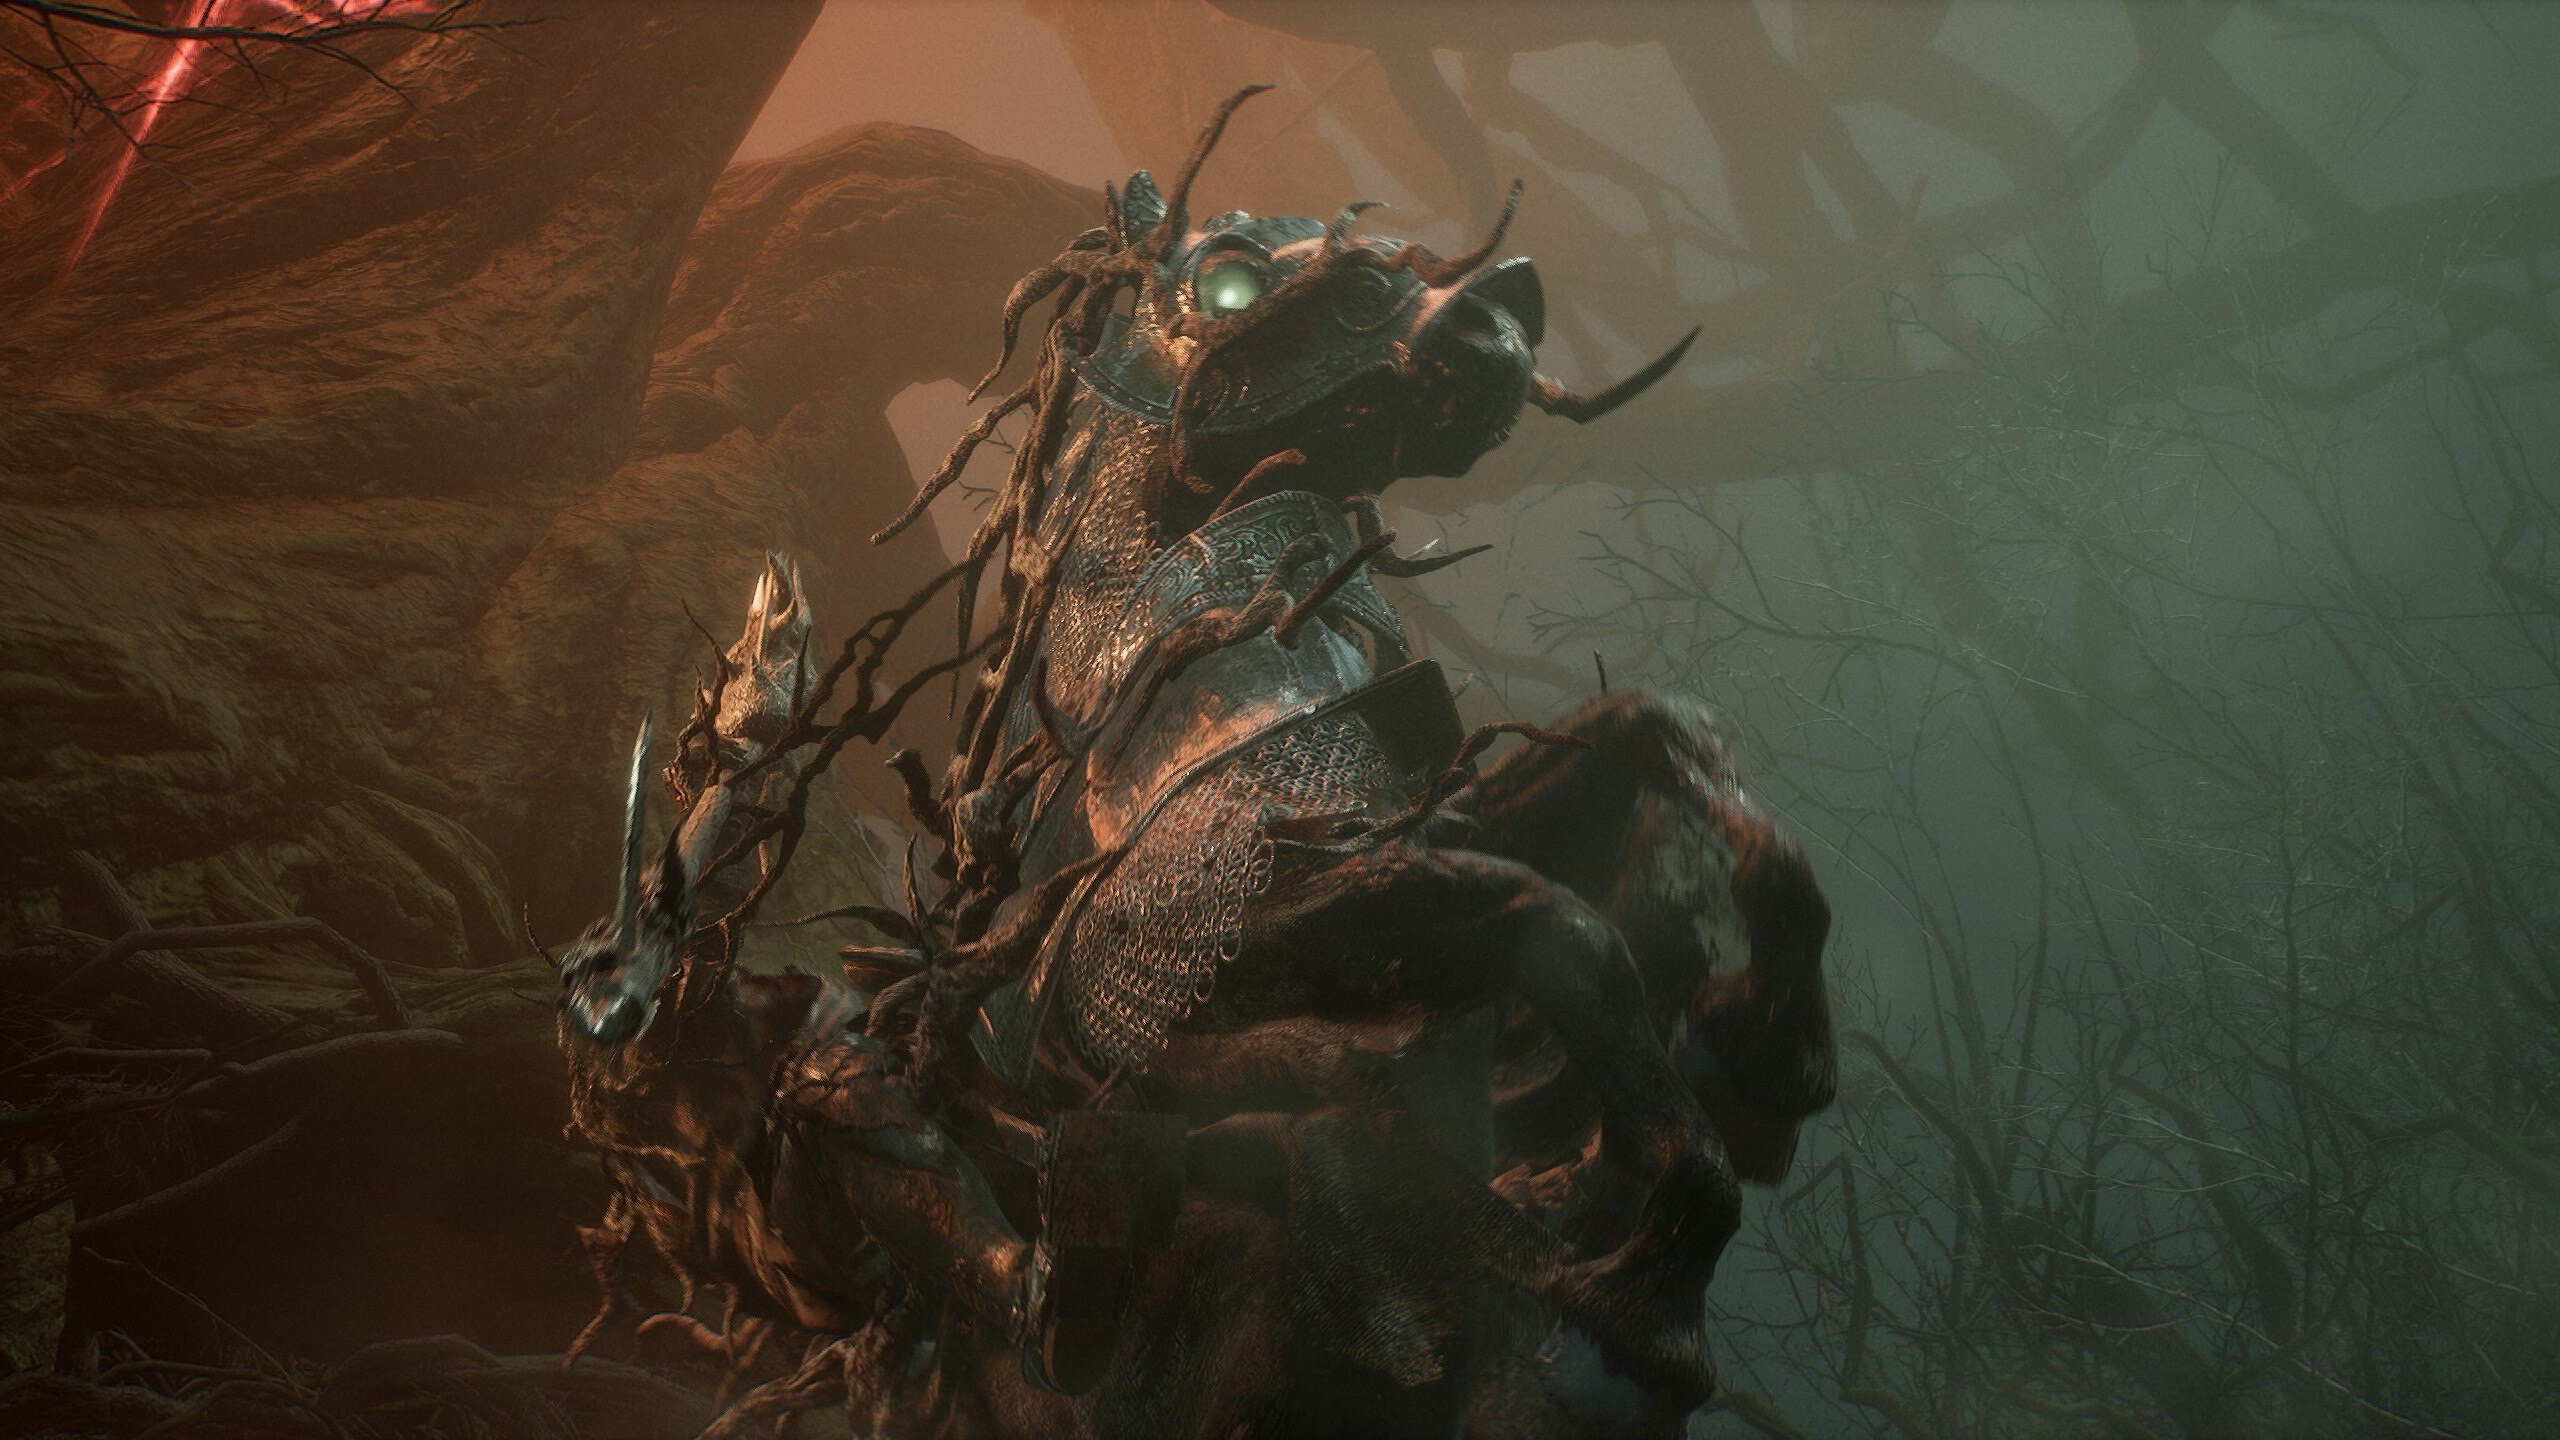
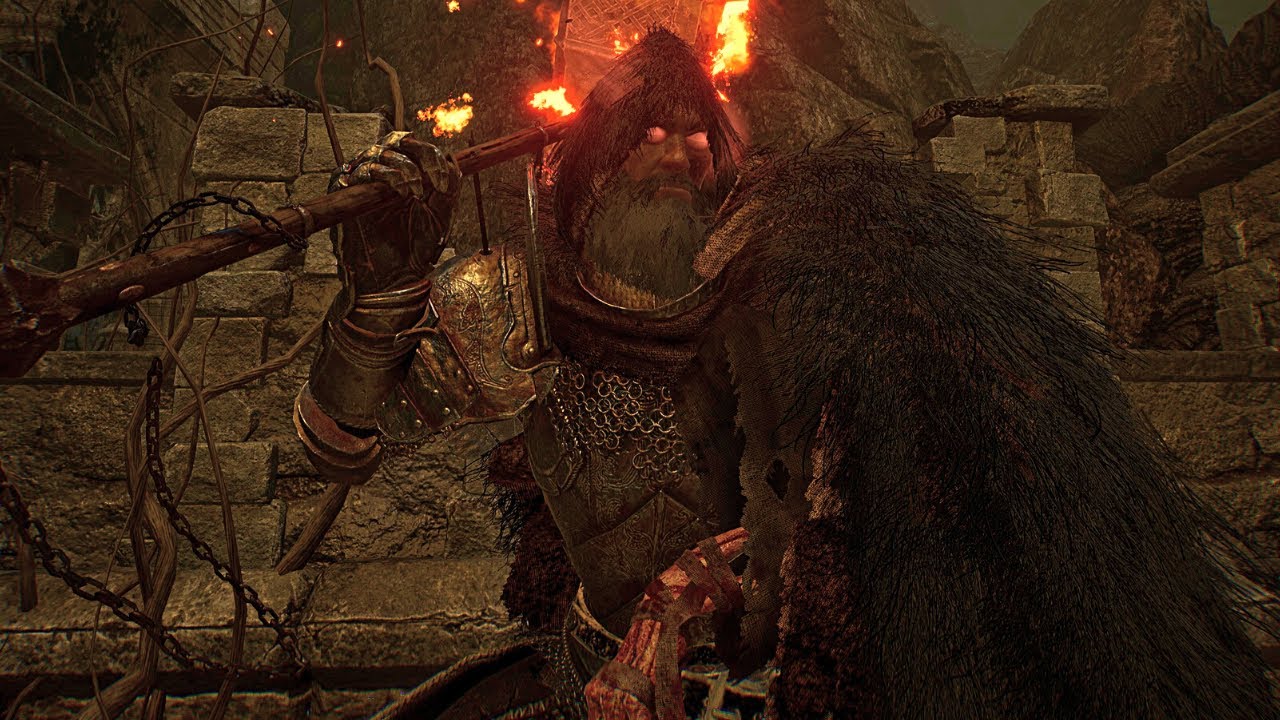
8. The Hushed Saint
Location: The poisonous swamp inside the Forsaken Fen after crossing a lengthy wooden bridge.
Rewards: Access to the first beacon, Vestige Seed x 1, Umbral Scouring x 8, Remembrance of the Hushed Saint (in Umbral after Soulflay), Umbral Scouring (in Umbral after Soulflay) x 2
Right off the bat, the Hushed Saint will ride his horse straight at you and try to attack. With the right timing, you can block this attack and knock him off his horse. If you miss, he will do the same thing again, but he will leap from his horse and throw his weapon at you like a spear.
You can choose to fight in either close combat or ranged attacks, it doesn’t matter. For close combat, you can parry and block his attacks, then try to break his stance. For ranged attacks, the Hushed Saint will continue to throw his spear-like weapon at you. He also has a quick lunge attack that covers quite a distance where he tries to impale you with his weapon, so beware when he pulls his spear back.
Another way to break his stance is to use your Umbral Lamp, which will allow you to spot some parasites around the battlefield that you can use to throw up thorns to knock him back. If you do this repeatedly, it will knock him down, and you can do a Grevious Strike. Plenty of these parasites will appear throughout the battle, so don’t worry.
This fight can be annoying as he can switch between riding his horse to close combat attacks and ranged attacks. He can even send out waves of thorns with his horse that cover a huge area. You can tell this is about to happen when the horse rears back and starts glowing. Run away from these thorns, roll over them, or jump away to avoid damage.
Phase 2:
About halfway down the health bar, the Hushed Saint will now summon his horse to attack you as well. He pounds on his shield, and the horse appears, charging straight at you. For this phase, he still uses the attacks from the first phase, but he can summon waves of thorns without his horse now.
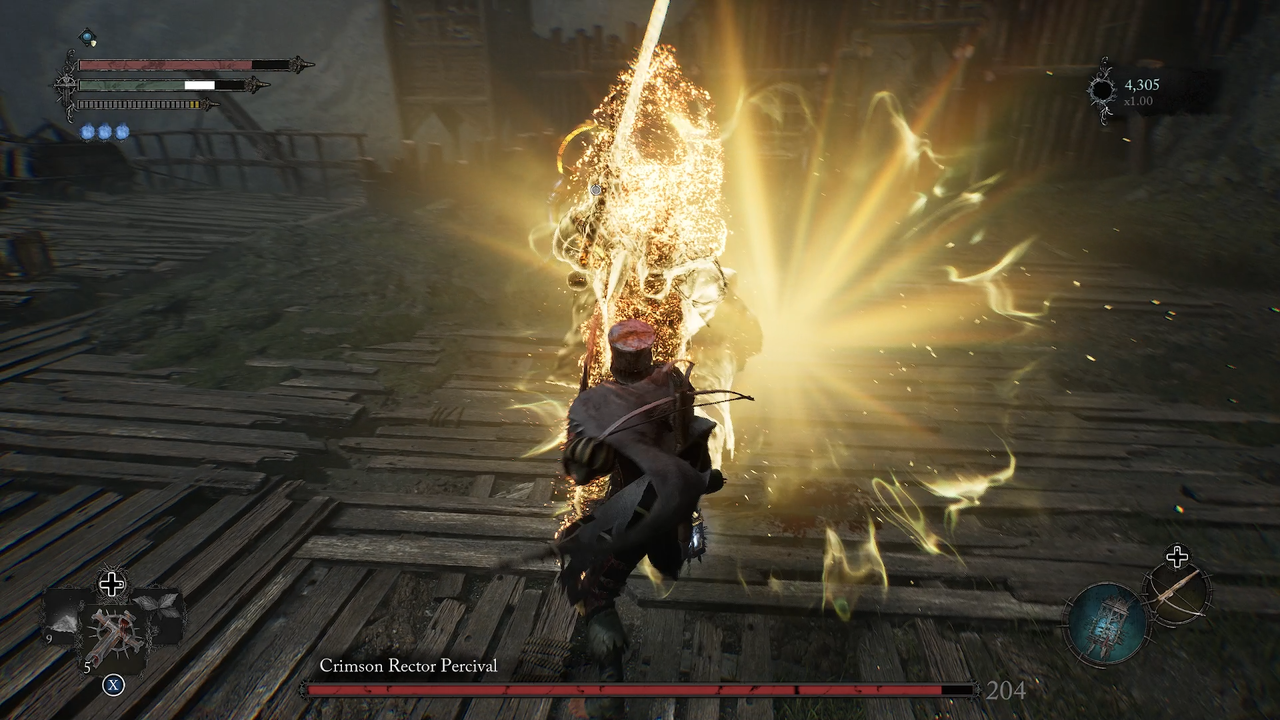
9. Crimson Rector Percival (Optional)
Location: In Fitzroy’s Gorge near the elevator shortcut.
Rewards: Vestige Seed, Ring of Brilliant Protection, Crimson Rector Leggings, Bloodlust Weapon
The important thing to note about this fight is that Crimson Rector Percival can use Radiance to heal himself and create a clone of himself to fight you. This does complicate things a little, giving you more of a challenge.
For his attacks, you can expect lunge attacks, jump attacks, and spin attacks, where he slams his sword down. As he takes a while to recover his sword from the ground, you will have a chance to attack him. To break his stance, you can block or parry his attacks.
As for his clone, it will perform the same type of attacks and sometimes just appear quickly to slam his sword down on you. There is a way to temporarily disable this ability, and you will need your Umbral Lamp. When you’re in Umbral, you can see parasites around the area, and you can put them to use. However, there are a limited number of parasites around, so you might have to use them sparingly or strategize.
Temporarily disabling his ability means that you only have to deal with his standard attacks, which is way less irritating.
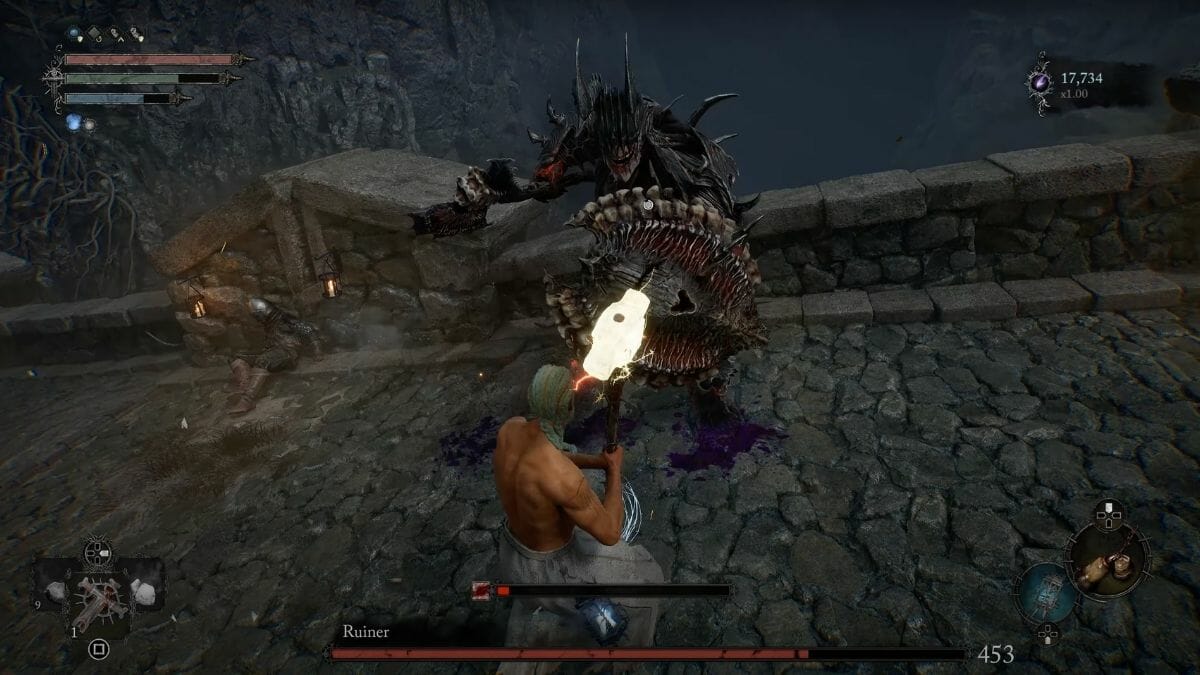
10. Ruiner
Location: On the Fitzroy’s Gorge bridge.
Rewards: Vestige Seed, a piece of Ruiner Armor Set.
The Ruiner’s fight is significantly more challenging compared to some of the bosses in Lords of the Fallen, as it takes place on a bridge that limits your movements and space. Before heading into battle, be sure to equip anything that will help against Fire attacks or make you resistant to Fire.
The fight starts with the Ruiner charging straight at you, but if it hits anything on the way, it will stop. So, get him to hit the boxes on the bridge, which allows you to attack him while he’s vulnerable. Make it quick, though, as he will try to back you towards the edge of the bridge. Dodge him or distance yourself.
He has a weapon and shield, which he will ignite with fire. When he attacks, his weapons leave a fire trail, and his attacks will send out waves of fire. If he smacks the ground, it will create pools of fire around you that will explode. His leaping and lunging allow him to create a huge area of fire and explosions as he lands as well.
Additionally, he will even throw out a fire-lit statue that can boost his attacks. Treat this like a parasite and destroy it. Any of his standard attacks can be parried or blocked, and you can regain health as well as inflict wither damage through them.
11. The Lightreaper (Optional)
Location: Fitzroy’s Gorge
Right after the Ruiner fight, you will enter a fort right after crossing a bridge, and this is where the Lightreaper will appear once more. Similar to the first encounter, if you can’t defeat him yet, he’ll disappear when you respawn. When you cross the same place again, he won’t reappear.
12. Infernal Enchantress
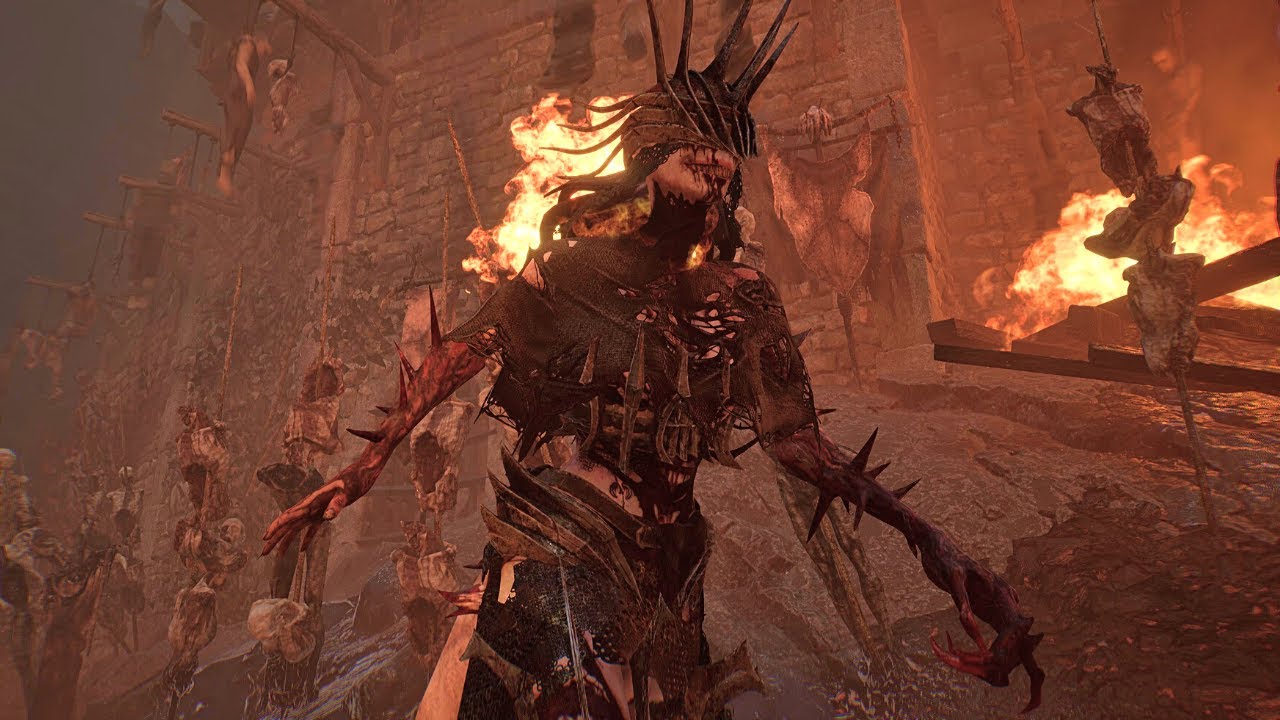
Location: In the burning village after the Vestige of Sebastian within Lower Calrath.
Rewards: Vestige Seed, Infernal Enchantress Flesh, Infernal Enchantress Flail, Infernal Enchantress Helm.
Immediately as the fight starts, the Infernal Enchantress will have a red protective bubble around her. Her health bar will also have a blue orb which means she is protected by some parasites.
To ensure the effectiveness of your attacks, you will have to break down that red bubble by locating four parasites. As you try to find them around the battlefield, you can attack her with some ranged attacks as they can pass through the barrier.
The location of the parasites is as follows:
- At the start of the battlefield, there is one hanging above the wooden walkway.
- A second one is nearby, close to a wall.
- The third one is on the left side by the broken bridge.
- Lastly, one is near her by the tree.
Once the barrier is broken, you can alternate between close combats and ranged attacks. For close combat, she can wrap herself in a Fire that continues to build up to an explosion. When you see this happening, run away to avoid significant damage. After the explosion, she will reappear in another spot in the arena. Her hands can also be used as a flamethrower that trails you.
If you prefer ranged attacks, she will start throwing fireballs at you. You can tell she is preparing for this attack when her arm reaches back, and she holds it there for a moment before throwing it at you. Additionally, she has an attack where red lines will appear with fireballs that emerge from the ground. Avoid these explosions. She will sometimes follow up with a fireball right at you, so beware.
13. Spurned Progeny

Location: Upper Calrath Plaza.
Rewards: Vestige Seed, Umbral Scouring x 8, Spurned Progeny Flesh, Giant Eyeball, Umbral Scouring (in Umbral after Soulflay) x 2, Remembrance of the Spurned Progeny (in Umbral after Soulflay).
For this fight specifically, try not to lock on to your target, as it will affect your gameplay. There is a potential for you to miss certain cues due to the camera angles and the size of your enemy. As for this first phase, you should target his legs.
Here’s what attacks to expect:
- He throws his hands down to scratch the arena and create a lava claw mark on the ground.
- A general swipe with his long arms that covers a huge part of the arena. These can be followed by him pounding the ground in front of him, thus exposing his behind and legs. As he takes a moment to get up, you can hit his legs as much as you want.
- He raises his head to the sky, where an arm will emerge and throw out fireballs. A variation of this would be fireballs coming out of the ground and exploding, similar to the Infernal Enchantress fight. These can follow you around, so run away when they appear.
- Lifting one leg to slam himself on the ground and try to sit on you. This is quite a fast attack, so if you see him lift his leg, dodge quickly.
- Punching at the ground right at you, where he will punch once with each hand, then end with both fists.
The first phase ends when he leans forward and throws up lava. You will have to find some stairs to get to the ramps above to start the second phase, as the arena is now flooded with lava.
Phase 2
This time, the Spurned Progeny’s attacks are still repetitive, but you will need a lot of patience to deal with it. Here are some attacks you can expect this time around:
- Slamming each of his hands on the ground, followed by a swipe attack. You can attack his hands when this happens, at least once. But do roll out of the way of his swipe.
- He slams his fist and sends out waves of fire repeatedly. You can get some attacks in here as he takes a while to lift his hand back up. Just get out of the way of his fire.
- Shooting a fist out of his mouth to catch you. This will happen three times in succession, so get out of the way. This attack begins when he squats down and his face is right in front of the ramp. There’s also a small roar that occurs before the hand makes an appearance.
- Variations of the hand emerge from his mouth, where fireballs get spat out, or a huge fireball gets released. For the first one, you will need to move to another ramp immediately. For the second one, get away or hide behind a wall, as it will cause you Fire damage just standing nearby. Plus, it explodes after a while.
Once a significant amount of damage is dealt, he will grab his throat and sit back, going still temporarily. The lava will also disappear from the lower level, so you can make your way there and attack him till the fight ends.
14. Bringer of Stillness, Nullity, and Silence (Optional)
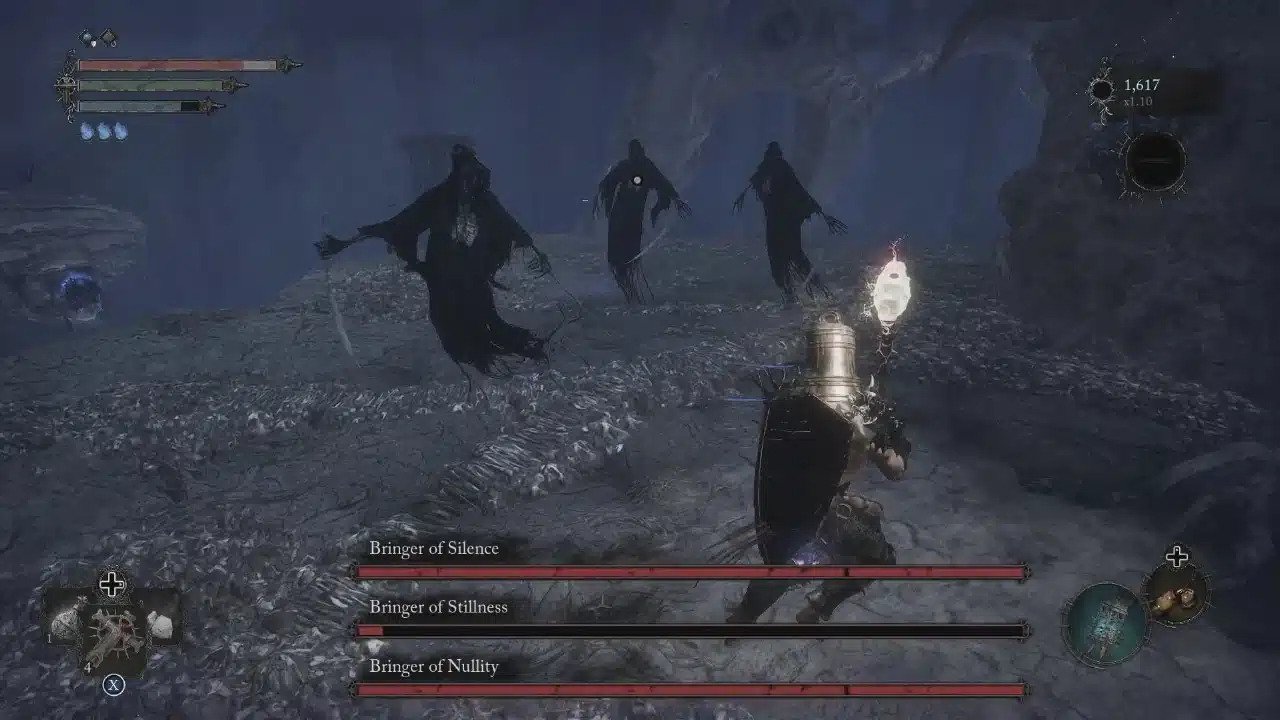
Location: Cistern, Sunless Skein in the Umbral Realm.
Rewards: Left-hand Bringer of Stillness Sword, Stillness Hood, Vestige Seed, Umbral Scouring x 5.
This trio is an optional fight if you enjoy a challenge. The first fight you’ll enter is with the Bringer of Stillness. You should have encountered the same enemy types in your adventures in the Umbral, and their attack patterns are the same. If you jump from the platform above and attack it by surprise, it will take its health down to half right away.
Once you get the Bringer of Stillness’s health down to half, the Bringer of Nullity will appear. You can hear a certain buzzing before it emerges from the ground and tries to stab you with dual blades. Your best bet is to get the two closer together to be able to hit them both at once. If not, try to focus on the Bringer of Stillness.
When the Bringer of Stillness’s health is close to gone, the Bringer of Silence will appear. This is why it is important for you to at least take one down first. Facing against three of them will be tough mainly because they mimic each other’s attacks. Rather than dealing with one attack at a time, you’re dealing with the same attack three times.
Some attack patterns or sequences you might encounter include:
- They will disappear into the platform with a black smokey trail that follows their underground movements. Watch where they go as they can take you by surprise with a scream audio when they jump on you and slam their knives down.
- They have attacks where they jump back, spin, and slice you with their blades.
Our advice is to focus on one at a time, starting with the one with the lowest health. Also, do remember that dying in the Umbral means it is game over for you.
15. Skinstealer
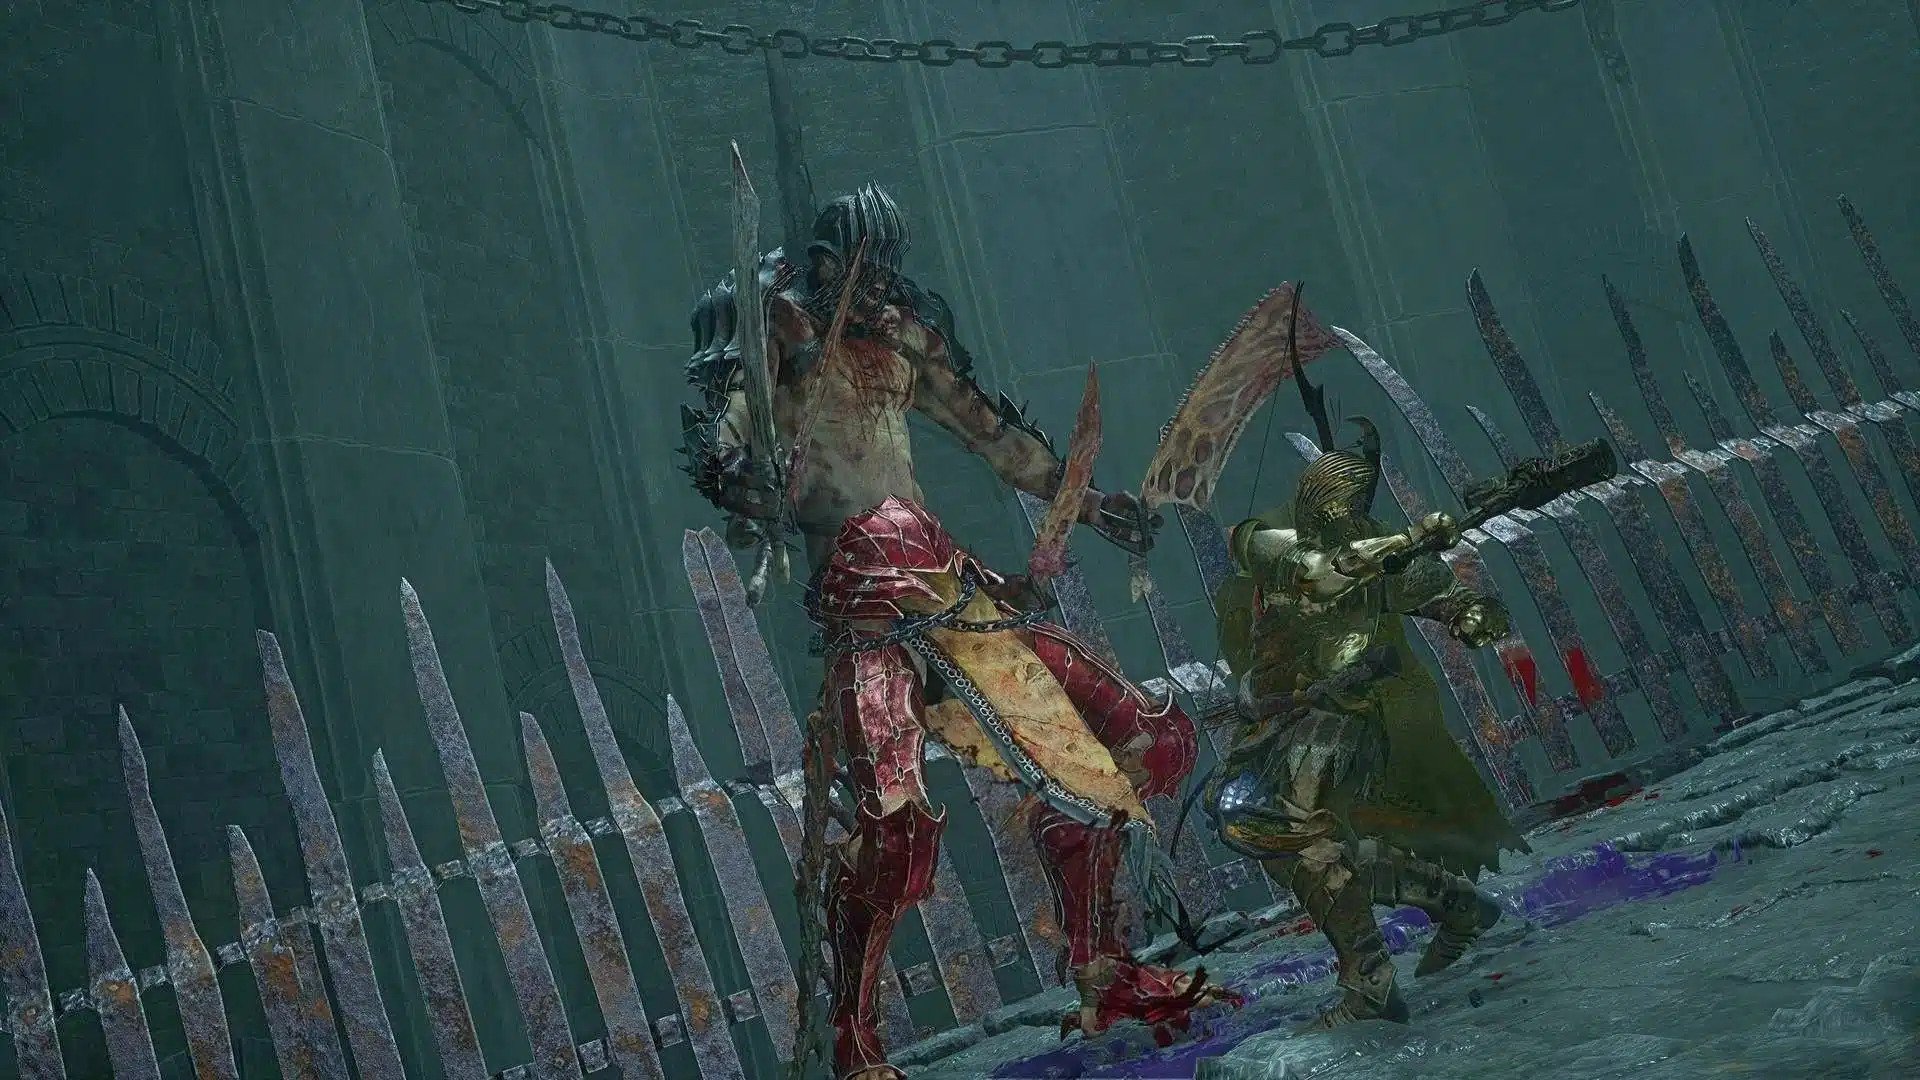
Location: Cistern, after the sewers.
Rewards: Vestige, Drainage Control Room Key, Skinstealer Armour, Skinstealer Cleaver
A rather straightforward fight in a rather confined space with not many choices in movement. The Skinstealer has four arms that are equipped with a blade. However, its attacks are pretty simple as it sticks to one or two combos before it pauses to start all over again.
The attacks you should look out for include:
- One basic swipe that you can parry, block, or dodge. You can also attack it with one or two hits that will make it skid and take some time to recover.
- A charge attack, where it charges its blades up and lights them quickly. It will then dash forward to try and slice you up.
- A lunge forward with a quick swipe.
It’s best to assume any attack will have a max of 2 tries, and that’s it. The creature’s attack patterns remain the same even if its health has dwindled.
16. Kinrangr Guardian Folard (Optional)

Location: A cave in the Fief of the Chill Curse accessible with a Fief Key located at the bell gate near the Windmill Vestige.
Rewards: Vestige Seed, Kinrangr Guardian Axe, Kinrangr Guardian Armour.
Kinrangr Guardian Folard has three hounds with him that are protected by a parasite located in the back left corner of the cave. Be sure to destroy this parasite otherwise, things will get difficult.
Try getting to the parasite through dry land rather than the water, as it will slow you down. You can use the Umbral to remove the water altogether, but a Mendacious Visage will be waiting for you, so to lessen your burden, stick to the Axiom.
After taking down the parasite, focus on taking down the hounds. You should put some distance between yourself and the Guardian Folard so you don’t have to worry about him while focusing on his hounds. The hounds should go down with a couple of hits, you will simply have to dodge their bites.
When that’s done, you can face off against Kinrangr. His attacks are similar to that of a Bulwark. His attacks are slow and heavy, so they can be parried, dodged, or blocked. You can even roll out of the way to attack him from behind. The attacks you should be wary of are the ice attacks.
For this fight, it is best to equip anything that helps with Ice resistance like the Frostbite Cure. When the frost damage builds up, it will start to impact your stamina. If it builds into a fall bar, then part of your stamina will be frozen until you recover.
His ice attacks include:
- Shards of ice get thrown at you when he throws down his weapon.
- Ice shards come out of the ground in certain areas when he throws his weapon down. This has a slightly delayed reaction, but if you see an icy mark, then the shards will appear.
- He’ll drag his axe along the ground, then flick it up, throwing quick ice shards at you.
17. Griefbound Rowena (Optional)
Location: At the Fief of the Chill Curse after defeating Kinrangr Guardian Folard.
Rewards: Vestige Seed, Frostbite Cure, Aelstrix.
This fight is slightly challenging as Griefbound Rowena constantly summons ‘wretched(s)’ and remnants to aid her in battle. They can be quite annoying as you try to focus on attacking her, but the good thing is, they are quite slow, so you can choose to ignore them. You will have to simply keep an eye out for their whereabouts.
Her attack patterns are similar to the Infernal Enchantress but in ice form. If you are far away from her, she will use ranged attacks like throwing icicle darts or forming a wall of ice to deter you from getting closer. The wall of ice will inflict huge frost damage, so you’re better off clearing the arena until it disappears. You can attempt to jump through it to get to her, but you might attain some damage.
For close-range attacks, she will blow ice at you or create big ice explosions that engulf her in a frosty cloud as ice shards emerge from the ground. Then, she’ll move to another location in the arena. At the same time, she will envelop herself with a cold wind that will cause you frost damage if you come close.
Your best bet to land an attack would be by using ranged attacks or getting in some attacks while she forms her icicle darts. This is one of the bosses in Lords of the Fallen where patience is much needed.
18. The Hollow Crow

Location: Near the Vestige of Loash in the Fief of the Chill Curse.
Rewards: Umbral Scouring x 8, Purifying Balm, Umbral Scouring (in Umbral after Soulflay) x 2, Remembrance of the Hollow Crow (in Umbral after Soulflay).
In this fight, you will want to focus on Lucy first rather than the Hollow Crow. She’ll continuously appear throughout the fight and emit a charge from a purple orb. This will summon all sorts of creatures from the Fief of the Chill Curse that you will have to fight, making this one of the more annoying bosses in Lords of the Fallen. Try to Soulflay the purple glowing orb that moves around the arena to hit Lucy’s soul and apply Wither damage to her.
Every time she appears, focus your attacks on her. When she disappears, then focus on the creatures she summons. Eventually, you’ll get to a point where you can perform a Grevious Strike on her. Note that aside from the summoned creatures, the arena itself will have the occasional ice and wind circles that will give you frost damage, so beware of this.
To Soulflay Lucy, be sure that your Umbral Lamp has been upgraded to the highest possible limit and socket the Umbral Eye of Betrayed Eliard to gain an extra charge. Additionally, you can go into the Umbral to attack her without having to Soulflay, but it is safer to fight in the Axiom. There are blisters you can gain charges from situated around the area.
After performing a Grevious Strike on Lucy, she will disappear for a moment, and the Hollow Crow will take her place. Some of its attacks will include:
- Shards of ice shoot upwards from the ground.
- It will throw a trail of ice that will speed toward you and follow you everywhere you go.
- Throwing icicles at you.
Lucy will appear again occasionally, and you can continue to deal damage by withering her health away. When this happens, the Hollow Crow will lay its head down from its nest and you can perform a Grevious Strike.
19. Harrower Dervla, the Pledged Knight/the Unbroken Promise
Location: In the Revelation Depths.
Rewards: Vestige Seed, Umbral Scouring x 8, Harrower Dervla’s Rosary, Dark Crusader’s Call, Ammunition Satchel, Umbral Scouring (in Umbral after Soulflay) x 2, Remembrance of the Unbroken Promise (in Umbral after Soulflay).
Both bosses are weak against Radiance as they use a lot of Wither attacks. But let’s start with Dervla. She is susceptible to several status effects like Bleed, Poison, and Fire, which are best inflicted with ranged attacks. Her attack patterns focus on a combination of close combat and ranged attacks done by a heavy sword. This also leaves her vulnerable as she needs time to recover.
Occasionally, she will run around the arena with her crossbow, where she will take a knee and shoot arrows at you continuously or spin in the air and shoot multiple arrows at once. These arrows will explode after a few seconds, so keep away from them even if they miss you completely.
Phase 2
As you reach the halfway mark of her health bar, she will use more Wither attacks and utilize her crossbow more. Her sword is now imbued with Wither damage, and she’ll send out Wither shockwaves at you. When she swings her sword, she’ll send out arcs of Wither damage as well.
Your best move is to dodge, parry, or block her attacks as they come while watching out for any changes in your surroundings. Dervla can form pools on the ground that cause Wither damage and stay in the Axiom realm. Note that pillars can temporarily protect you, but Dervla will destroy them with ease. Use them only when any sort of wind with Wither damage is used.
Moving on to the Unbroken Promise fight, which happens immediately after defeating Harrower Dervla. A girl will come down from above and integrate with the Harrower Dervla, forming the Unbroken Promise.
The first thing it will do is push a sword imbued with Wither into the ground to send out a huge dome of Wither damage, so stay far away or get wrecked. For this second fight, we would recommend you use ranged attacks. The attack patterns of the Unbroken Promise are more chaotic and unpredictable as it jumps around and swipes at you with its claws or slams its fist down.
It will slam its fist down three times, each time in the same area. For its jumps, it will try to slam its sword down as an attack when it lands.
Phase 3
At about 70% health, it will conjure up two chains with nails attached at each end and incorporate them into its attacks. The attack patterns are similar to the previous phase, but these nails can also move on their own and target you. It can also slam into the ground and deliver shockwaves of Wither damage.
The nails can also spin around the Unbroken Promise, making a wider circle the faster it spins. Hence, it will be near impossible to get close, so ranged attacks are your best bet. Pillars can also be smashed, so use them as a form of protection only when necessary.
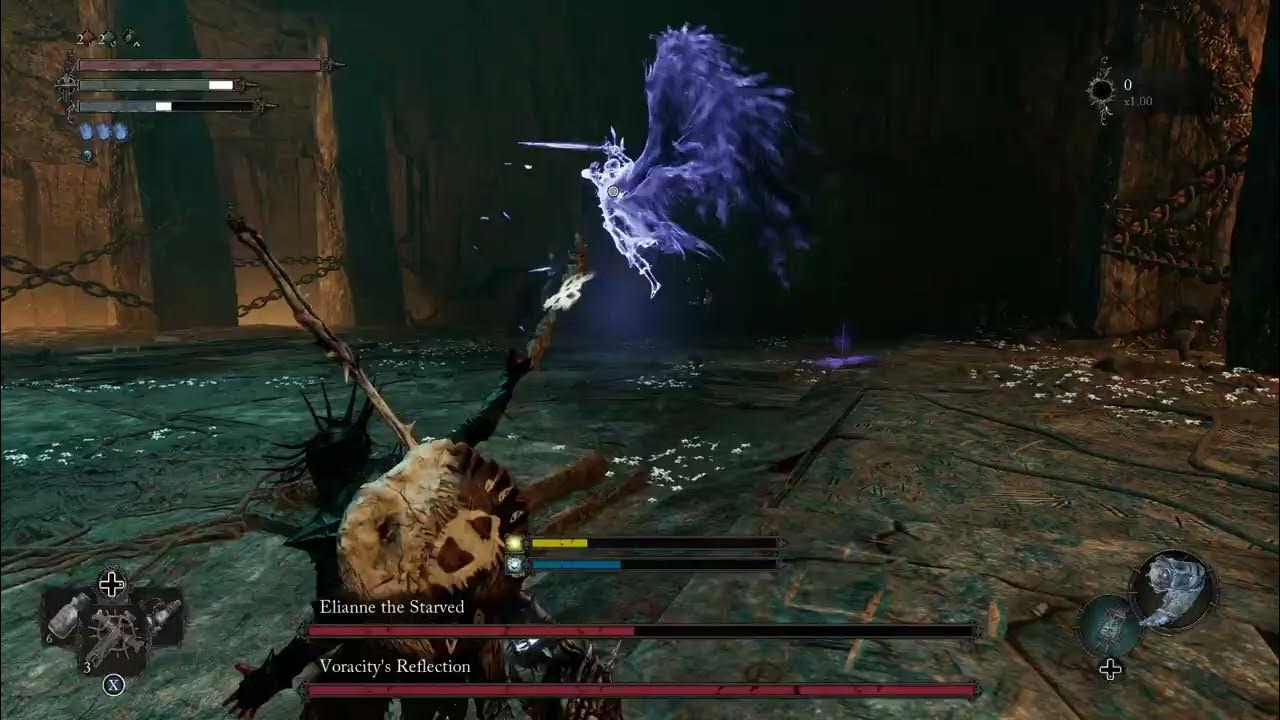
20. Elianne the Starved
Location: After defeating the Harrower Dervla boss fight, purchase the Umbral Scouring Clump from Molhu, then use it on the well located in the boss room. You will be taken to the Mother’s Lull to fight Elianne.
Rewards: Vestige Seed, Umbral Scouring x 8, Elianne’s Umbral Parasite.
Elianne is the boss you will go up against if you choose the Umbral Ending, which is the secret ending in Lords of the Fallen. Furthermore, if you cleanse any beacons, you will be designated the Radiant Ending of the game and won’t be able to go up against her. There are steps to achieving the Umbral Ending, which you can look up here.
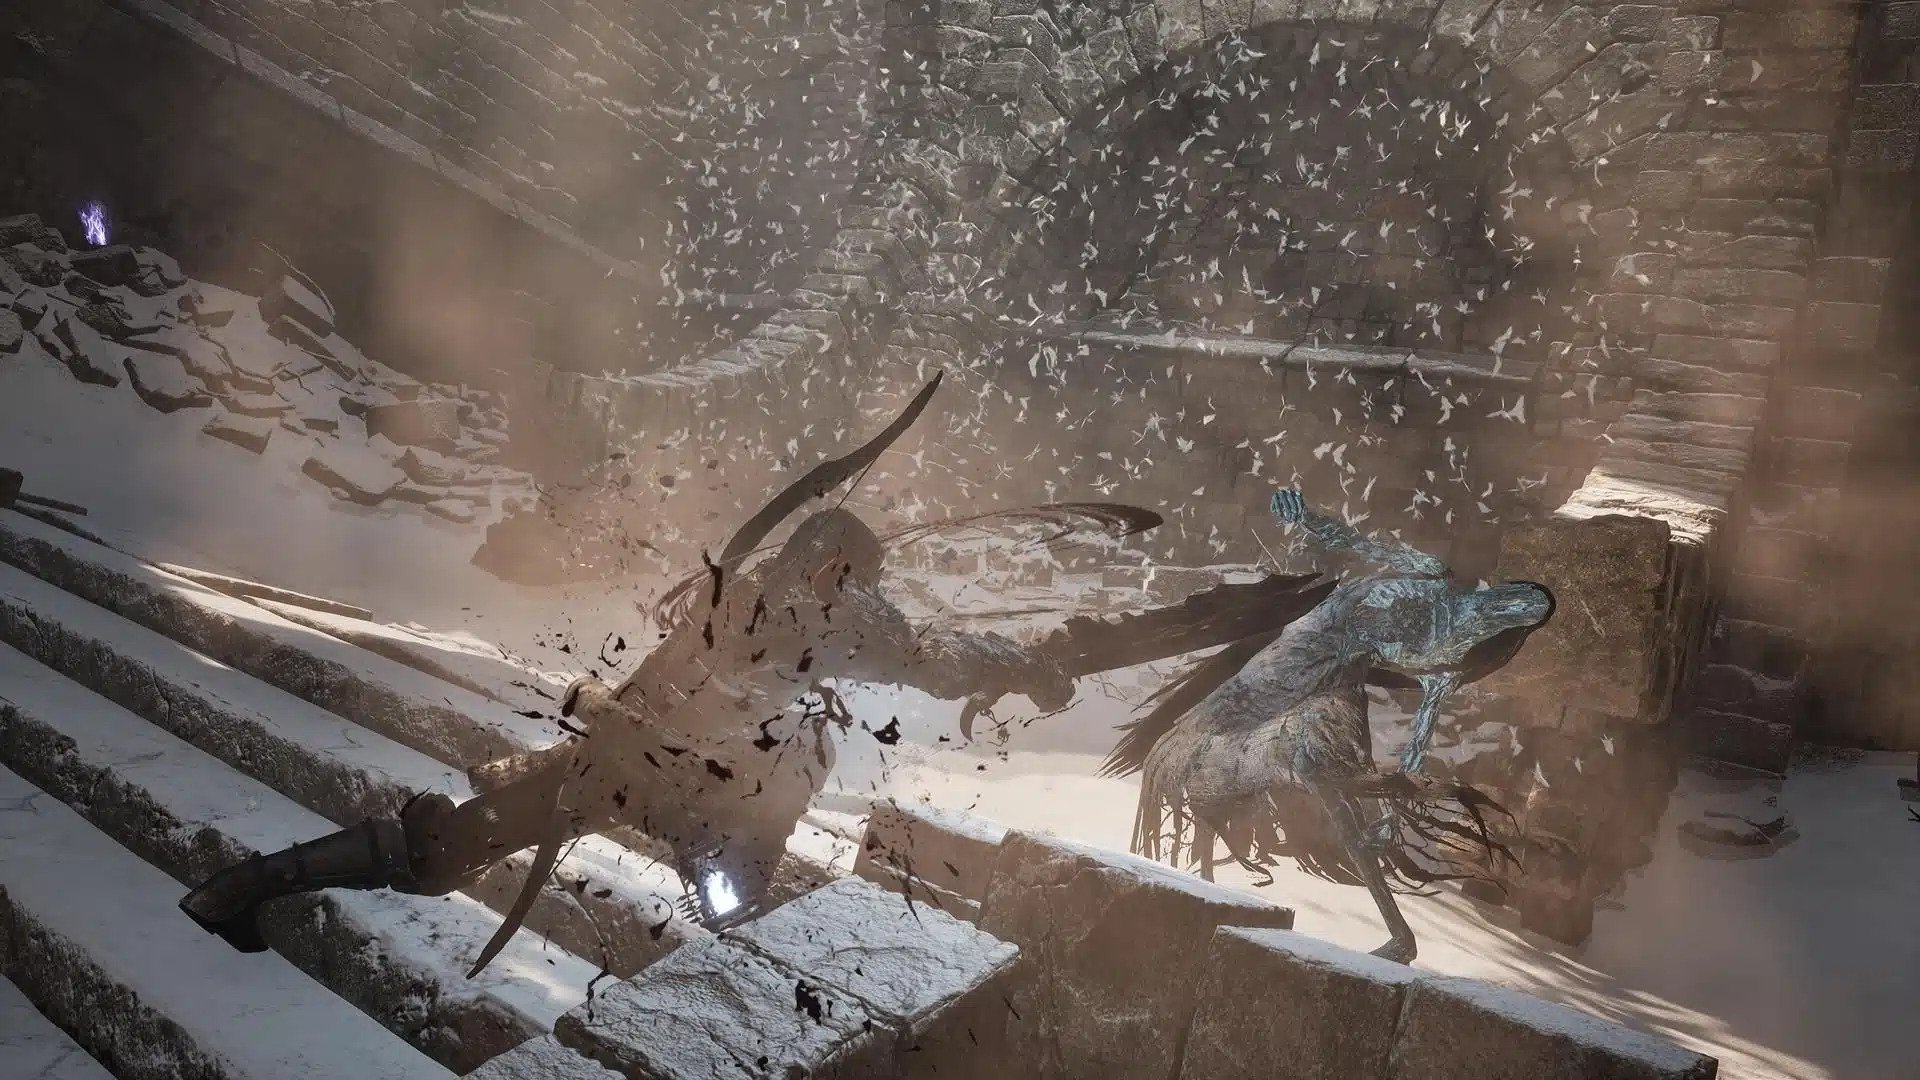
This boss fight is reminiscent of the second phase of Pieta, She of Blessed Renewal’s fight, with similar attack patterns. But instead of Radiance, Elianne uses Wither attacks. Right at the beginning of the fight, Elianne will fly right at you with long sweeping sword attacks like Pieta, with the same attack pattern with two slow hits and a third follow-up.
She has a long recovery period in between hits and another recovery period after the third hit. So, you can get in a ton of attacks. After this, she will put in more variation with her sword attacks like slamming the sword into the ground, causing a Wither explosion nearby.
At around 80% health, she will use a beam to hit you with either Radiance or Wither, as well as create clones of herself and Voracity’s Reflection, which will have a health bar.
Phase 2
When she summons Voracity’s Reflection, you’ll be in Phase 2. Voracity’s Reflection is easier to defeat, even if it has a health bar equal to Elianne’s. From here, Elianne will fight using Radiant attacks, and Voracity’s Reflection will fight using Wither attacks.
Umbral Eyes will start to emerge and float around the arena in an attempt to distract and damage you as well. Try your best to dodge them while fighting the two enemies. At this point, it is easier if you could take down Voracity’s Reflection first and then get to Elianne. If you take down Voracity’s Reflection, Elianne will be stunned, and you can perform a Grevious Strike. The entire arena may be filled with Umbral Eyes, so this is not going to be easy.
Phase 3
At around the halfway mark of Elianne’s health bar, the Voracity’s Reflection will reappear, so focus your attacks on taking it down. A variation of Pieta’s attack with two replicas will happen, where they will perform a criss-cross attack. After this attack is done, Umbral Eyes will start emerging once again to follow you around and cause damage.
Like before, taking down Voracity’s Reflection stuns Elianne and allows you to perform another Grevious Strike.
Phase 4
Around the last third of Elianne’s health, you will enter Phase 4, which is the final phase. Just like the previous phases, Voracity’s Reflection will reappear and you will have to deal with Radiant and Wither attacks. Their attack patterns remain the same as in previous phases, but you will just need more patience to finish the fight.
Taking Voracity’s Reflection down allows you to perform the final Grevious Strike on Elianne. Try your best to dodge and parry any attacks to last longer. Patience and repetition are much needed here.
Elianne is, without a doubt, one of the hardest bosses in Lords of the Fallen. She makes you work for that ending.
21. The Sacred Resonance of Tenacity (Optional)
Location: In Belled Rise after acquiring the Pilgrim Perch Key and opening the bell gate by the Bellroom Vestige. You can also explore this area sooner if you purchase the key from Stomund, Captain of the Fidelis, for 9,000 Vigor.
Rewards: Sacred Resonance Hammer, Animated Vigor Skull x 2.
Another boss fight that has attack patterns similar to going up against Bulwarks that you encounter throughout the game. This boss uses a heavy weapon, which means that its attacks are slow. It will also lunge at you with continuous attacks.
When you approach the cage that holds the boss, there are mages around that you will need to get rid of first. Additionally, destroy the parasite that is protecting the boss.
The Sacred Resonance of Tenacity uses Radiance attacks, which sets it aside from other Bulwarks. His attack patterns consist of the following:
- He charges his sword with Radiance, then hits the ground to send shockwaves that cause Bleed and Holy damage.
- He brings his arms to pound his chest and sends a dome of Radiance out that will damage you significantly if you get caught in it.
Another thing to note is that the fight will take place in a small, confined area, but you can lead him up some stairs near the exit and then drop yourself off. As he is following you, he will do the same and suffer fall damage as the stairs are quite high up.
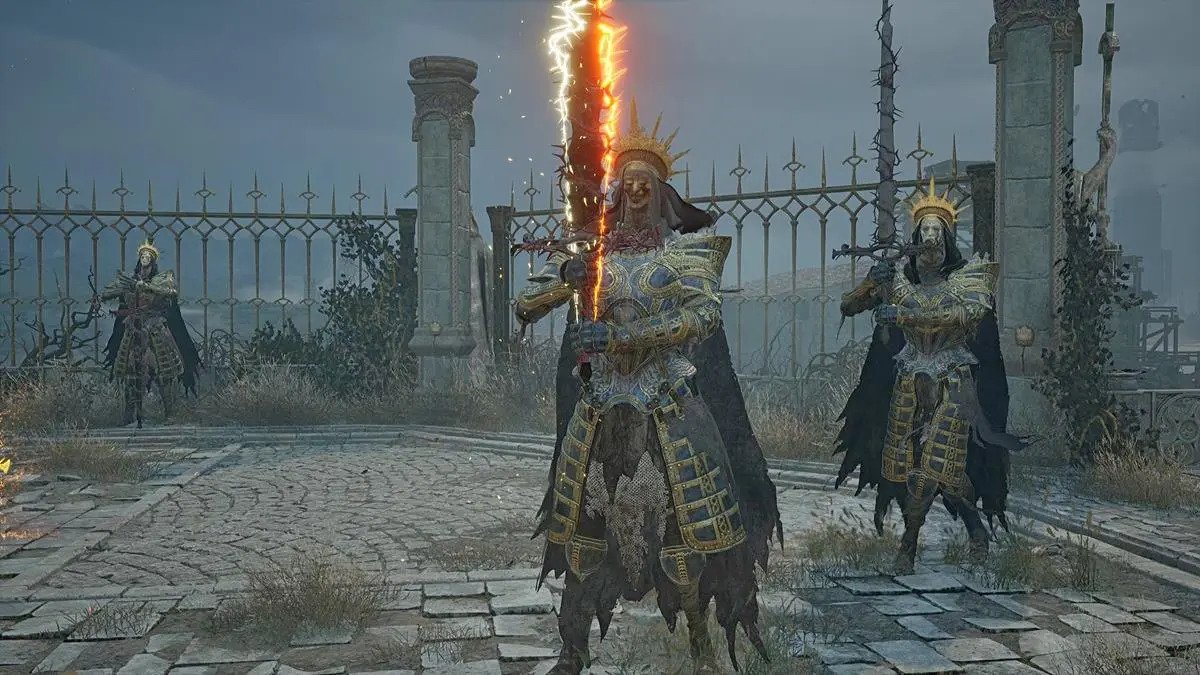
22. Abiding Defenders
Location: Exploring the Manse of the Hallowed Brothers.
Rewards: Luminous Abiding Defender Sword, Abiding Defender Mask Helm, Briostone Trio x 2, Divine Arms Spell, Flail of Wisdom.
The Abiding Defenders consist of two bosses at once – Abiding Defender Kyra and Abiding Defender Lirenne. You’ll have to fight them both at the same time. Abiding Defender Kyra will create obstacles around the arena that you will have to be aware of and avoid, while Abiding Defender Lirenne will dish out heavy-handed attacks.
An important thing to note is that you will have to defeat them one after another right away. If you defeat one and the other one is still alive for a long time, it can revive the defeated one. Your best bet is to lower both of their health and defeat them in one go. So far, these are the only bosses in Lords of the Fallen that can revive each other.
For Kyra’s attacks, here’s what you should look out for:
- She will emit golden pools that will explode and cause Holy damage.
- Several pockets of Holy damage will appear, followed by spinning swords around the arena.
For Lirenne’s attacks, look out for:
- Lunging sword attacks.
- She will teleport around and charge her sword, which sends Holy projectiles at you when she swings it.
This fight will keep you on your toes, as you need to pay attention to your surroundings while focusing on the enemies in front of you. Good luck!
23. Blessed Carrion Knight Sanisho
Location: The Tower of Penance at the Abbey of the Hallowed Sisters Vestige.
Rewards: Carrion Knight Staff, Carrion Knight Armor, Animated Vigor Skull x 2.
The Blessed Carrion Knight Sanisho will slowly make his way to you the moment you step on the bridge toward the Tower of Penance. He is protected by a parasite, so destroy that first. His attacks are quite slow with plenty of opportunity for you to land an attack. Be sure to equip yourself with any items that allow for Poison resistance, like Poison Cure or Poison Resistance Balm.
His weapons will emit poisonous fumes, and his attacks will let out poisonous clouds, which will eventually cover the entire bridge. In a way, the fight becomes one where you have to be cautious about the poisonous clouds rather than attacks from the knight himself. His attacks can be parried, blocked, or dodged, and his movements remain slow throughout the fight.
Occasionally, he takes a moment to recover as well, so you can land in a couple of hits. The main issue will be your resistance to Poison and avoiding those toxic clouds. Everything else should be easy to deal with.
24. Tancred, Master of Castigations/Reinhold the Immured
Location: The Tower of Penance.
Rewards: Vestige Seed, Tancred’s Key, Umbral Scouring, Remembrance of Tancred (in Umbral after Soulflay), Umbral Scouring (in Umbral after Soulflay) x 2.
This is a tough battle that spans numerous phases and continues between two bosses. We start with Tancred, who uses a weapon and shield to deal Holy and Bleed damage. You can equip any item that helps you be more resistant against these effects and use Fire-based attacks as he is more vulnerable towards those.
In the beginning, you will have to destroy the parasite that Tancred has, which provides a shield for him. He will then start charging at you quickly to attack you with his sword and trident. These attacks are typically jabs and swings. His attack pattern follows two long swings and a follow-up overhead attack where he slams his weapon into the ground to cause Holy damage.
Phase 2
When his health reaches about 70%, his attack patterns will start to vary. He will target you with Holy projectiles and protect you against any of your attacks with his shield. In addition to his attacks from the first phase, a lot of his Radiant attacks will start to emerge, as well as attacks that have a huge area of effect. These include:
- He slams his shield to the ground, causing a rippling area attack that you have to jump over.
- Beam attacks where he lowers himself down, then draws his weapon back and lunges forward with a Holy beam that will trail you.
Phase 3
As you take down Tancred, a cut scene will play where he gets replaced by Reinhold. For this phase, aim for his arms and legs which will cause him to be staggered or fall. Most of his attacks will feature quick arm swipes, which you can dodge by rolling towards him and attacking, then jumping away.
There are moments when he will leap in the air and slam his body or head down quickly to attack. When he tries to stand up and stagger backward, then falls; you should take this as a cue to attack him repeatedly. He will take a while to recover.
Phase 4
This is where he will start using Fire attacks. When this happens, you should switch to fighting with Holy attacks to counter him. His Fire attacks include:
- Spitting fireballs, which is followed by him launching himself in the air right to where you are. When he lands, pools of lava will appear.
- Similar to Tancred, he will start using projectiles and beams of fire that will follow you.
- Creating large pools of magma that you should run away from.
In terms of strategy, aim for his limbs. His attack patterns do not change much from the previous phase, so you will still know what to look out for.
25. Abbess Ursula

Location: Close by the entrance of the Abbey of the Hallowed Sisters.
Rewards: Abbess Chalice, Weeping Abbess Mitre, Large Manastone Cluster x 2.
Abbess Ursula’s favourite attack is her Radiance beam which causes Holy damage upon impact. This beam will follow you around and lasts for quite a while, so keep running and dodging to avoid a huge chunk of your health getting taken away. Alternatively, you can run towards her as it gives you a good chance to get an attack in.
However, getting close to her will ensure that she starts defending herself. She will lunge at you with her weapon, then teleport to another part of the arena to charge up her attack. She will shoot you with her Radiance beam once again, so keep dodging or utilize the statue located in the middle of the arena to block it. At the same time, try to get closer to her to land a hit or try using your ranged attacks.
She may alternate her defense tactics for when you get closer by using her chalice. As she pours red liquid onto the ground, you will be hit with Bleed and Holy damage if you get in contact with it. This red liquid will be spread around the arena, so step back and avoid it.
Another chalice move is when she starts drinking from it. This will restore her health, so interrupt her whenever you see this happening, or this fight will never end.
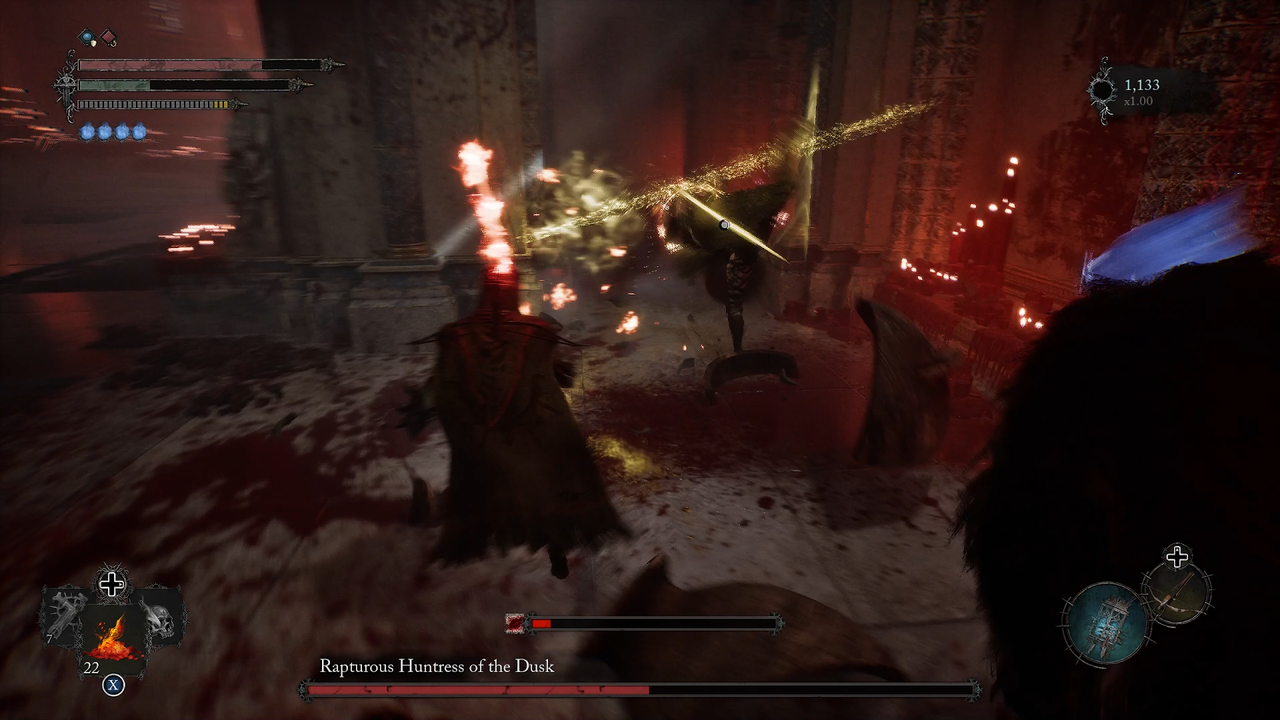
26. Rapturous Huntress of the Dusk (Optional)
Location: The Abbey of the Hallowed Sisters by interacting with the Rune of Adyr.
Rewards: Vestige Seed, Sanctified Huntress Shield, Rapturous Huntress Leggings.
If you have talked to The Iron Wayfarer on your way to this fight, then he will appear to help you. With the Iron Wayfarer, the Rapturous Huntress of the Dusk will focus her attacks on him at the beginning of the battle, which allows you to attack her. The Iron Wayfarer will also apply Wither damage to her, which helps you take out a good amount of her health.
Once you reach the halfway mark of her health, her attack patterns and stance will change as she imbues herself with Radiance. For this, you will want to use Fire-based attacks to counter her Radiance. Her movements are faster, and she tends to dodge attacks at the last minute, right before they land.
She will also add more lunges and flip attacks with follow-up attacks that deal Holy damage. There’s also the Holy barbed wire attack which she uses to make the arena smaller and more difficult to navigate. However, with the Iron Wayfarer around, you won’t need to worry too much.
27. Judge Cleric, the Radiant Sentinel

Location: The Empyrean.
Rewards: Ammunition Satchel, Umbral Scouring x 8, Thorned Chalice, Umbral Scouring (in Umbral after Soulflay) x 2, Remembrance of Judge Cleric, the Radiant Sentinel (in Umbral after Soulflay).
You’re in for a long and arduous fight with Judge Cleric, the Radiant Sentinel. Out of all the bosses in Lords of the Fallen, this one may be the most tiring. You’ll be starting easy, as Judge Cleric has a limited moveset at the start of this fight. But since there will be multiple phases, you’ll be continuously challenged.
She fights with a sword and a flag, which she swings back and forth. There are also lunging attacks where she will attempt to spear you with the flag.
Phase 2
At about 70% health, she will summon Radiance, and her moves will change. Her lunges are quicker and will cover more area but the swinging moves from the first phase remain. Plus, she will now float in the air and charge up her attacks. This leaves her vulnerable until she decides to slam down and let out a shockwave of Holy damage. Right after, the arena will be covered with Radiant swords.
Some other attacks include:
- Summoning a rain of Radiant swords, which is followed by a ranged lunge attack.
- Swinging her flag like a mace with Holy damage trailing after it.
- Summoning an arrow that emerges from the ground with a circle surrounding it, which turns into a rain of arrows. She will create multiple arrows, so multiple rain spots will emerge.
Phase 3
As you dwindle her health down, we get to another phase where she gets afflicted by Rhogar. Her health is replenished entirely, kind of like a revival. This time, you should switch to Holy attacks and avoid Fire attacks as she uses Rhogar attacks.
Her attack patterns remain the same as the first phase but are replaced with Fire instead. The swinging remains the same, while the lunging covers more area with fire added to it.
Phase 4
At around 70% health, her moves will change once again, with moves similar to the second phase. There’s the floating and exploding with ripple attacks that cover a huge area. But this time, she will float up and land to send a dome of fire, which ends in an explosion.
Additionally, she can send Rhogar crystals in a shockwave effect when she hits the flag to the ground. She will repeat this often and throw out fireballs when she uncrosses her sword and flag. The fireballs will come in two rows near her, making it harder to get closer to her.
She will also push her flag into the floor, causing Rhogar to erupt from it. This time, pools of Rhogar will appear around the arena which she will use to teleport and get closer to you. Then comes her usual follow-up attacks, so keep moving to avoid getting hit. Just be sure to watch out for Rhogar as well.
Defeating the Judge Cleric may grant you the Adyr Ending, which is also the bad ending. To get the Adyr Ending, you have to make sure you have not cleansed any beacons throughout your playthrough. Not to mention, this is one of the hardest bosses in Lords of the Fallen with all its challenging phases.
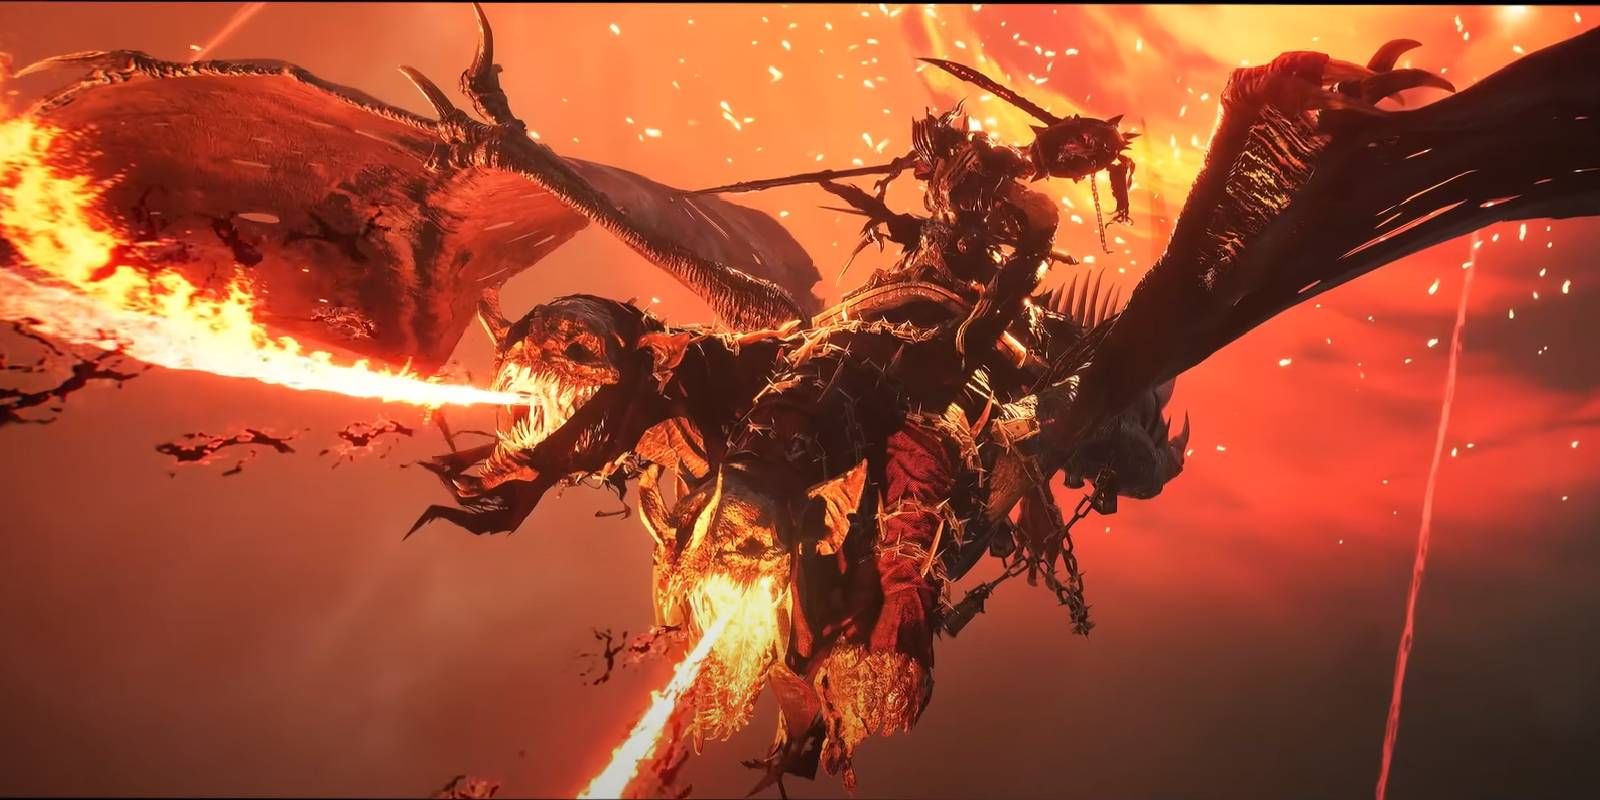
28. The Lightreaper
Location: Revisiting Upper Calrath after finishing in The Empyrean.
Rewards: Vestige Seed, Umbral Scouring x 25, Lightreaper Flesh, The Lightreaper’s Umbral Parasite, Umbral Scouring (in Umbral after Soulflay) x 2, The Remembrance of The Lightreaper (in Umbral after Soulflay).
This is the last time you’ll encounter The Lightreaper, and you will have to defeat him this time if you haven’t already. The Lightreaper fight always begins the same way – he rides his dragon while it shoots fire down on you. If you move to either side of the fire, you won’t get burned, and they will disappear.
He will then reappear and the dragon will fly down to try and clip you. This attack will be repeated twice, then he’ll jump off the dragon to the ground, where you can finally start the fight. The Lightreaper will start by throwing an arc of Rhogar at you by crossing and uncrossing his sword quickly. In a way, this fight is similar to the Skinstealer fight.
Here are some of the attacks you can anticipate in this fight:
- A spinning dash attack where he spins and swipes his blades several times at you, then stops and launches himself with a slashing motion right at you.
- Lunge attacks are similar to the Skinstealer, where he will lunge twice and pause. He can also perform a single slash or lunge attack.
- A leap and spin where he drives his swords down to try and impale you. He will occasionally try to jump and land another slashing attack right after as well.
Phase 2
About a quarter of his health gone, Phase 2 will begin as he lets out a beam of Rhogar and then disappears into the sky. A repeat of his flying attacks with his dragon will occur twice before he lands on the floor once again. This time, he will use more Rhogar attacks, so attacking him with Holy attacks will add more damage.
In addition to his Rhogar arcs, he will also let out beams of fire throughout the arena. The spinning and slashing remain the same, with added Fire damage upon landing. One notable attack would be when he brings his arms in to charge up, then lets out Rhogar until he explodes. The Rhogar damage will spread across the arena. This only happens when his health gets down to about a third in total.
Phase 3
In the final phase, The Lightreaper’s swords will now be on fire and his dragon is summoned to join the battle. The dragon will create pools of fire around the arena while The Lightreaper hunts you down. He has a follow-up attack where he twirls in the air, sends out a projectile, and launches himself straight at you.
As he dashes around quickly, he will drag his sword on the ground to create pools of lava, then lunge at you to try and land in an attack. You will find that he is now more relentless and quick, with more attack combos to tire you out. Continue to hit him with Holy damage and watch your step to avoid getting Fire damage.
To fully get through this, you will need precision, patience, and a whole lot of skill.
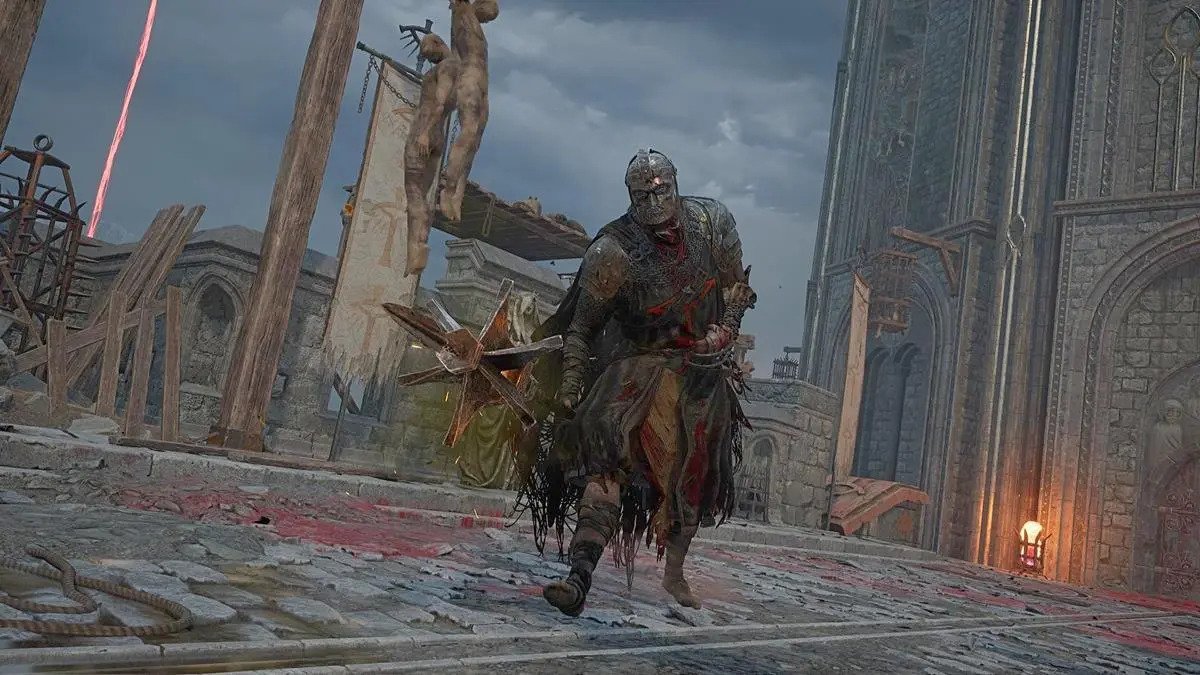
29. Andreas of Ebb
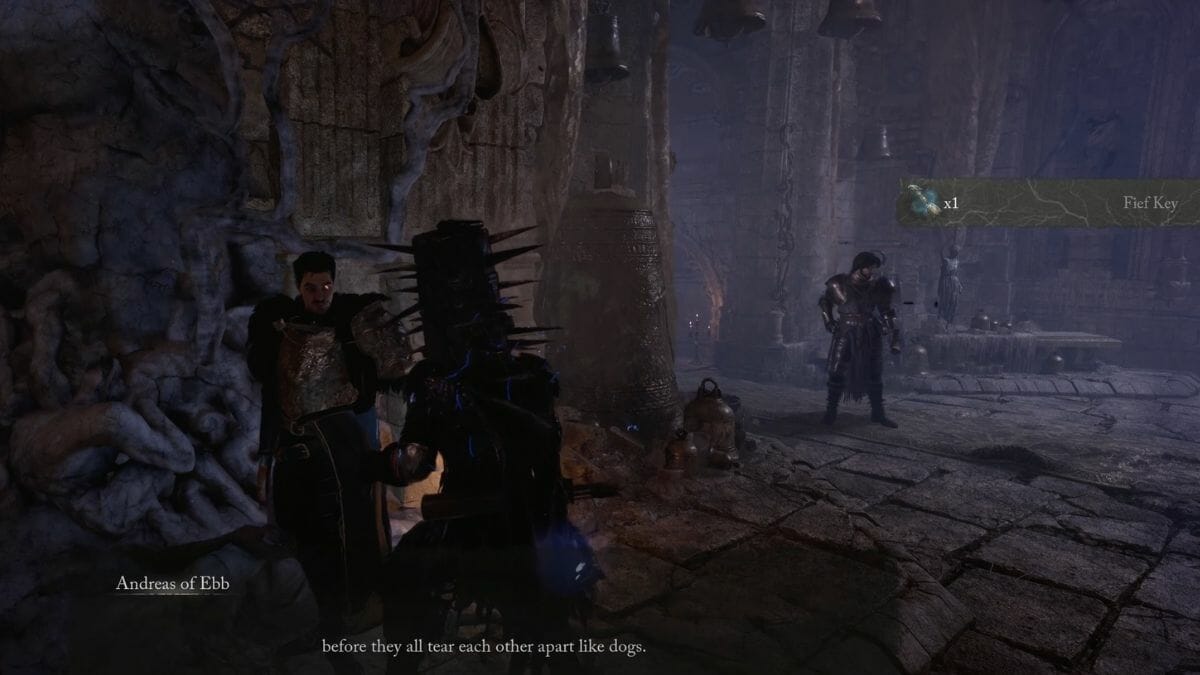
Location: Deeper within Upper Calrath, close to the Bramis Castle entrance.
Rewards: Vestige Seed, Andreas of Ebb’s Sword, Andreas of Ebb’s Ring, Andreas of Ebb’s Book of Lineage, Andreas of Ebb’s Armor Set (Sleeves, Leggings).
At this point of your journey, you should have encountered Andreas of Ebb as one of the NPCs hanging around in places throughout your journey. You will encounter him as a boss if you are following Andreas of Ebb’s quest line, right after defeating the Lightreaper boss.
Andreas has a rather limited move set but can deal a huge amount of damage right away by inflicting Poison on you. He is well equipped with throwing knives and two-handed swords, as well as smoke bombs. These smoke bombs allow him to disappear and reappear somewhere else in the arena, throwing you off. The arena itself is a rather small and limited space which further enhances the difficulty of the fight.
Some of his attack patterns include:
- Sword slashes interlinked into short combos.
- A quick jab-forward attack that is hard to counter or block can happen up to three times at once.
- Throwing his knives at you, which inflicts Poison that continues to build up.
Other than this, he’s just an oversized melee enemy that you’ve encountered before. His damage is massive, but everything else is pretty straightforward. Just remember to equip something to enhance your Poison resistance, and you’ll be okay.
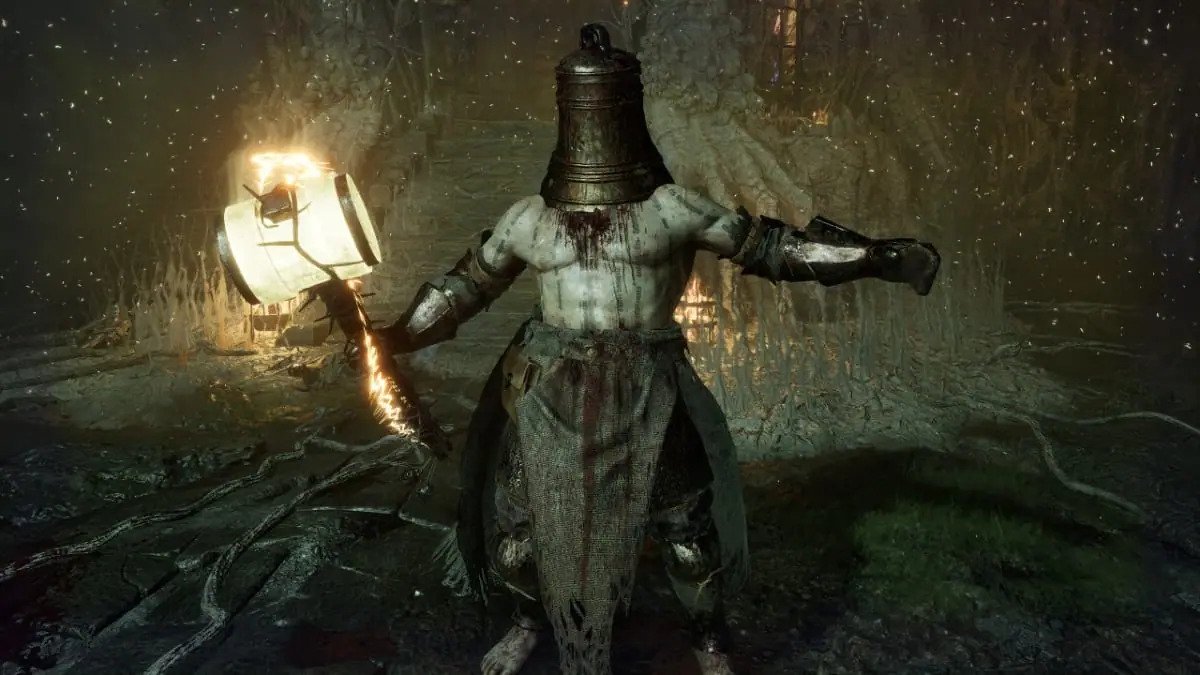
30. Paladin’s Burden
Location: Path of Devotion, Belled Rise. To access Belled Rise, you will need the Pilgrim’s Perch Key. If you haven’t gotten one yet, you can purchase it from Stormund at Skyrest Bridge for 9,000 Vigor. Either that or complete the Upper Calrath section of the main story when Stormund drops it at Skyrest Bridge.
Rewards: Umbral-Tinged Flayed Skin, Umbral Scouring x 8, Unripe Berries x 2.
To take on the Paladin’s Burden, you will have to be in Umbral. Use Fire attacks to damage him as he uses Wither and Radiance attacks. As the fight starts, he will talk while prepping for battle, and you can land in a few quick hits. But do it quick and jump back as he is also equipped with a lamp that can Soulflay you.
The Paladin’s Burden is quite fast on his feet, but his attacks can be slow. It is a little hard to predict his attacks as he seems to hesitate most times, and his attacks will land a little later than anticipated. He is quite adept at dodging and avoiding your ranged attacks, so you might have a tougher time to land a hit unless you time it right.
When he holds his arms out to let out a rippling wave of Wither damage, land a follow-up attack to gain back your health. Often when he has his hands out, you can land a quick attack.
As for his lamp, there are two attacks he can do with it. The first one is a Radiance spell which appears as a cloud in the arena where bolts of Radiance will start to follow you and explode one after another.
The second one will be to restore his health. He will lift his arm in the air to perform an attack and if it is successful, he will gain some health back while the rest of his health bar will turn to Withered health. This means that if he hits you right after this, he will gain even more health.
You can avoid this by interrupting his move and following up with another attack of your own. If you let this happen, the fight will just continue to drag on, which is never fun.
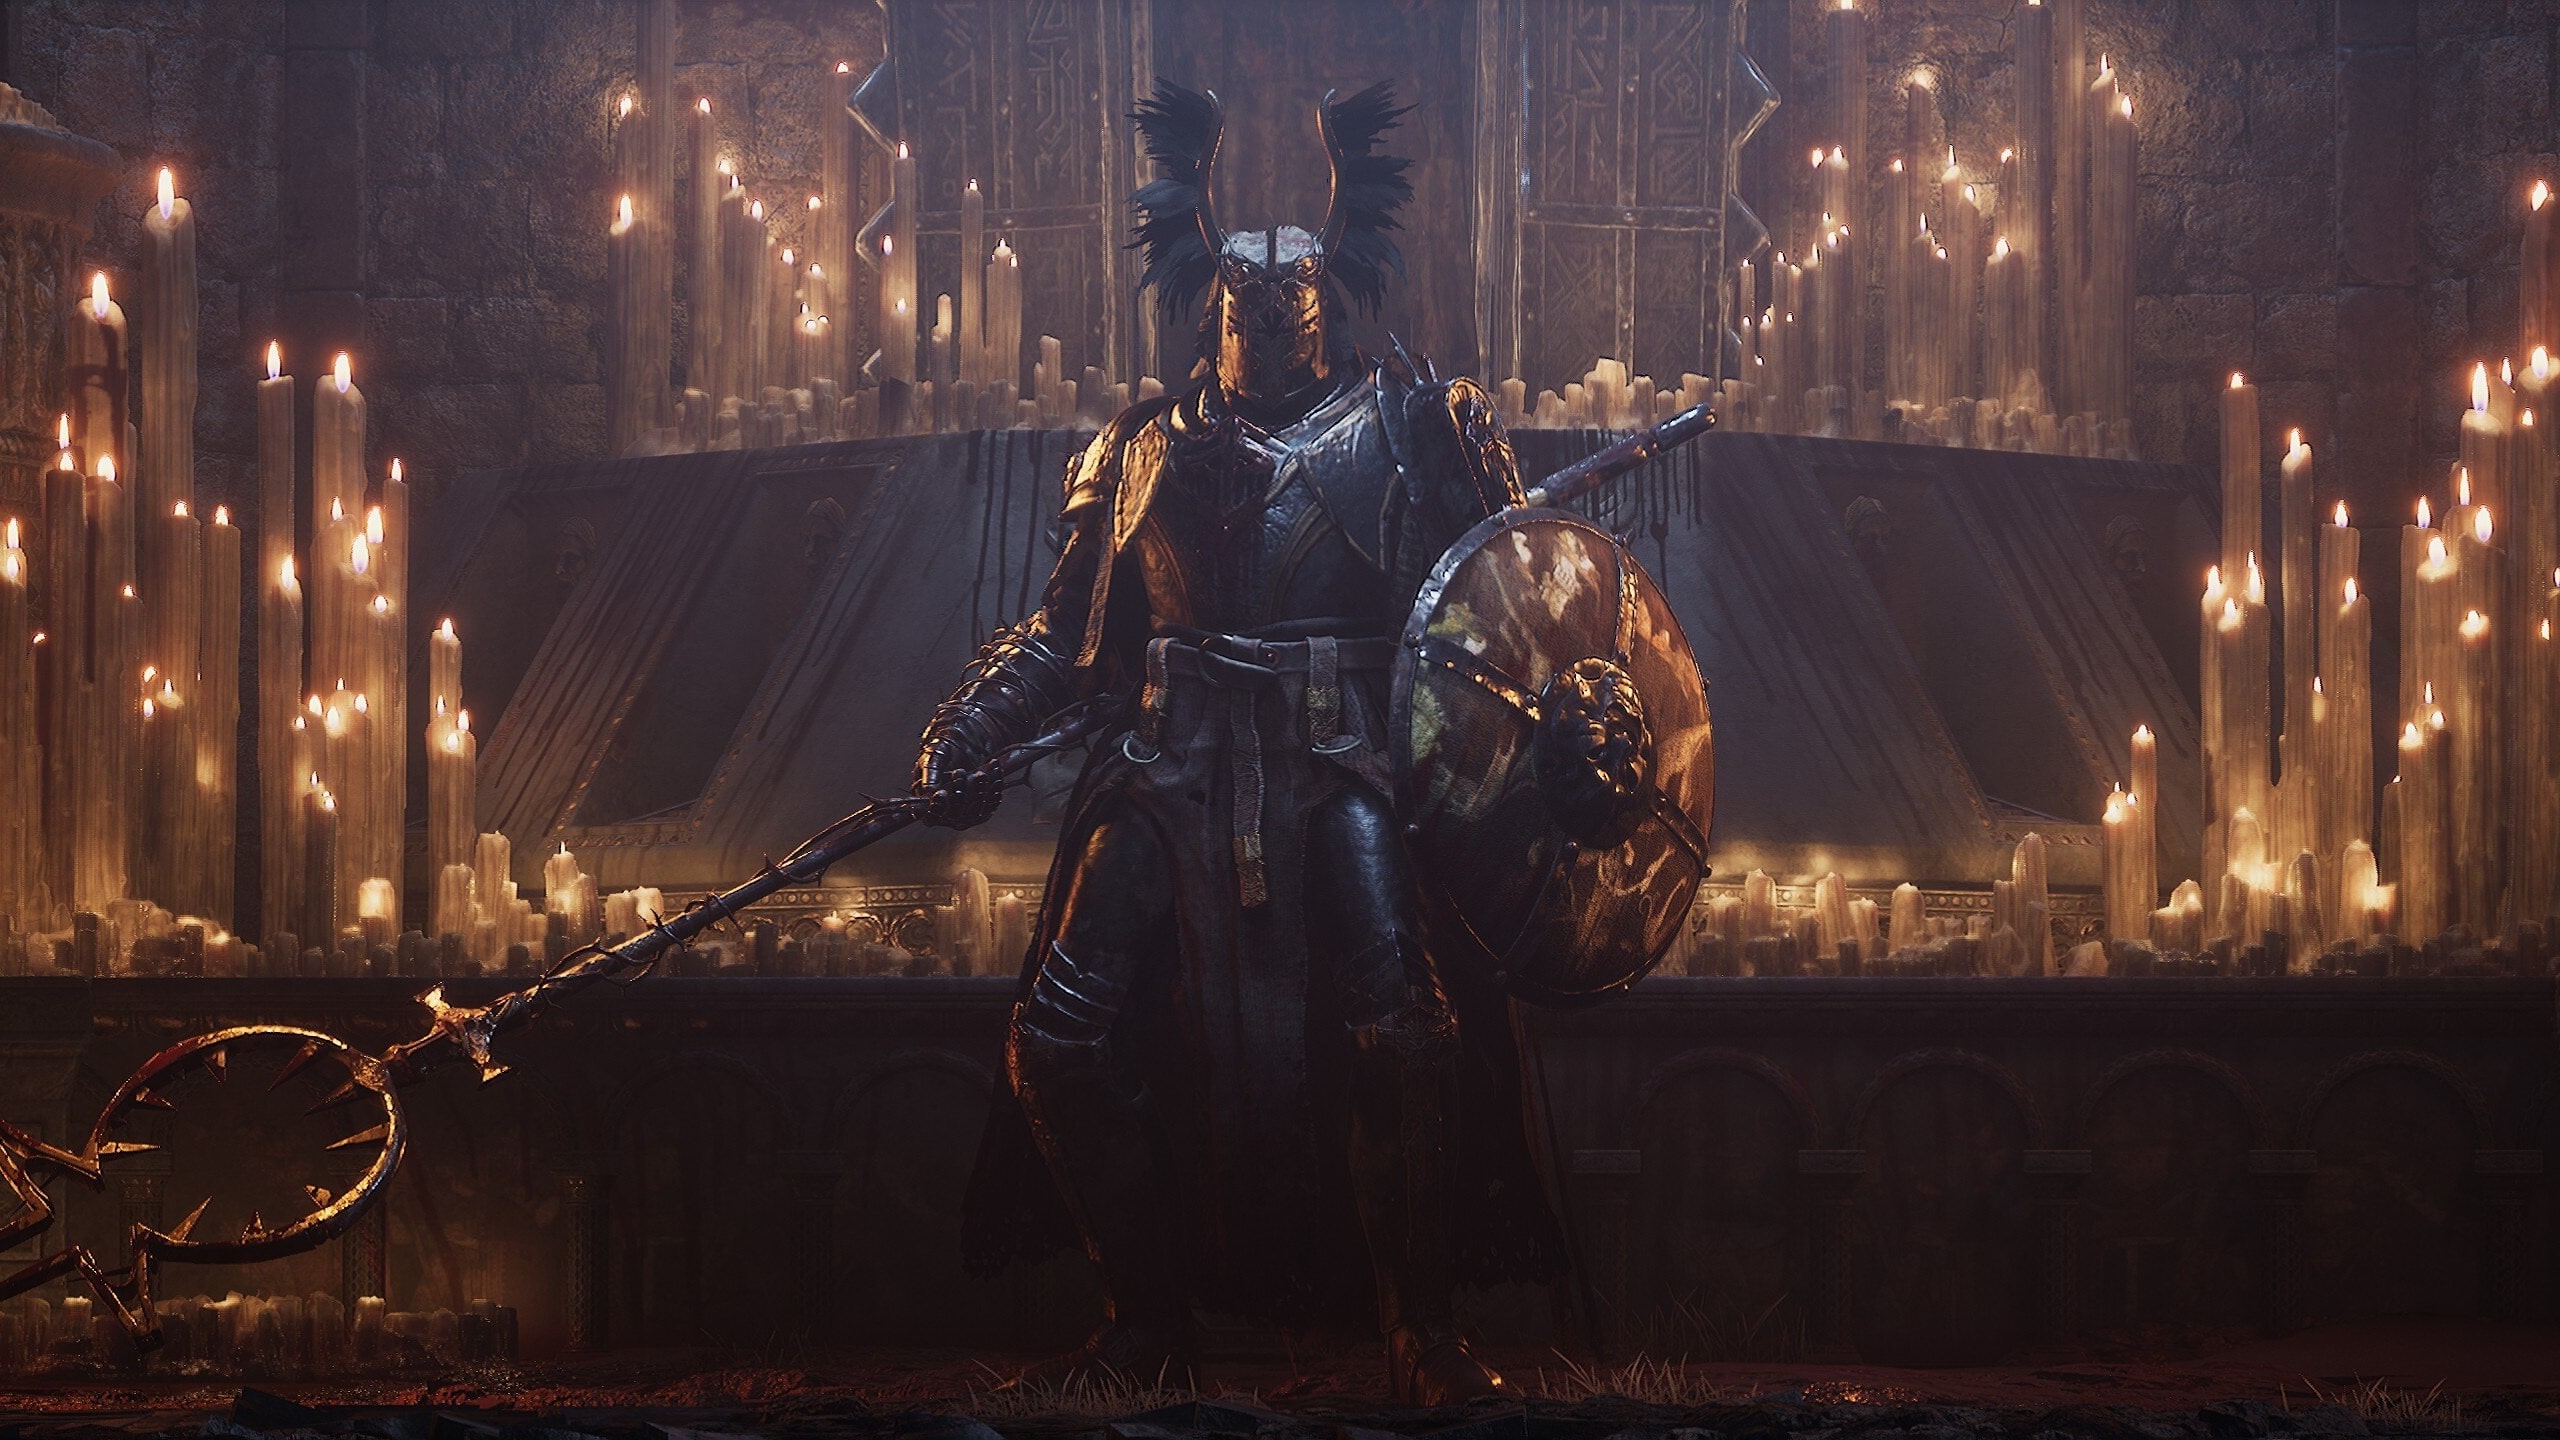
31. The Iron Wayfarer
Location: Near the gates of the Bramis Castle.
Rewards: The Iron Wayfarer’s Hammer, Vestige Seed, Rune of Adyr
You should be familiar with The Iron Wayfarer, as he helps you in your fight against the Rapturous Huntress of the Dusk. Little do you know that he is an integral part of achieving the Umbral Ending and you will end up going up against him. He is a human that wields a hammer and sticks to one-handed attacks.
His movements are rather slow, with the occasional dash. Even so, what makes this fight difficult is the area in which it takes place. You are in a corridor-sized area with nowhere to go. The Iron Wayfarer also tends to envelop his weapon in Fire, which allows him to let out Fire-based attacks.
It should be noted that he can use either Wither or Fire to imbue his weapon with elemental attacks. This depends on whether he has acquired the Mark of Adyr before you get to his fight or not. If he has it, then he will most likely use Fire attacks, and if not, he will imbue his hammer with Wither instead.
The good thing is, he cannot kill you if you end up blocking his Wither attacks with a shield or weapon. However, if he uses Fire attacks, it will build up, and you will eventually take damage.
One of his go-to attacks is a three combo overhead attack which is easy to dodge as it is quite slow and predictable. He also has a lunge attack that cannot be blocked but can be dodged.
Some of his Fire attacks include:
- Buffed fire hammer attack, where there will be a fire splash after the hammer lands an attack.
- Fire strike attack, which explodes and causes Fire damage to the area when the hammer hits the ground.
- Striking the ground three times which starts a fire stream that moves quickly towards you, followed by blast damage.
When he reaches about 20% health or below, he will do about six Fire Stream attacks that will engulf the entire arena with fire. This will be difficult to dodge, so be prepared to take some damage. You can try to position yourself to continuously dodge between the wall and center to try and avoid it, but it takes some effort and precision for sure.
32. Damarose the Marked
Location: Outside the Bramis Castle.
Rewards: Damarose’s Cleaver, Animated Vigor Skulls x 2.
Here’s another NPC you’ve most likely come across in your journey, and she generally tells you not to cleanse any beacons. Doing so will ensure that you fight against her. She will block your path and fight you right before you enter the castle. Fighting and defeating her will mean that you can no longer do her quest.
Damarose’s fight is rather straightforward. Right off the bat, she will attack with a combo, so either step back or parry her attacks. If you are good at parrying, you may end up staggering her. She mainly attacks with Fire, and some of her moves include swings and strike attacks with her cleaver, usually in three-hit combos.
At about one-third of her health gone, a mark will appear above her head, and she will imbue her cleaver with Fire. This time, if any of her attacks land, it will increase your Burn meter. She will continue to use her three-hit combo, but after each hit, the mark will glow and throw a fire projectile at you. Plus, she will also unleash a stream of fire from her hand that can cause the Burn status.
When you reach the halfway mark of her health bar, a second mark will appear. This means that her fire projectiles are now doubled. Even so, her three-hit combos will remain the same. As you reach the final stretch of her health bar, a third mark will appear, which means the number of projectiles is increased. This will also cover a wider area.
We would advise you to dodge her attacks and let her finish her combos before landing some quick attacks and retreating.
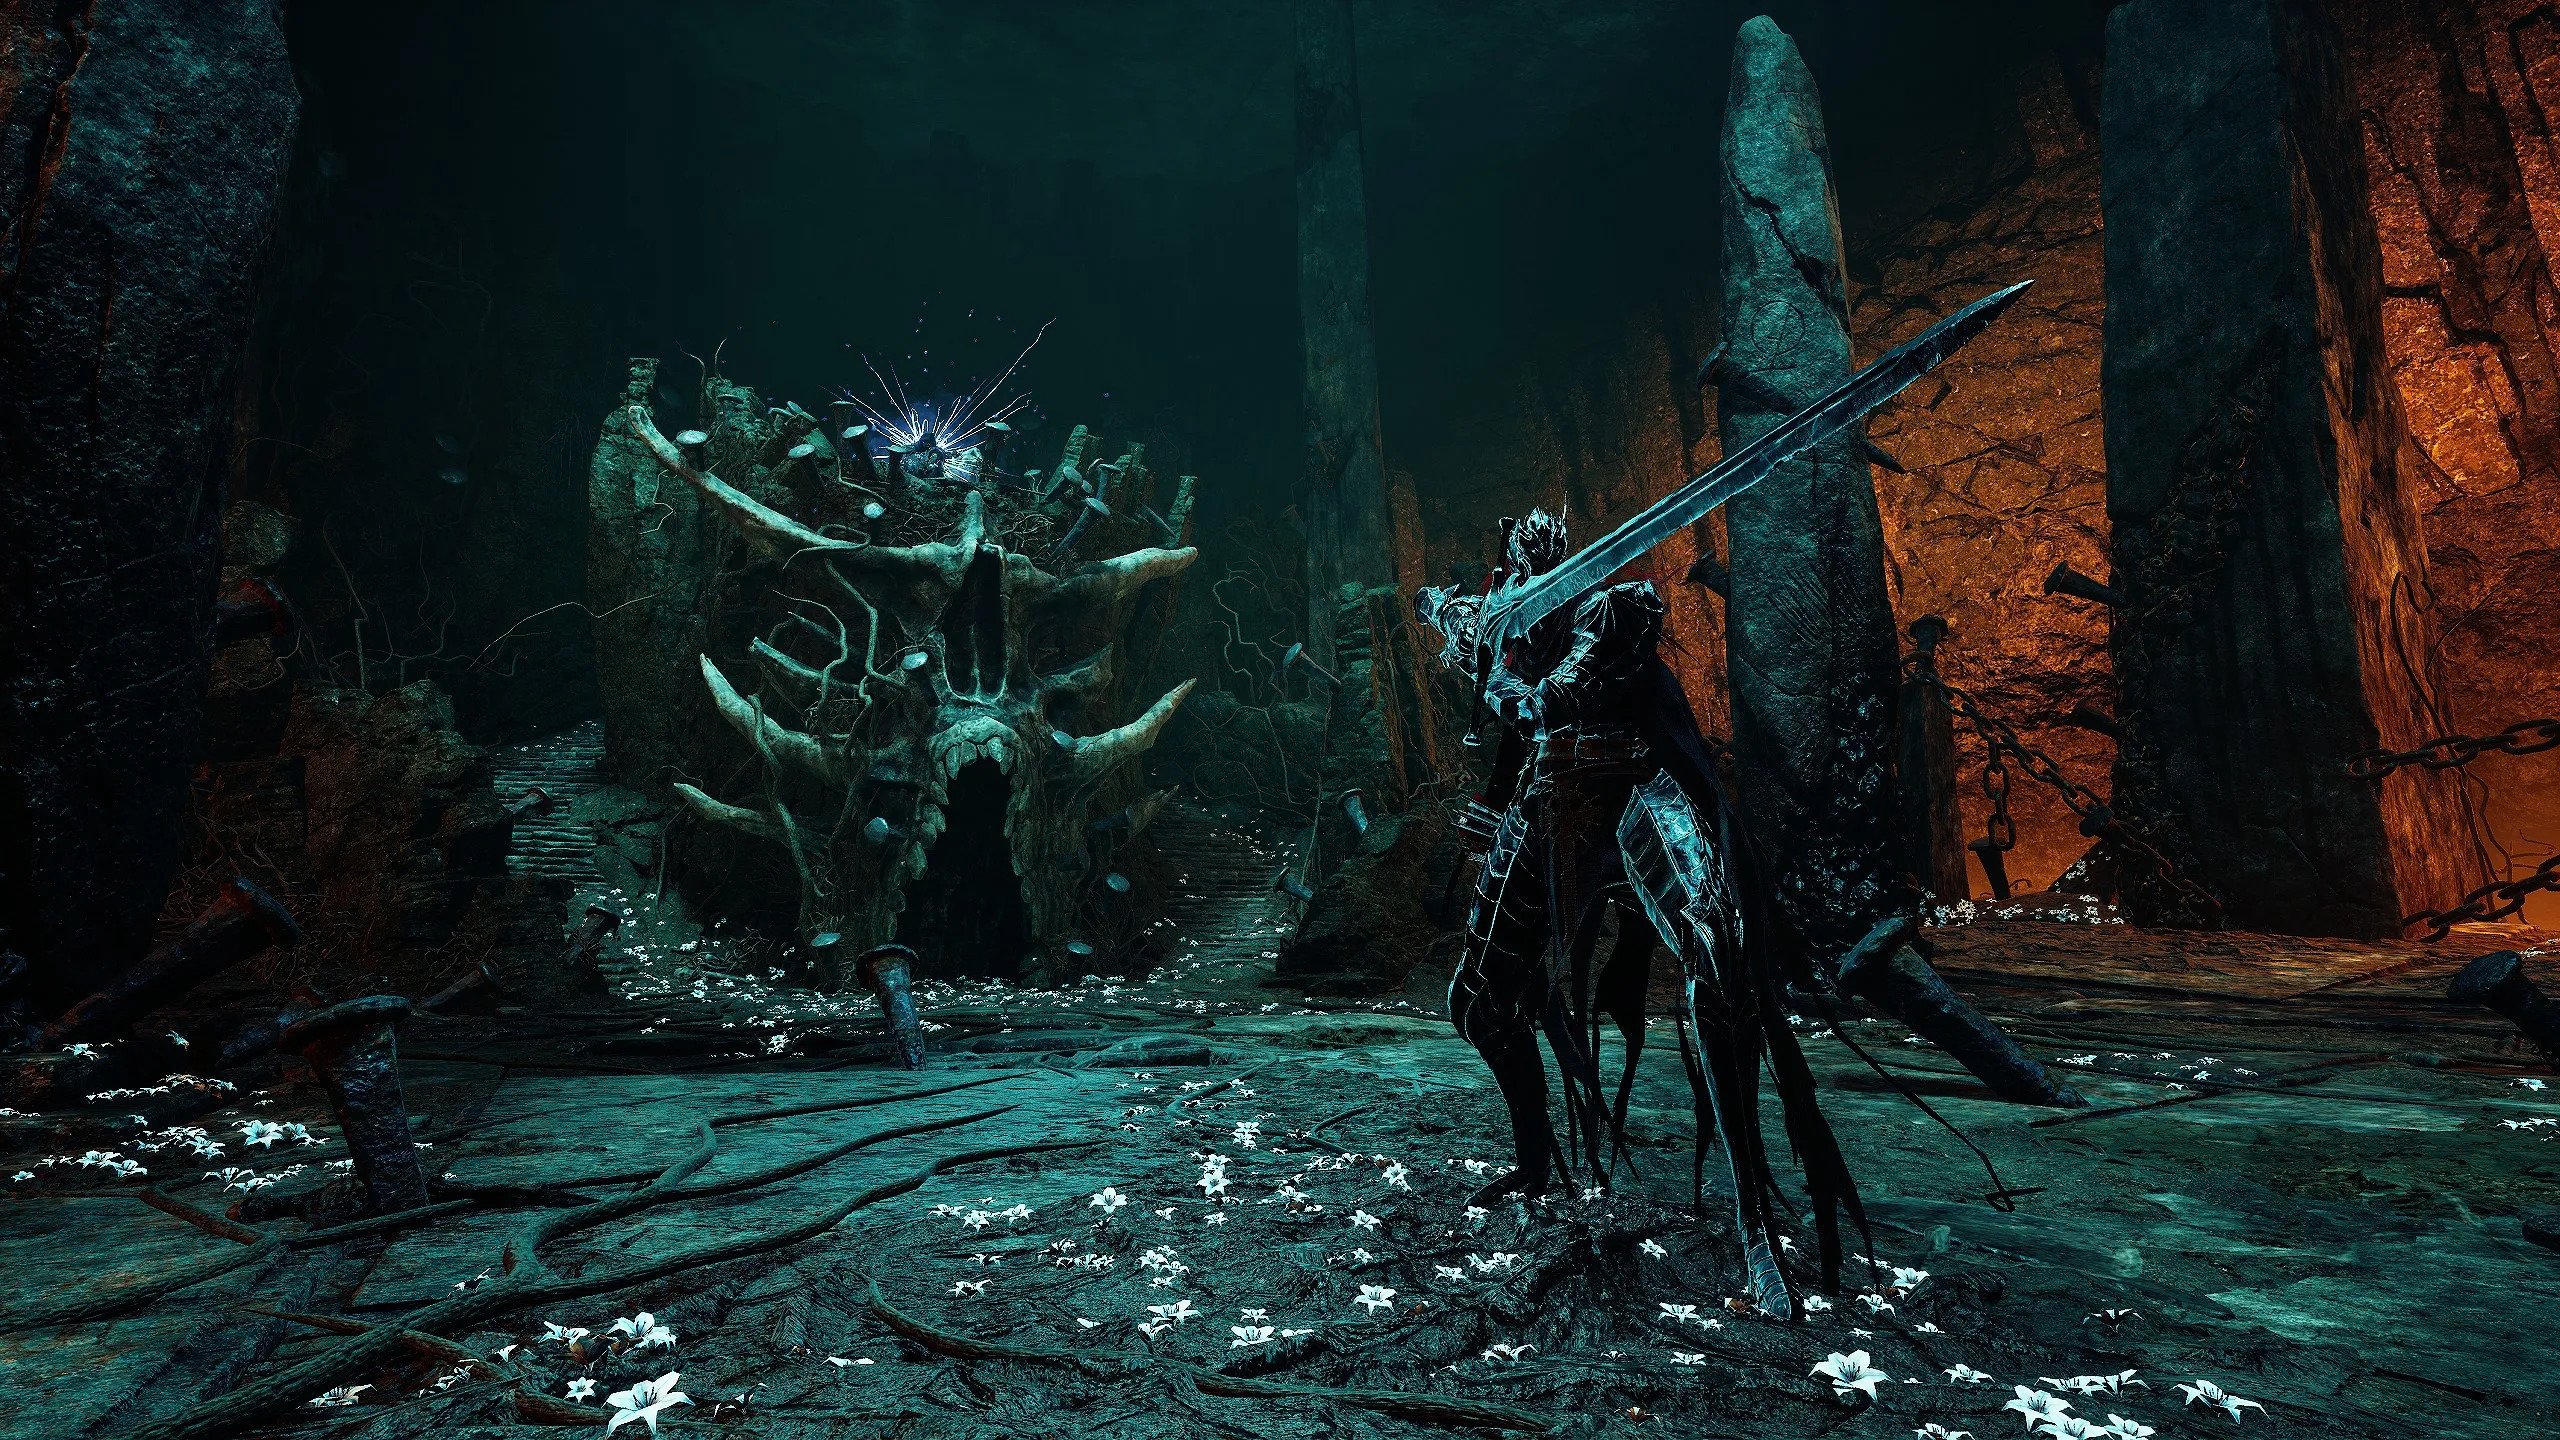
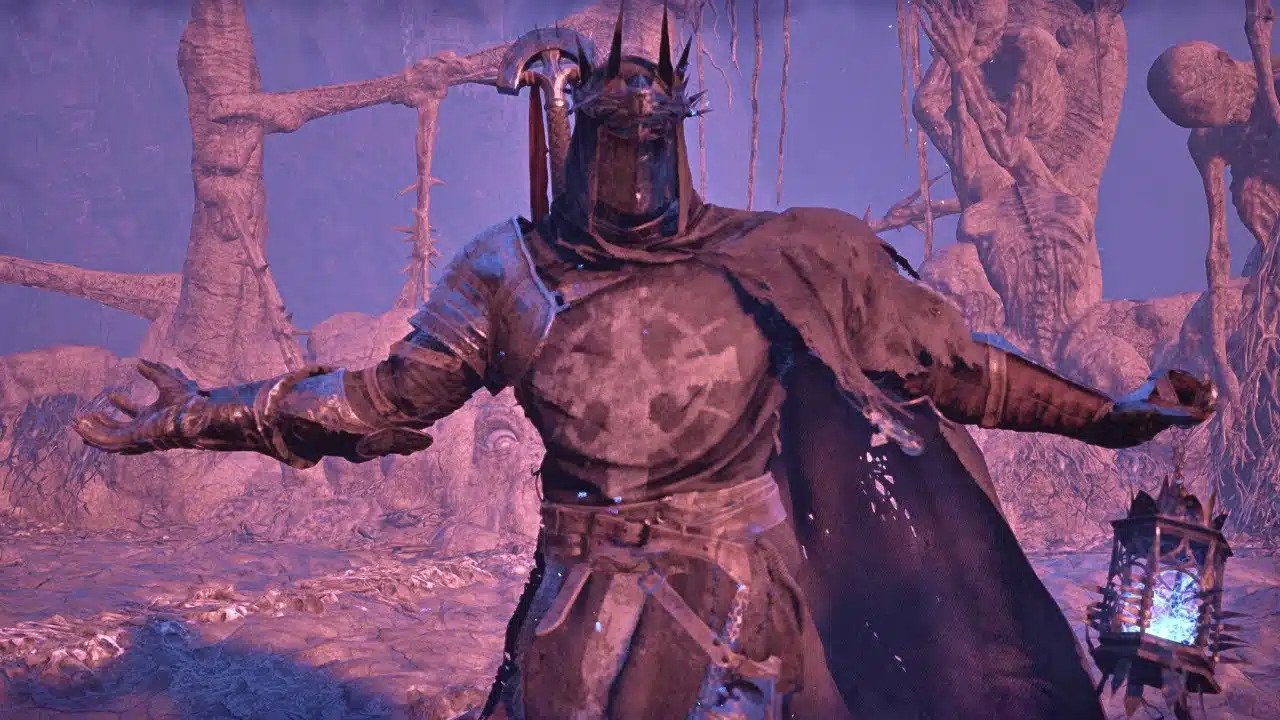
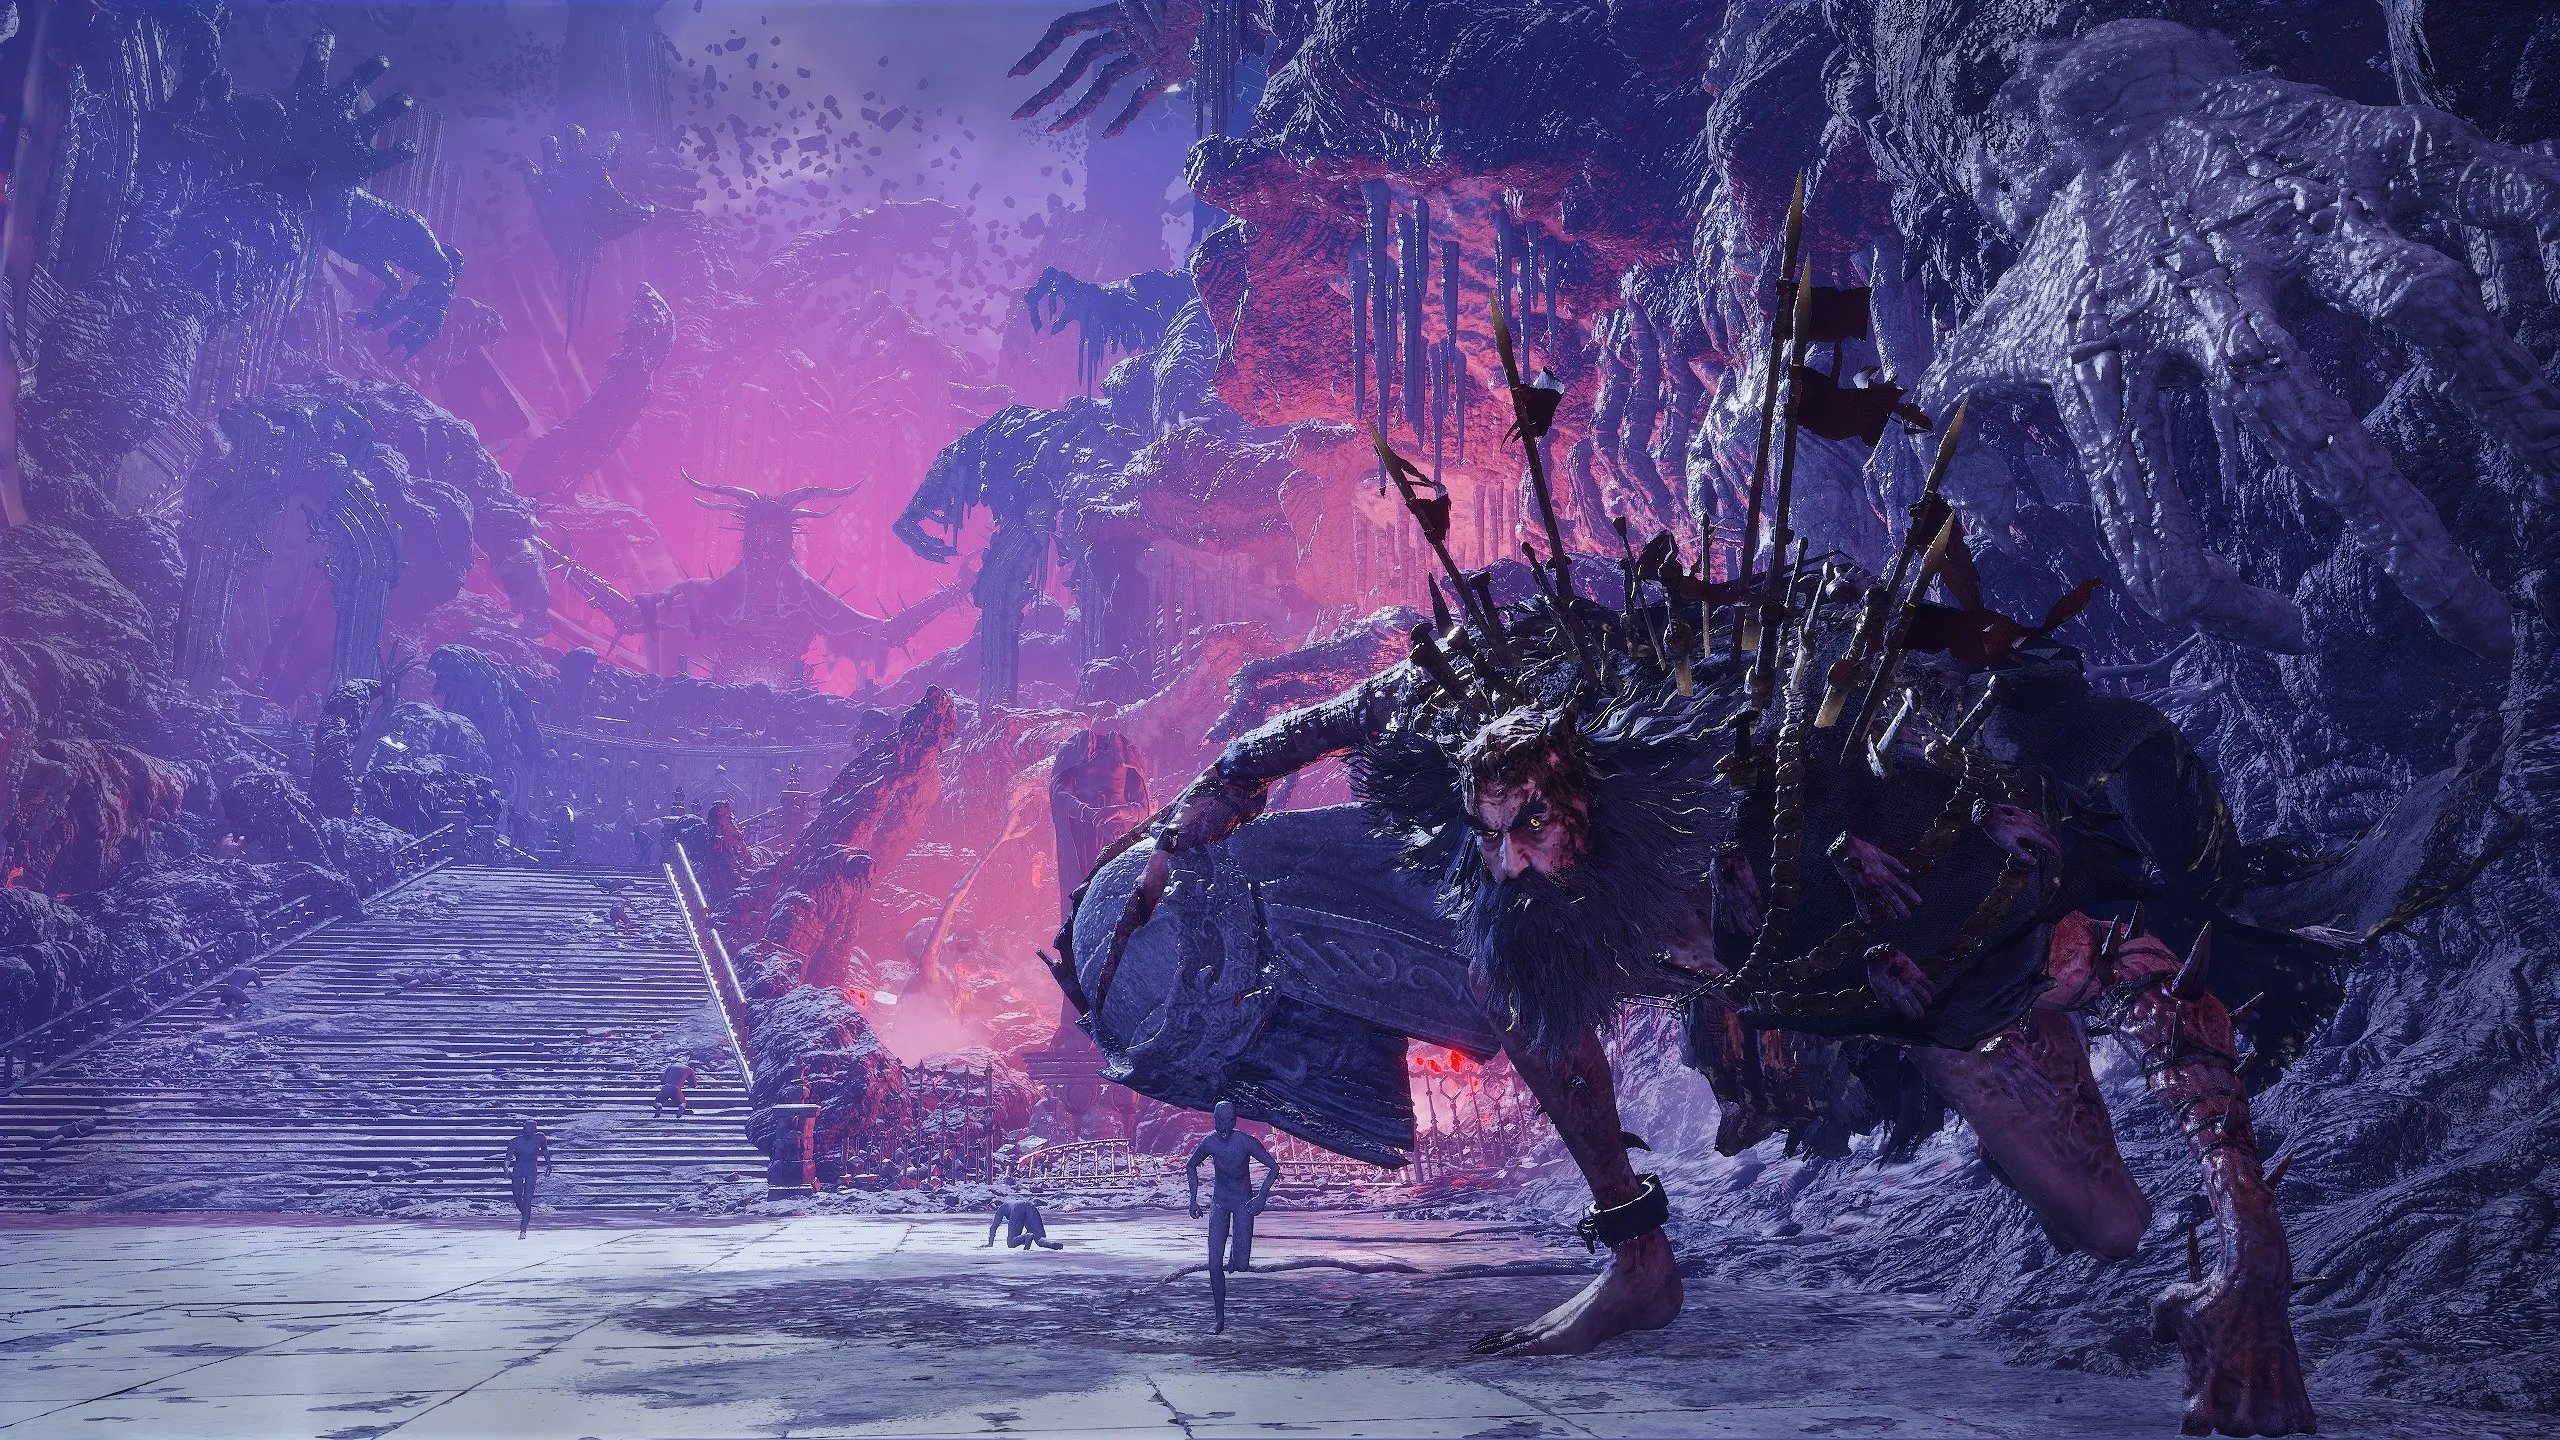
33. The Sundered Monarch
Location: Further within the Bramis Castle.
Rewards: Vestige Seed, Umbral Scouring x 8, Remembrance of the Sundered Monarch (in Umbral after Soulflay), Umbral Scouring (in Umbral after Soulflay) x 2.
At the beginning of the fight, the Sundered Monarch won’t move, so you can freely attack him either with ranged attacks or close combat. For the moment, he will only use some ranged attacks that are easily dodged. The cue for this is him biting his arm and then flinging it with projectiles.
After a couple more hits, he will break his chains and pull the statue’s head off to use it as a weapon. With this statue head, he will swing his arms out, holding the statue head on the ground while Rhogar spikes appear on his arms. His arms will swing three times so you can time yourself for an attack.
He will also raise the statue’s head and slam it down. This move may be a little slow so you will have to find the right timing to dodge it and attack him. Lastly, he can also leap into the air and slam the statue head down, so get away.
Phase 2
At around the halfway health mark, he will fly into the air and slam down, thus causing an explosion of Rhogar. From here, he will be filled with Rhogar, and Rhogar swords will fall around the arena. He will whip his arms around, and the swords will fall in circles from far to near. You can try to attack him while the swords are falling far away, as it does take some time to reach.
Again, he will let out more projectiles and rise with Rhogar flames around him. The swords will now fall and follow you around the arena.
34. Adyr, the Bereft Exile

Location: You will be invited into the Rhogar Realm, and entering it will allow you to confront Adyr. If you have cleansed all beacons, this fight will be available. However, if you choose a different ending, this boss fight won’t trigger.
Rewards: Umbral Scouring (in Umbral after Soulflay) x 2, Remembrance of Adyr the Bereft Exile (in Umbral after Soulflay), Infernal Weapon Spell.
This is the final boss you will encounter to end your journey through all the bosses in Lords of the Fallen. Defeating Adyr, The Bereft Exile, means you have achieved the Radiant Ending, which is typically labeled as the good ending. You will find Adyr right after you’ve defeated The Sundered Monarch.
When you walk up the stairs at the start of the fight, Adyr will start talking while sending out balls of Rhogar to enter the bodies in the arena. These Rhogar-infected bodies will start to follow you around and attack you. The Rune of Adyr will pulse when they are near, and they will start throwing fireballs at you.
Each follower or infected body will go down in a couple of hits which directly impacts Adyr’s health. When his health is completely depleted, walk into the Rhogar circle, and a cutscene will start. Note that you are on a time crunch. If you do not deplete his health by the time he finishes talking, he will bomb the entire arena, and you’ll be dead. His whole speech lasts about five minutes, so get to taking down those infected as fast as possible.
At this point, the choices you’ve made will impact what you get. Completely cleansing all five beacons means you have achieved the Radiant Ending.
And that’s a complete guide to the 34 bosses in Lords of the Fallen! It has been a long and tiring journey, so be sure to reward yourself with a pat on the back and a good time. May this guide prove useful to you in your journey. If you are looking for more souls-like games, we’ve got the list for you!