
In Genshin Impact, you have your normal bosses, and your weekly bosses reset every week as well. These weekly bosses are usually the boss fights you’ve been through in the game’s story or Archon quests.
Naturally, the Genshin Impact bosses drop different materials for you to use to ascend and level up your characters, artifacts, or weapons. The weekly bosses do tend to be harder than normal bosses, which is why they drop better rewards.
As an avid fan of the game, I was tasked with ranking the Genshin Impact Bosses. Just keep in mind, this is largely my own opinion, and yours may vary – you can let me know what you think in the comments below.
Note that this list will be periodically updated as the bosses increase and the game continues to expand.
28. Anemo Hypostasis
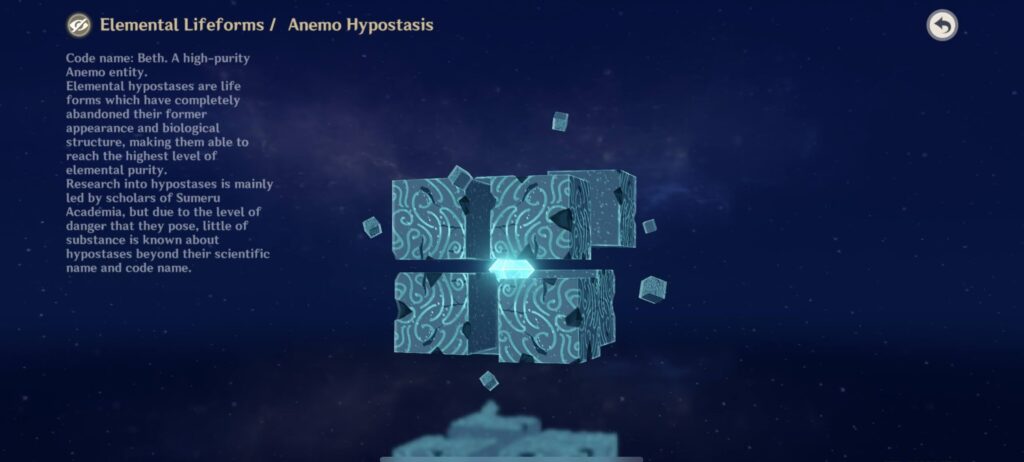
Location: Northern of the Stormbearer Mountains, Monstadt.
Rewards: Hurricane Seed, Vayuda Turquoise, Artifact Sets (Lucky Dog, Berserker, Instructor, Gladiator, Wanderer’s Troupe).
Weaknesses: All elements except Anemo.
Special Achievements: “That’s one big Crystalfly”, “…Not indicative of final product,” Back With The Wind and That’s One Big Crystalfly (Co-Op).
Boss Type: Normal Hypostasis Boss.
This is one of the easiest Hypostasis and Genshin Impact bosses to defeat, as you can use any element except Anemo to pound this elemental being. This also makes the fight less enjoyable since there isn’t much of a fight. All you have to do is to dodge its Anemo attacks and focus on its core. This Hypostasis will throw out tornadoes and mini cubes from the sky, but they’re all pretty easy to dodge.
Another fun hack is being able to ride the winds that the Hypostasis provides when it is low in HP to collect all of the sigils to prevent it from reviving. The Anemo Hypostasis leads you towards its defeat in the end.
27. Electro Hypostasis
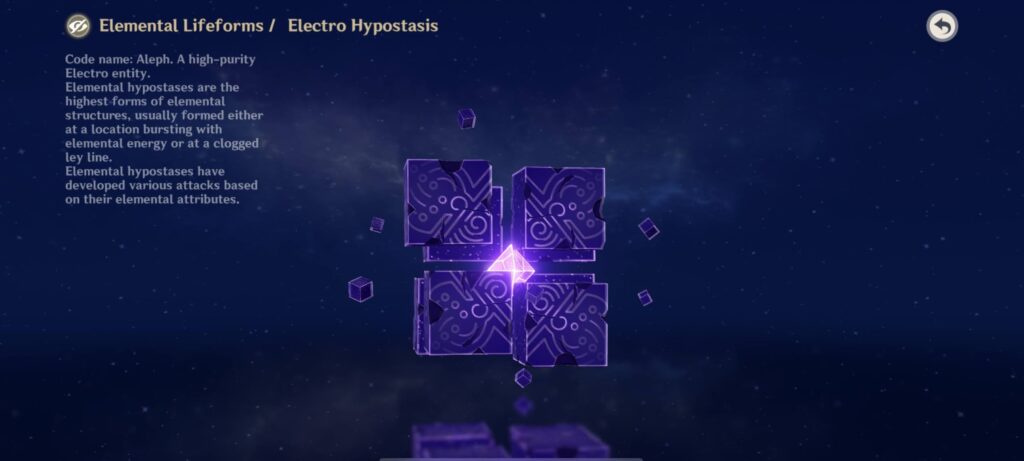
Location: South of Cape Oath, Monstadt.
Rewards: Lightning Prism, Vajrada Amethyst, Artifact Sets (Traveling Doctor, Instructor, The Exile, Prayers for Wisdom, Gladiator’s Finale, Wanderer’s Troupe).
Weaknesses: Pyro and Cryo elements, Plunging Attacks.
Special Achievements: The PRISM Program, Force Field Erosion, “… Lizard-Spock”, …And Still Smiling!
Boss Type: Normal Hypostasis Boss.
Another easy-to-beat Genshin Impact boss, the Electro Hypostasis provides more variety in its forms to attack or trap you, but it’s still pretty easy to defeat. Bring along hard-hitting DPS characters to help you out of being trapped in an Electro box, and make sure to keep attacking its core when exposed.
Some players have even beaten this guy in under 10 minutes, so who’s to say you can’t either? Just dodge its wide area of attacks and bring along counters to its Electro elements like Pyro or Cryo, and you’re good!
26. Stormterror Dvalin (Confront Stormterror)
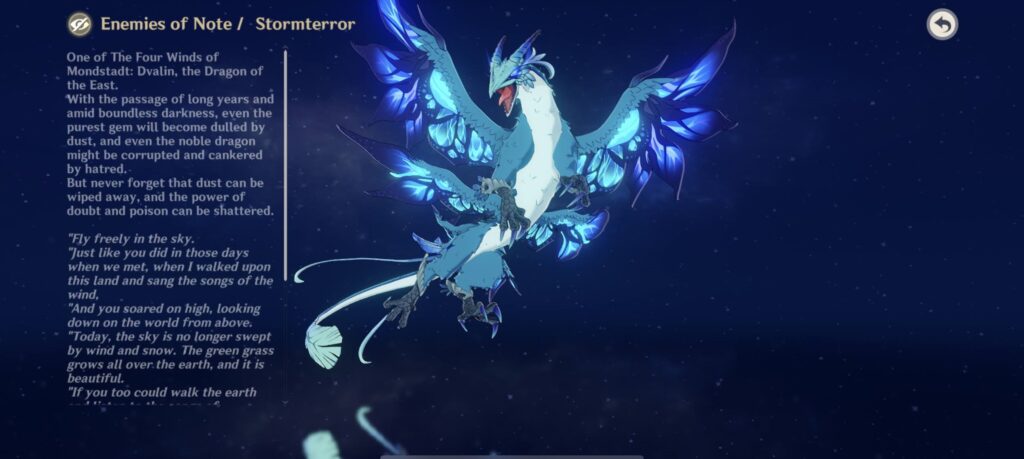
Location: Stormterror’s Lair, Brightcrown Mountains, Monstadt.
Rewards: Dvalin’s Plume, Dvalin’s Claw, Dvalin’s Sigh, Artifact Sets (Berserker, Instructor, The Exile, Gladiator’s Finale, Wanderer’s Troupe), Dream Solvent, Northlander Billets, Vayuda Turquoise, Vajrada Amethyst, Varunada Lazurite.
Weaknesses: Claymore & Bow characters (Ganyu especially).
Special Achievements: None
Boss Type: Weekly Boss found in Trounce Domain.
Probably one of the first-ever major boss battles you’ll ever encounter is with this guy, Dvalin. As a weak upstart when you first came into battle with him, he can be rather difficult to defeat. But as you level up and revisit the fight in Trounce Domain, you’ll come to find that he’s pretty easy to beat.
Just make sure you’ve got a strong Bow and Claymore character in your team, and you’re good. Aimed shots at his neck will weaken him, and claymore hits to his back/wings will get the job done. Make sure just to avoid his attacks and float around on the wind to avoid getting shocked. Characters like Ganyu can get this fight over in about 3 Aimed Shots.
25. Dendro Hypostasis
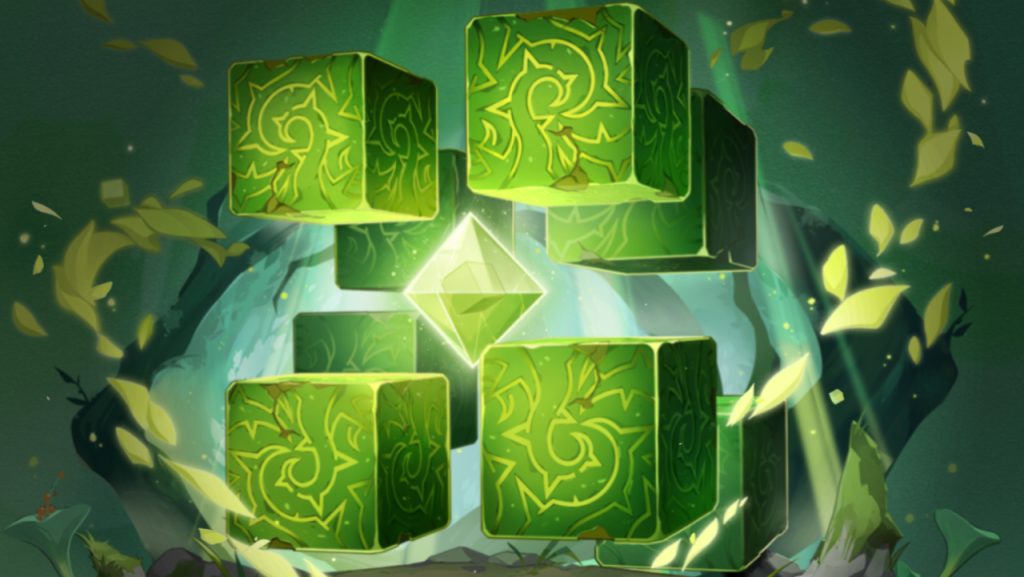
Location: Land of Lower Setekh, Sumeru.
Rewards: Quelled Creeper, Artifact Sets (Berserker, Instructor, Adventurer, Gladiator’s Finale, Wanderer’s Troupe), Nagadus Emerald.
Weaknesses: Pyro and Electro elemental abilities.
Special Achievements: The Marvelous Uses of Nitrogen Fixation, Records of The Fall.
Boss Type: Normal Hypostasis Boss.
Not the weakest hypostasis out there, but easily defeated still, we have the Dendro Hypostasis. You can find this boss in the deserts of Sumeru rather than the forest. The best way to defeat this boss is to manipulate the Dendro element by activating elemental reactions with other elements.
Your team composition should be made up of hard-hitting Electro and Pyro characters in order to create a Burning or Quicken reaction. Avoid Dendro characters at all costs, as this hypostasis is immune to Dendro. As usual, this hypostasis has several different moves for you to actively avoid, and it focuses on AoE attacks. Make sure to destroy its Restorative Pliths once they spawn due to the boss’ low health.
24. Geo Hypostasis
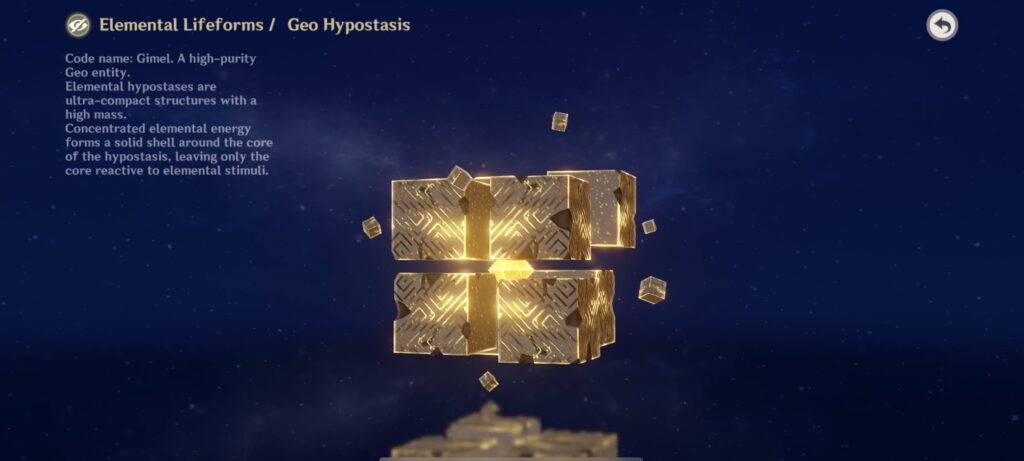
Location: A small island in the Guyun Stone Forest, Liyue.
Rewards: Basalt Pillar, Prithiva Topaz, Artifact Sets (Traveling Doctor, Instructor, The Exile, Gladiator’s Finale, Wanderer’s Troupe).
Weaknesses: Blunt attacks and plunging attacks from claymores, Geo DMG for pillars.
Special Achievements: Juggernaut, A House Ill-Founded, None Stand Secure, You Have To Hit The Pillars.
Boss Type: Normal Hypostasis Boss.
A slightly more annoying but easy to defeat Hypostasis, bring on your hard-hitting Claymore characters and Geo damage dealers for this one. This creature spawns Geo pillars around the arena and you’ll have to destroy them one by one while it attempts to hurt you with some Geo bursts.
As its health dwindles, it will try to revive and spawn out more pillars which you will have to destroy to stop it from reviving. Pretty straightforward. Most of its elemental outbursts cover only one part of the arena, so you can quickly dodge or run away from the area to avoid damage.
23. Cryo Regisvine
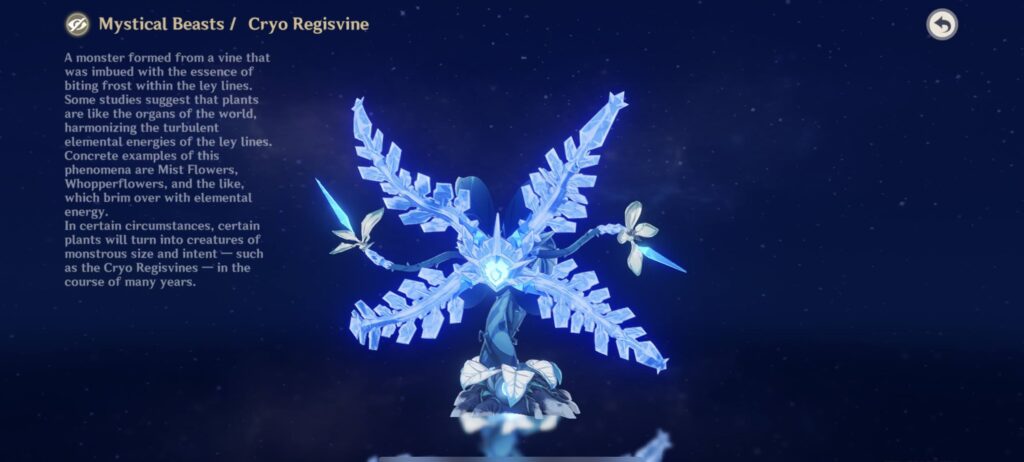
Location: North of the Falcon Coast, Monstadt.
Rewards: Hoarfrost Core, Shivada Jade, Artifact Sets (Lucky Dog, Berserker, The Exile, Prayers to Springtime, Gladiator’s Finale, Wanderer’s Troupe).
Weaknesses: Pyro is most effective, with bow characters for breaking the Corolla.
Special Achievements: Extreme Gardening, “Take That You Overblown Mist Flower!”, Knockout, ‘Just Me and You, The Sky So Blue, and Almost Getting Killed By A Cryo Regisvine’.
Boss Type: Normal Regisvine Boss.
This huge ice plant is sure to intimidate you during your first encounter, but if you have some strong Pyro characters along, it should be a breeze to handle. A suggestion would be to have Pyro Bow characters like Yoimiya around to help attack its exposed Corolla in certain phases of the battle. Once the Corolla is destroyed, everything is easier.
Regisvines are naturally easier to deal with if you have melee characters around, so bring along your favorite DPS Pyro characters like Diluc, Yanfei, or Hu Tao to help. The Cryo Regisvine will occasionally shoot out a Cryo laser beam from its center, but as long as you’re behind it and out of reach, you’ll be fine.
22. Pyro Regisvine
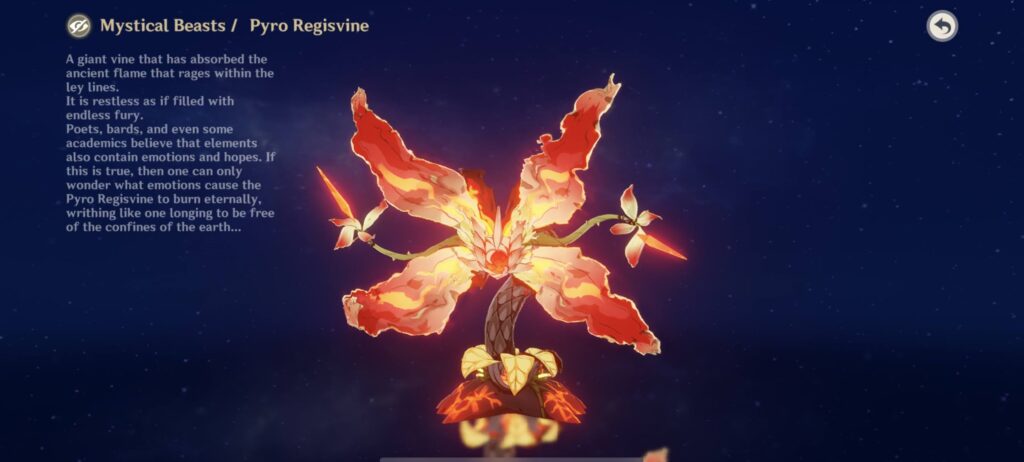
Location: Cuijue Slope, Liyue.
Rewards: Everflame Seed, Agnidus Agate, Artifact Sets (Adventurer, Berserker, Instructor, Prayers for Illumination, Gladiator’s Finale, Wanderer’s Troupe).
Weaknesses: Hydro elements and bow characters for breaking the Corolla.
Special Achievements: Gardener Extraordinaire, “That Was Blooming Hot”, Core Meltdown, This Is Fine.
Boss Type: Normal Regisvine Boss.
Most of the Pyro Regisvine’s attacks consist of faceplanting itself onto the ground, dragging its head across the area, or spitting fireballs at you. There are more variations to its attacks than with the Cryo Regisvine, and it can be more difficult since Hydro DPS characters are pretty scarce.
Any element except Pyro is effective against this guy, but the most effective would be Hydro to put out that fire. As with the previous Regisvine, melee characters and a bow character to break the Corolla is needed. For Hydro bow wielders, you can only put your hope in Childe with his hard-hitting Hydro damage. For Hydro melee characters, you could go for Mona or Xingqiu to help with the attacks. The upcoming Kamisato Ayato would be a fine addition too.
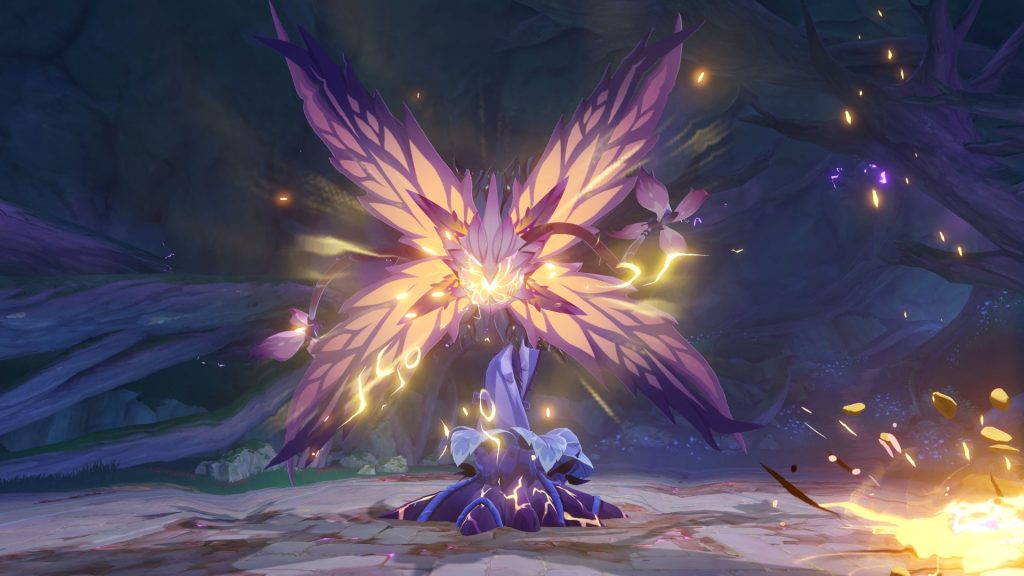
21. Jadeplume Terrorshroom
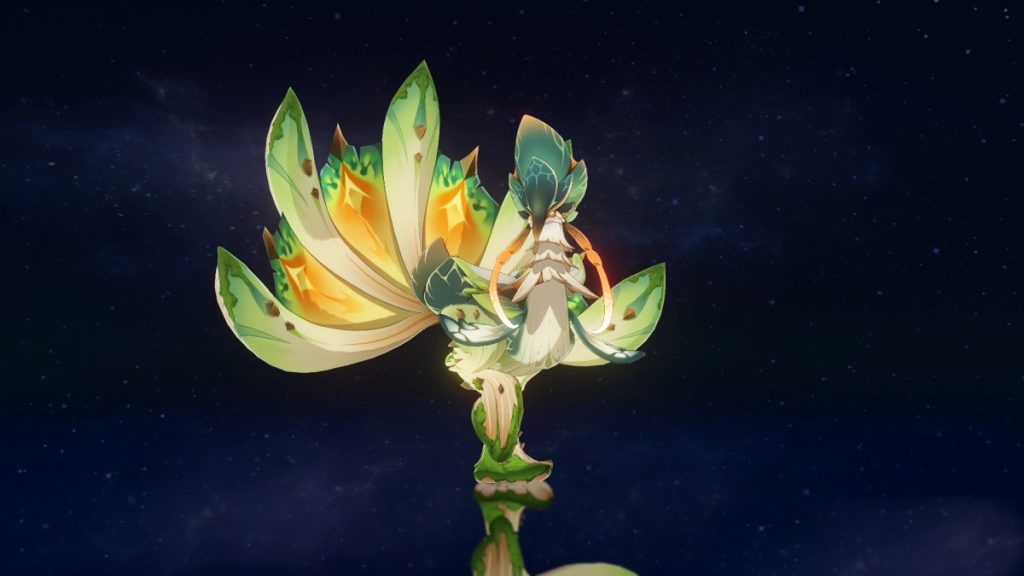
Location: Vissudha Field, Sumeru.
Rewards: Majestic Hooked Beak, Artifact Sets (Berserker, Instructor, Adventurer, Gladiator’s Finale, Wanderer’s Troupe), Nagadus Emerald.
Weaknesses: Electro and Pyro elemental abilities.
Special Achievements: Three Strikes, I Can’t Take It Anymore!, The Smell of Grilled Mushrooms in the Morning, Nanomachines, Son!, I’m a Flexitarian.
Boss Type: Normal boss.
The Jadeplume Terrorshroom will test your Dendro skills to the max, but it is not difficult to defeat once you’ve grasped the basics of Dendro. From its name, you could probably already guess that this boss is simply an oversized mushroom. As such, it has a huge resistance to Dendro, but it is not completely immune, of course.
Similar to other Fungi enemies that you will have encountered in the game, this Jadeplume Terrorshroom has an Activated and Scorched state that can be triggered by different elements. Each state brings its own pros and cons for you to manipulate based on your team composition and abilities. Nothing you can’t handle by now, though!
20. Electro Regisvine
Location: Mawtiyima Forest, Lokapala Jungle, Sumeru.
Rewards: Thunderclap Fruitcore, Artifact Sets (Traveling Doctor, Instructor, The Exile, Prayers for Wisdom, Gladiator’s Finale, Wanderer’s Troupe), Vajrada Amethyst.
Weaknesses: Cryo, Pyro, and Dendro elemental abilities.
Special Achievements: When Autumn and Dew Meet, The Mad Flower At the End of the Road, Electric Shock Hazard.
Boss Type: Normal Boss.
The long-awaited electro regisvine proves to be the hardest regisvine yet. Even so, equipping yourself with Pyro and Dendro characters would make quick work of this oversized plant. Even Cryo and Pyro would make a good team as you can trigger the Melt reaction. To defeat this boss, make sure to attack its external cores to prevent explosions from occurring.
There are three attacks used by this regisvine, the core explosions which were mentioned previously, root attacks and corolla attacks. With a good amount of dodging, destroying any external cores and proper team composition, this fight can be over in a blink of an eye.
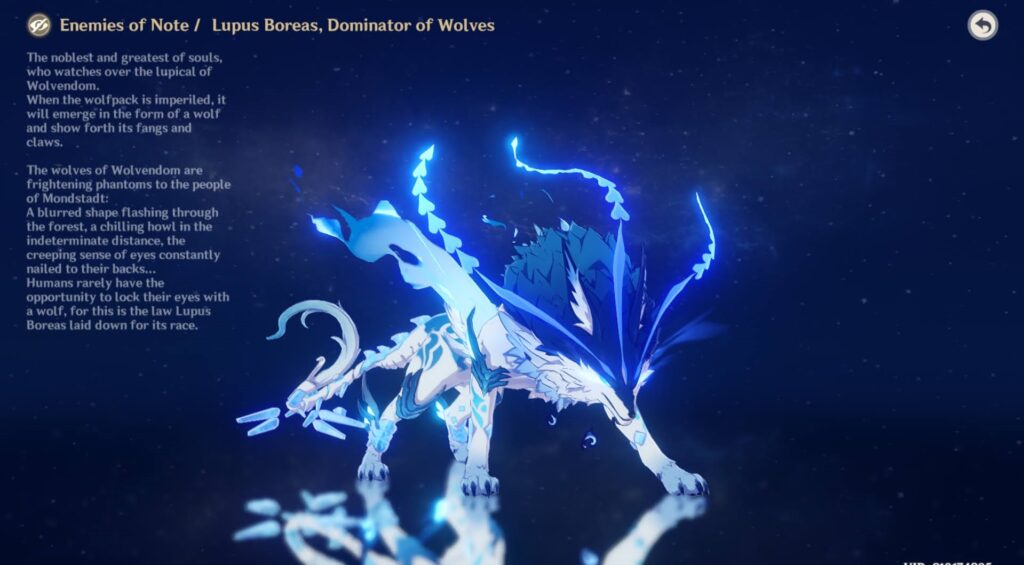
19. Lupus Boreas/Andrius (Wolf of the North Challenge)
Location: Wolvendom, Windwail Highland, Monstadt.
Rewards: Tail of Boreas, Ring of Boreas, Spirit Locket of Boreas, Artifact Sets (Berserker, Instructor, The Exile, Gladiator’s Finale, Wanderer’s Troupe), Dream Solvents, Northlander Billets, Shivada Jade, Agnidus Agate, Prithiva Topaz.
Weaknesses: Mainly Pyro elemental attacks. Bow users and catalyst users are also more useful in certain phases.
Special Achievements: Wolf Pact.
Boss Type: Weekly Boss found in Trounce Domain.
There’s more variety in Andrius’ fight, but it’s still easy to beat once you’ve figured out his moves. There are two phases to his fight and an interlude in between where he leaps and charges at you in a haze. You won’t have to go through the interlude if you’ve reduced his health in the first phase though.
His first phase consists of Cryo elemental attacks, while his second phase incorporates Anemo attacks. For the interlude, make use of your Bow or Catalyst characters and attack him from range as he runs around. You should bring a healer since Andrius’ health pool is twice that of Stormterror, even if he is one of the earlier Genshin Impact bosses you’ll come up against.
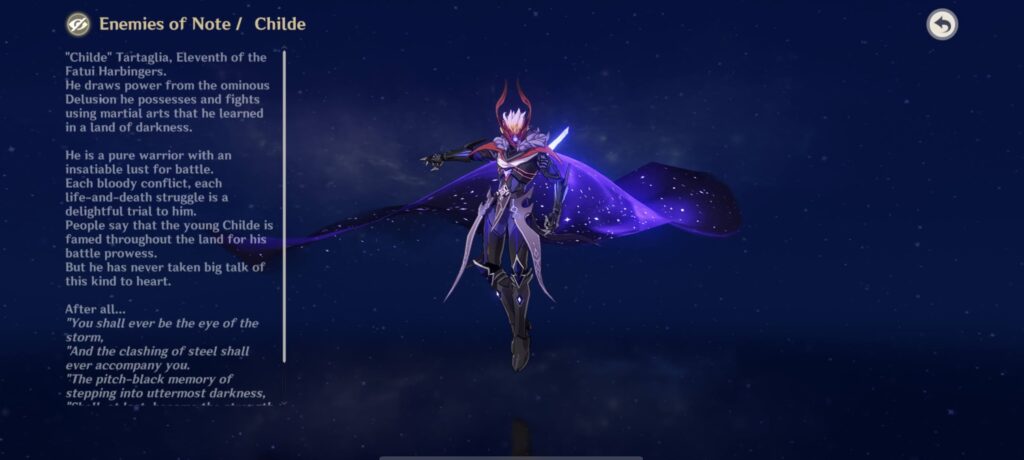
18. Tartaglia Childe (Enter the Golden House)
Location: Mt. Tianheng, Sea of Clouds, Liyue.
Rewards: Tusk of Monoceros Caeli, Shard of A Foul Legacy, Shadow of the Warrior, Artifact Sets (Berserker, Instructor, The Exile, Gladiator’s Finale, Wanderer’s Troupe), Dream Solvent, Northlander Billet, Varunada Lazurite, Vajrada Amethyst, Shivada Jade.
Weaknesses: Non-Hydro/Electro damage-dealing characters (Anemo, Pyro, Cryo, Geo).
Special Achievements: Outlander Vs. Outlander, A Delusion’s Abilities Don’t Decide a Battle’s Outcome.
Boss Type: Weekly Boss found in Trounce Domain.
His fight was underwhelming for me, and with recent updates, players have found ways to cheese (cheat) through his fight as well. It was a good fight, but it felt like it was over too fast. There are three phases to his fight, and he changes elements from Hydro to Electro and a combination of both, which was a nice surprise.
In the first phase, you’ll be fighting with Childe: Hydro Vision, as he deals mostly Hydro damage with about 15 different attack patterns. In the second phase, you’ll be fighting with Childe: Electro Delusion, which is the masked electro-damage-dealing version. He has about 16 attack patterns here for you to fight against.
In the third phase, Childe: Foul Legacy – The Devouring Deep showcases him with a combination of both Electro and Hydro abilities with about 14 attack patterns. This guy goes crazy, and it’s best to put non-Electro/Hydro characters to use here.
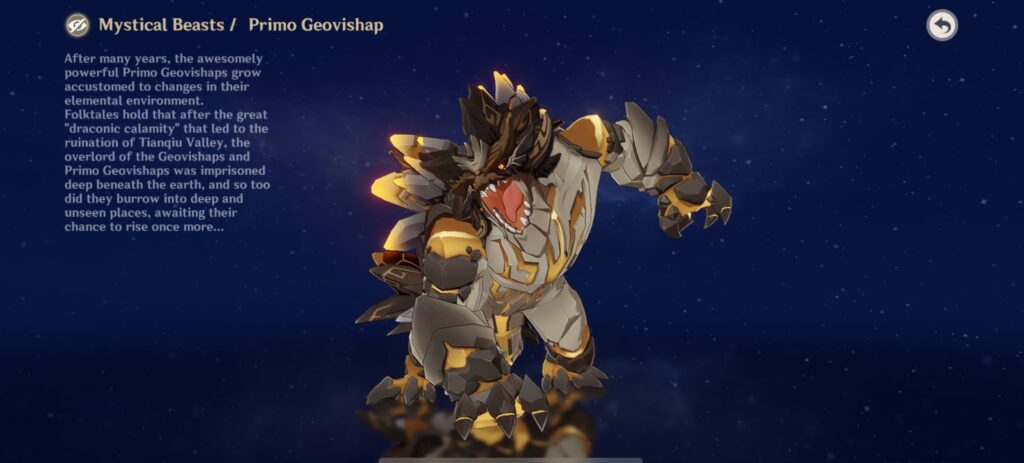
17. Primo Geovishap
Location: Tianqiu Valley, Liyue.
Rewards: Prithiva Topaz, Juvenile Jade, Ascension Gems, Artifact Sets (Berserker, Instructor, The Exile, Prayers for Wisdom, Prayers to Springtime, Prayers for Illumination, Prayers for Destiny, Gladiator’s Finale, Wanderer’s Troupe).
Weaknesses: depending on the element that it imbues itself with, but do bring a shield character to help.
Special Achievements: Deflection!, You Can Have Those Back!, Geo Elemental Reaction?, Fine, I’ll Do It Myself, Moving Mountains.
Boss Type: Normal Geovishap Boss.
This creature can automatically imbue itself with certain elements – Pyro, Hydro, Cryo, or Electro. This makes it unpredictable unless you’ve done this fight countless times. In this sense, your best bet is to bring along a shield character to help, like Zhongli or Diona.
The Primo Geovishap uses two elements, Geo and whatever it decides to imbue itself with. Most notable is its Primordial Shower Attack. Although this boss has four times the health pool of the Regisvines and Hypostasis bosses, once you block his Primordial Shower Attack, his health pool lowers. This is because its attacks are reflected at it, and lowers its HP. Great boss for farming for Ascension Materials, though, as he drops materials for all elements.
16. Azhdaha (Beneath the Dragon-Queller)
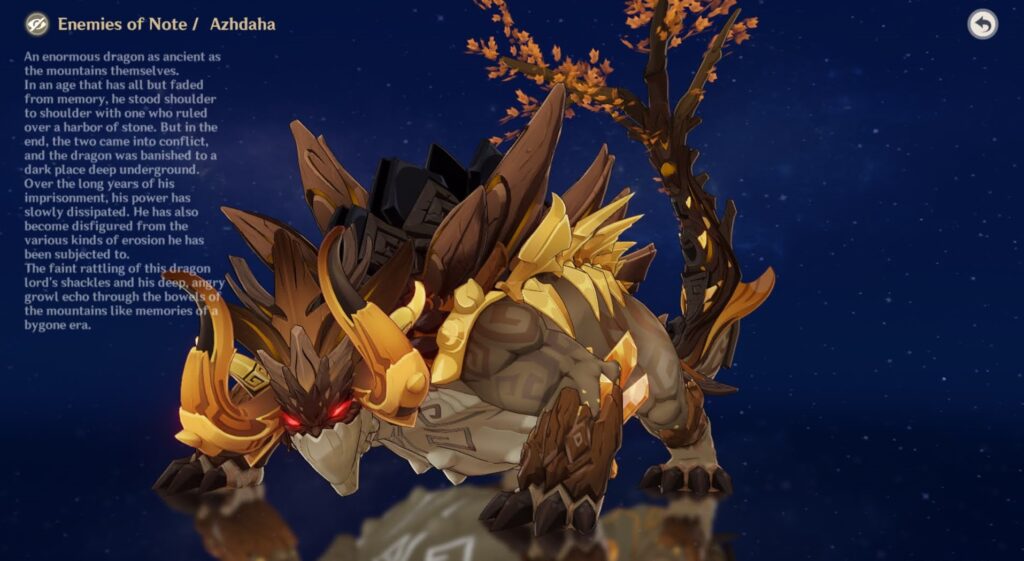
Location: Dragon-Queller, Nantianmen, Liyue.
Rewards: Dragon Lord’s Crown, Bloodjade Branch, Gilded Scale, Artifact Sets (Berserker, Instructor, The Exile, Gladiator’s Finale, Wanderer’s Troupe), Dream Solvent, Northlander Billets, Prithiva Topaz, Ascension Gems.
Weaknesses: Depends on the elements imbued by Azhdaha.
Special Achievements: Sternest of Souls, The Finishing Touch, Blast from the Past.
Boss Type: Weekly Boss found in Trounce Domain.
Azhdaha turns everything up a notch with three battle phases and the inclusion of a Ley Line Disorder based on the element that is showcased on the door of his Trounce Domain. Make sure to check which sigil is lit up before entering the domain to ready yourself.
Azhadaha will also infuse himself with these elements, while his main element is Geo. In total, he’ll infuse himself with two other elements throughout the fight. You’ll see more and more of this occurring as we go along this list of Genshin Impact bosses; it’s what keeps things interesting.
A little tip, never try to attack this guy from the side, as it will trigger a body slam, attack him from the front and back only. As such, you should bring along characters with large hitboxes like Diluc, Klee, and Ganyu. If you prefer staying away from him and his huge variety of attacks, bring along a Bow or Catalyst character.
15. Perpetual Mechanical Array
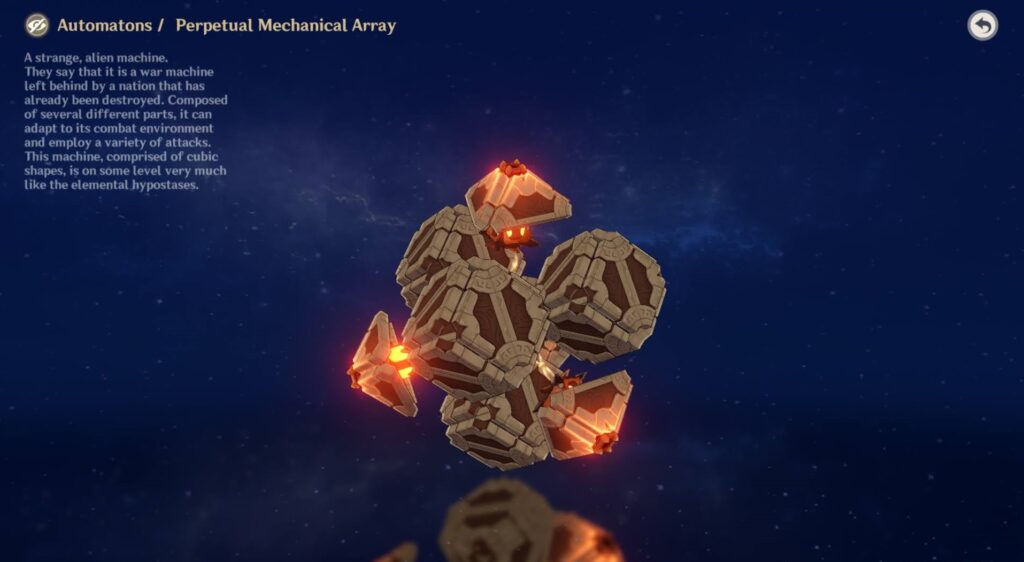
Location: Under Jinren Island, Inazuma.
Rewards: Perpetual Heart, Prithiva Topaz, Shivada Jade, Artifact Sets (Lucky Dog, Berserker, The Exile, Prayers to Springtime, Gladiator’s Finale, Wanderer’s Troupe).
Weaknesses: Elemental DMG.
Special Achievements: The Battle of Narukami Island, Core Breakthrough, Could All Uninvolved Machinery Please Leave Immediately?, The Not-So-Perpetual Mechanical Array.
Boss Type: Normal Boss.
This may be a personal opinion, but I loathe mechanical creatures in this game. So naturally, the Perpetual Mechanical Array fight was not something I enjoyed. However, it does have more variety in its attack, which adds more flair in battle. It also has a predictable move set, just like all the other mechanical creatures in the game.
Once you’ve figured out its move set, everything gets somewhat easier. But this Genshin Impact Boss is a pain to deal with. Aside from its usual set of attacks – Energy Cannons, Cube Rolls, Orbital Strikes, Blade Spins, Rocket Blasts, and Sword Slashes, it summons 4 Ruin Sentinels to protect itself in defensive mode, each of a different variety.
I hate it, but it’s great for those who enjoy a variety of challenges.
14. Rhodeia of Loch/Oceanid
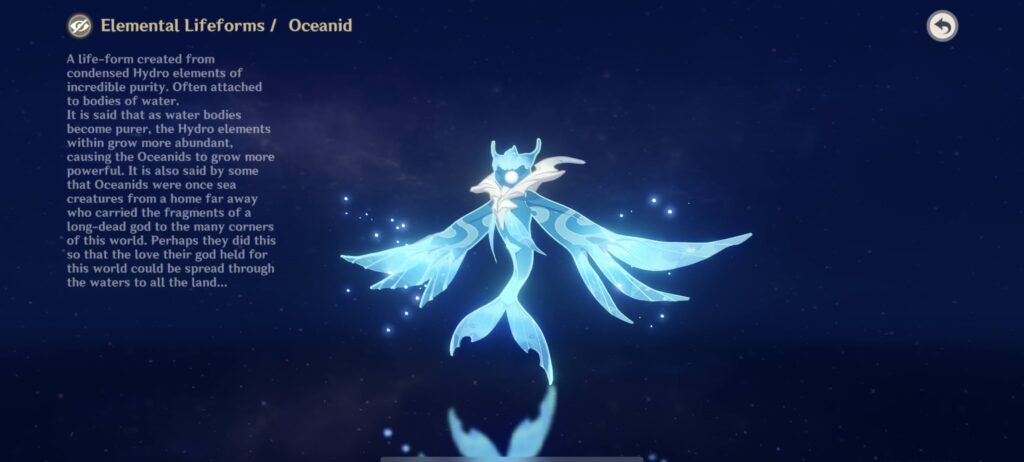
Location: Bishui Plain, Liyue.
Rewards: Cleansing Heart, Varunada Lazurite, Artifact Sets (Adventurer, Berserker, The Exile, Prayers for Destiny, Gladiator’s Finale, Wanderer’s Troupe).
Weaknesses: Bow or Catalyst users, preferably elements other than Hydro.
Special Achievements: Hydro Hunter, ‘Dip, Duck, Dive, Dodge, Defeat’, A Fish Called Rhodeia.
Boss Type: Normal Boss.
The main thing about Rhodeia is her Hydro Mimics that do all the fighting for her. She has six different types of Hydro Mimics, each with different elemental weaknesses and abilities. If you’re concerned and can’t differentiate the various types yet, bring along some bow characters and shoot them from a range. Either that or some Catalyst users.
Throughout your fight with her, the platforms around you will start to sink as well, so make sure you run to safety before it does, or you’ll find yourself in water. Since she is a Hydro boss, her Hydro Mimics can only deal Hydro damage and are impervious to them. Bring along some Pyro, Cryo, and Geo characters as a counter.
13. Cryo Hypostasis
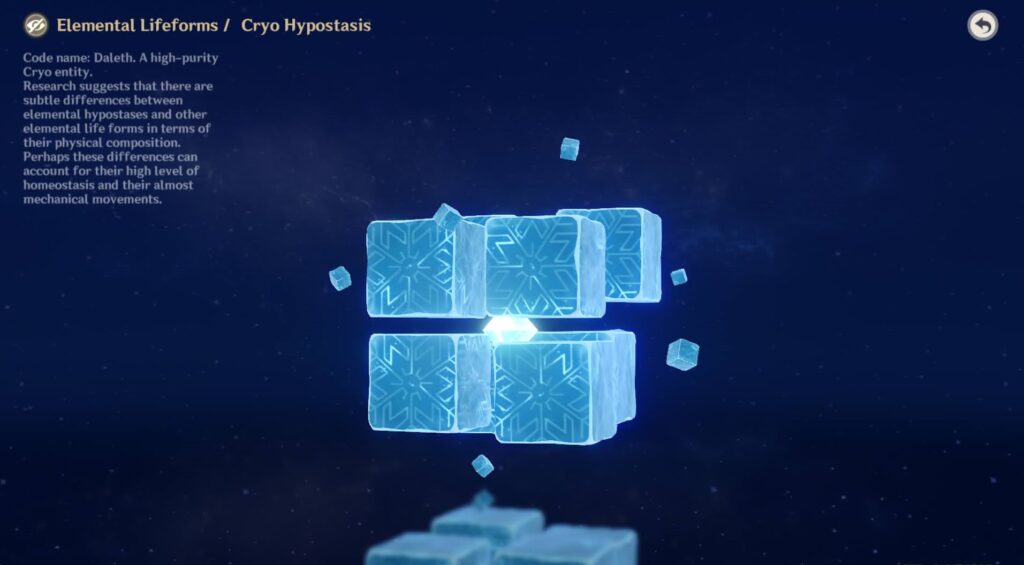
Location: Dragonspine, Monstadt.
Rewards: Crystalline Bloom, Artifact Sets (Lucky Dog, Berserker, The Exile, Prayers to Springtime, Gladiator’s Finale, Wanderer’s Troupe), Shivada Jade.
Weaknesses: Pyro attacks and damage.
Special Achievements: “…A Single Night’s Work”, “Knee-Deep Snow…”, Put On Ice.
Boss Type: Normal Hypostasis Boss.
We’re transitioning into the better half of the Genshin Impact bosses here with the Cryo Hypostasis. By better, we mean it gets more fun, and the gameplay gets way more challenging. How is the Cryo Hypostasis more challenging, you might ask? Well, the Sheer Cold passive effect is rather killer and more effective in this battle than in normal situations. There are three braziers around for you to warm up, but only if you can get to them in time.
Naturally, Pyro attacks deal the most damage but Superconduct reactions through the use of Electro are useful as well. If you want to stay away from the Hypostasis to avoid getting cold, bringing along a Pyro Bow or Catalyst character like Yoimiya or Yanfei is a smart choice.
12. Hydro Hypostasis
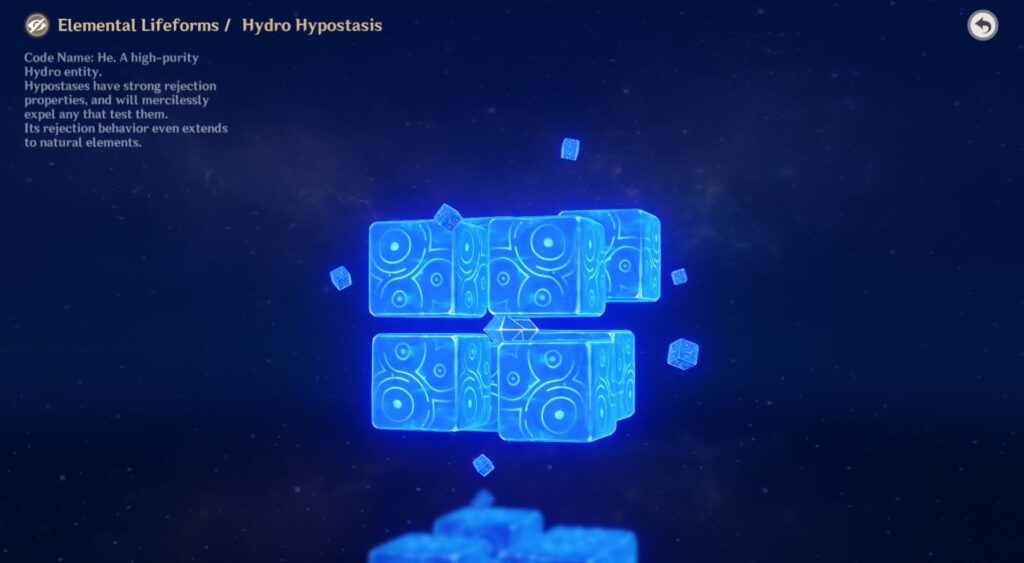
Location: Suigetsu Pool, Watatsumi Island, Inazuma.
Rewards: Dew of Repudiation, Varunada Lazurite, Artifact Sets (Traveling Doctor, Instructor, The Exile, Prayers for Destiny, Gladiator’s Finale, Wanderer’s Troupe).
Weaknesses: Pyro and Electro elemental attacks that can cause elemental reactions/damage.
Special Achievements: Dry Clean, Bio-Oceanic Weapon.
Boss Type: Normal Hypostasis Boss.
The Hydro Hypostasis has some water droplets that surround the Hypostasis with their own Hydro Shields that you need to break to defeat them. Any element can do the job here aside from Hydro, of course.
Since this boss is always in the ‘Wet’ state, Pyro and Electro characters can inflict Vaporize and Electro-Charged reactions as well. The only exception is the Frozen state, as this Hypostasis is immune to that.
Overall, this Hypostasis has eight different attacks, which keep it engaging as you dodge while trying to deal damage.
11. Ruin Serpent
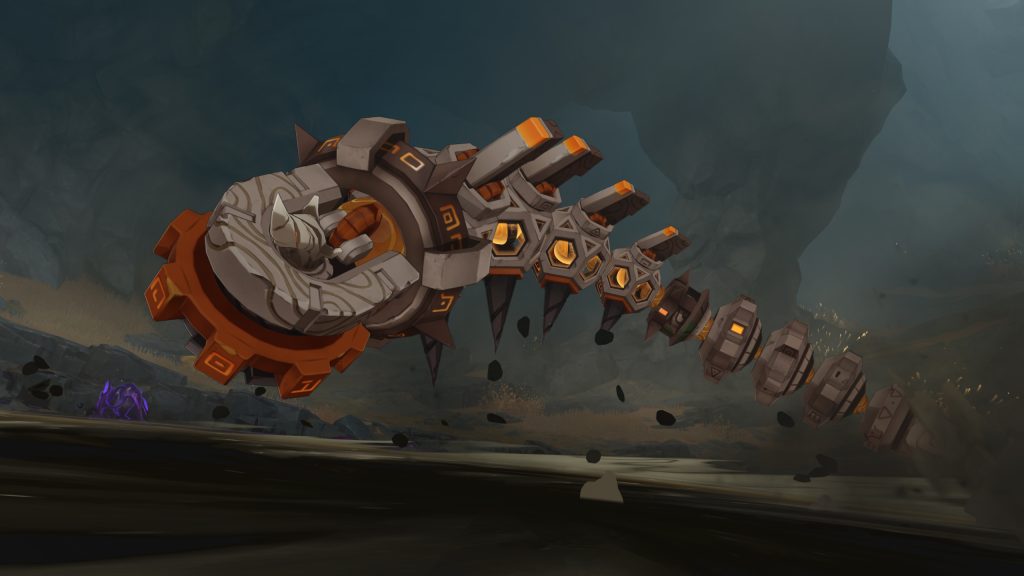
Location: The Serpent’s Cave, The Chasm: Underground Mines, Liyue.
Rewards: Runic Fang, Artifact Sets (Traveling Doctor, Instructor, The Exile, Gladiator’s Finale, Wanderer’s Troupe), Prithiva Topaz.
Weaknesses: Characters that can trigger reactions.
Special Achievements: Overflowing Light, Ouroboros, Surpassing The Ancients’ Wisdom.
Boss Type: Normal Boss.
A boss located deep within its own area in the Chasm, the Ruin Serpent is basically a giant snake automaton. What makes the Ruin Serpent difficult to defeat is not its damage or attack patterns but its huge health pool. You would also need to have acquired the Lumenstone Adjuvant Gadget and have it equipped to help you with the fight.
The Ruin Serpent can burrow into the ground and create some corrosive purple goo which you will have to avoid stepping on or it will drain your health and your Lumenstone’s energy. This boss can attack from long range and short range as it draws energy from the purple goo, so beware.
Equipping some characters with quick elemental bursts and even ranged characters could help whittle down the serpent in no time.
10. Pyro Hypostasis
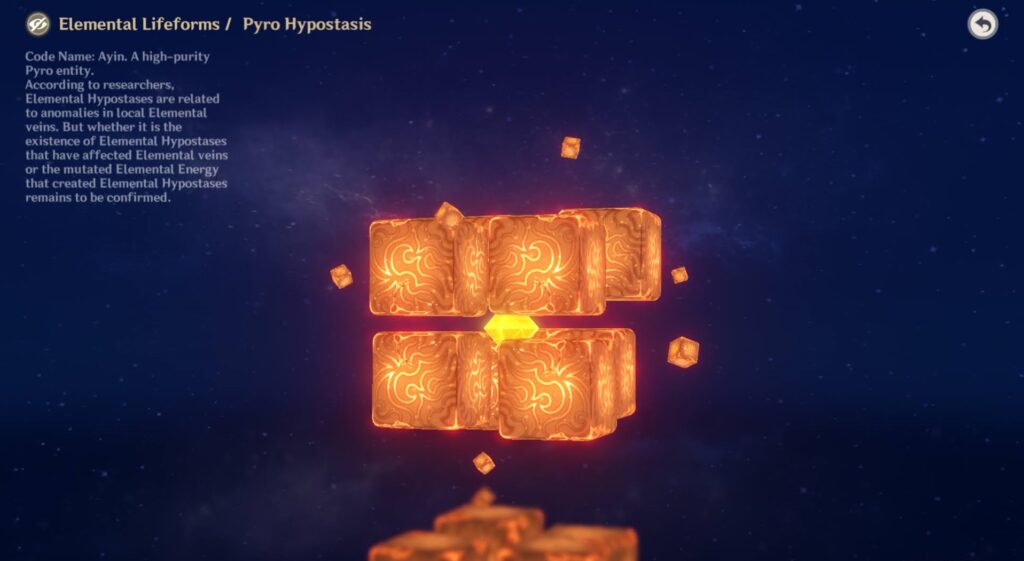
Location: Northern Kujou Encampment, Kannazuka, Inazuma.
Rewards: Smoldering Pearl, Artifact Sets (Adventurer, Instructor, Berserker, Prayers for Illumination, Gladiator’s Finale, Wanderer’s Troupe), Agnidus Agate.
Weaknesses: Hydro elemental attacks and damages.
Special Achievements: It’s Quiet…Too Quiet…, Burned Yourself, Did You?, Smells Like Animal Spirit!, Operation Bonfire.
Boss Type: Normal Hypostasis Boss.
At last, we have Pyro Hypostasis as the remaining Hypostasis on the list! There are two phases to this fight, the Ignited State and the Extinguished State. This Hypostasis starts in the Ignited State, with a Pyro shield in place that can be removed with Hydro damage. The Pyro Hypostasis has three main attacks which you’ll need to dodge if you want a shot at his shield, and it isn’t easy.
However, once the shield is removed, the Hypostasis moves to the Extinguished State with three Tinders planted around the arena. You will have to destroy these quickly so that the Hypostasis won’t be able to revive or gain back any health. It is also actively reviving itself, so you better work quickly!
9. Golden Wolflord
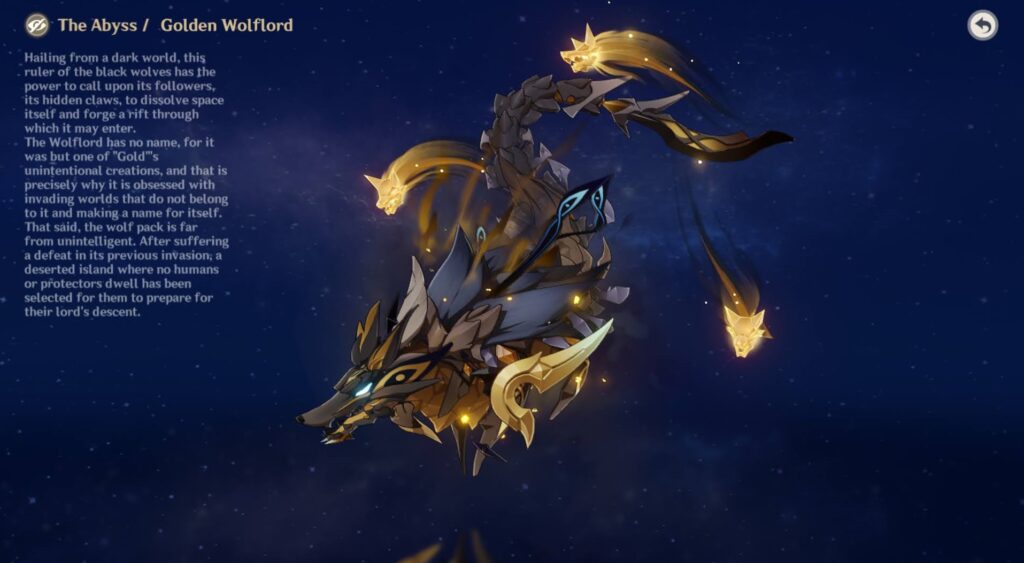
Location: Tsurumi Island, Inazuma.
Rewards: Riftborn Regalia, Prithiva Topaz, Artifact Sets (Traveling Doctor, Instructor, The Exile, Gladiator’s Finale, Wanderer’s Troupe).
Weaknesses: Bow and Catalyst users, Geo elemental attacks.
Special Achievements: Inugami’s End.
Boss Type: Normal Boss.
Don’t be fooled, this wolf can fly. This makes it part of the reason why he’s located so high on this list – a flying wolf is a pain to beat. Especially if you’re bad at using Bow characters. Another thing is the Golden Wolflord can cause Corrosion. This is a passive effect present in all Riftwolves and a rare effect that deals significant damage to those affected by it. This also means that this battle will eat away at your health.
Get yourself a ranged character (Bow or Catalyst) for this one as well as a Geo character for the later part of the fight when he deploys his skulls. The skulls can effectively be destroyed through Geo elemental attacks, and destroying them grants you access to the weakened Wolflord.
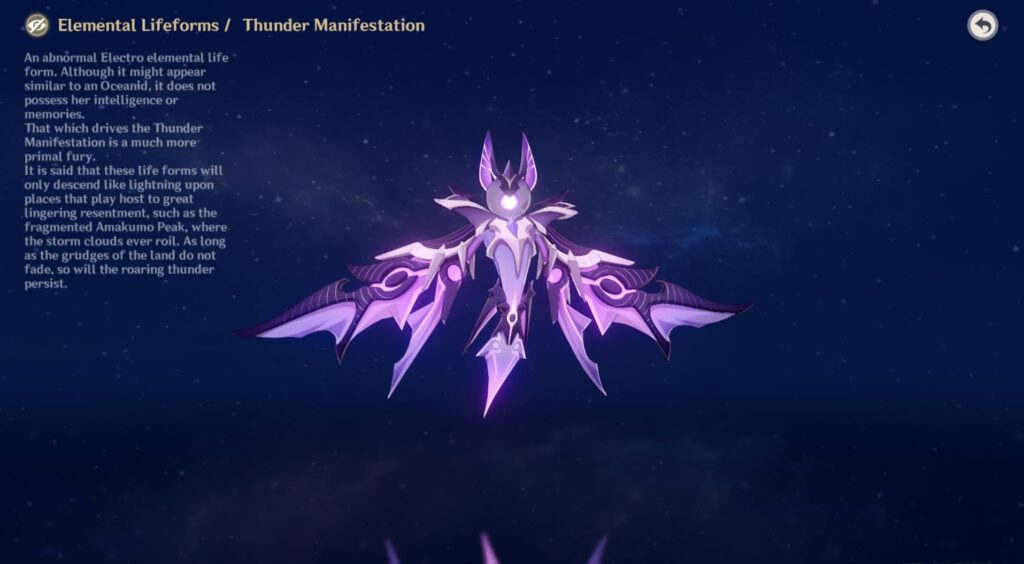
8. Thunder Manifestation
Location: Amakumo Peak, Seirai Island.
Rewards: Storm Beads, Vajrada Amethyst, Artifact Sets (Traveling Doctor, Instructor, The Exile, Prayers for Wisdom, Gladiator’s Finale, Wanderer’s Troupe).
Weaknesses: Pyro or Cryo elemental abilities.
Special Achievements: Love and Non-Communication, Thunder Fall.
Boss Type: Normal Boss.
A completely Electro infused Genshin Impact boss, the Thunder Manifestation is one of the tougher bosses in the game for those who are still busy exploring the many islands of Inazuma. It is immune to Electro damage, so make sure to bring Pyro or Cryo characters along.
Another thing you should know, this boss can fly and teleport around the arena. It would be best for you to bring Bow or Catalyst characters to help with this issue like Yoimiya, Ganyu, Yanfei or Klee. The Thunder Manifestation has a Fury buff and will strike you with shockwaves amongst her many other attacks, but just get out of range and you’ll be fine.
In terms of shields, Geo shields would do best as they can help Crystallize the Electro elements and provide elemental shards for protection. Bring Zhongli if you have him!
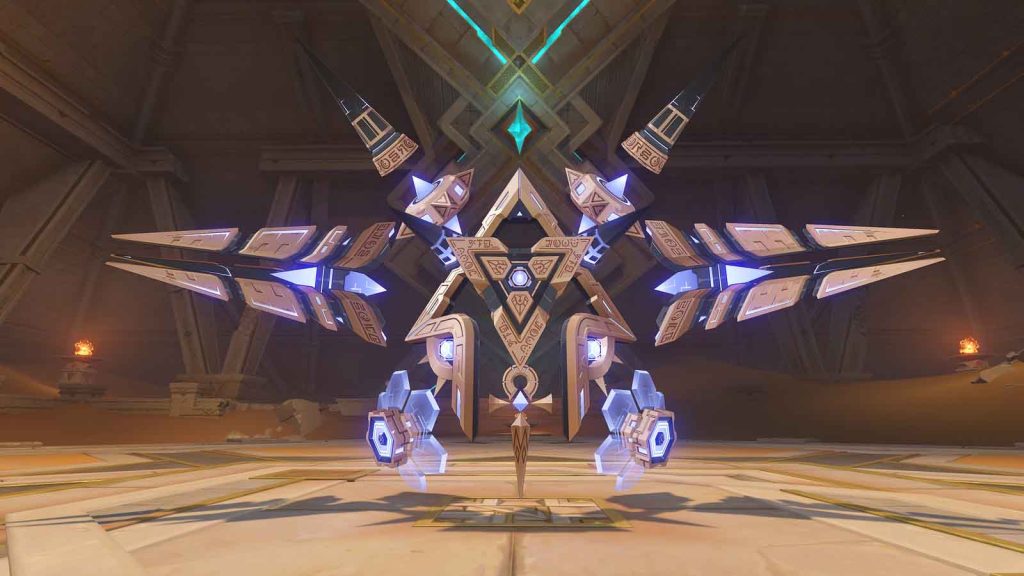
7. Algorithm of Semi-Intransient Matrix of The Overseer Network
Location: Hypostyle Desert, Sumeru.
Rewards: Light Guiding Tetrahedron, Artifact Sets (Adventurer, Berserker, Instructor, Gladiator’s Finale, Wanderer’s Troupe), Agnidus Agate, Vayuda Turquoise.
Weaknesses: Electro elemental abilities.
Special Achievements: System Shock, Daisy, Daisy, Establishing a Beachhead, The Invisible Hand.
Boss Type: Normal Boss.
That name is truly a mouthful, to begin with. This machinery looks like an extra boosted automaton, and that’s essentially what it is as well. Found in a remote part of Sumeru, this ancient piece of machinery differs slightly from other automatons. Instead of being resistant to physical attacks, it is 10% resistant to all kinds of damage.
The annoying thing about this automaton is that it can turn invisible, and when it is in this state, it gains 210% resistance to damage. Even so, it is not invincible. Just figure out its position and make sure to use the right attack to fight back. It is recommended that you bring in some Electro damage dealers for this one.
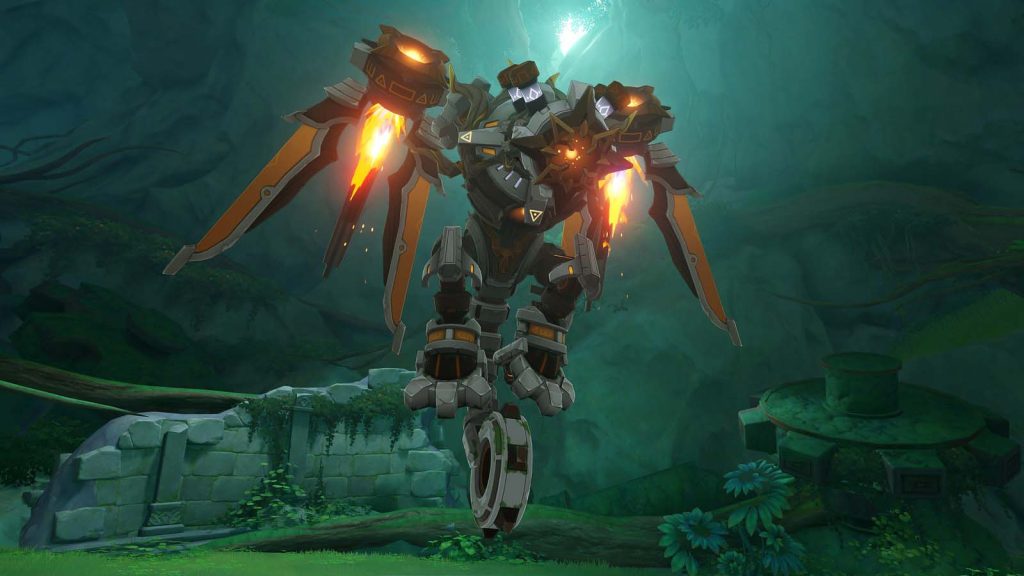
6. Aeonblight Drake
Location: Ardravi Valley, Sumeru.
Rewards: Perpetual Caliber, Artifact Sets (Berserker, The Exile, Lucky Dog, Gladiator’s Finale, Wanderer’s Troupe), Shivada Jade, Varunada Lazurite.
Weaknesses: Hard-hitting DPS characters.
Special Achievements: Dragonslayer, Victory is a Mindset, Resistance is Futile!, Stop it, Mr. Robot!
Boss Type: Normal Boss.
If you hate dealing with those pesky automatons and mechanical array robots, then you’re not going to like this one. The Aeonblight Drake is essentially a dragon automaton. This means that it is highly resistant to physical attacks. Like all automatons, the Aeonblight Drake has a charging period and a paralyzed period where it reveals its weak points as well.
As a dragon, this automaton will either be walking on the ground, making it easier to attack, or flying in the air, which makes it harder to attack if you don’t have a bow or a catalyst-wielding character. This one is best dealt with by two damage dealers of different elemental abilities, especially if you’re bad at dodging its attacks.
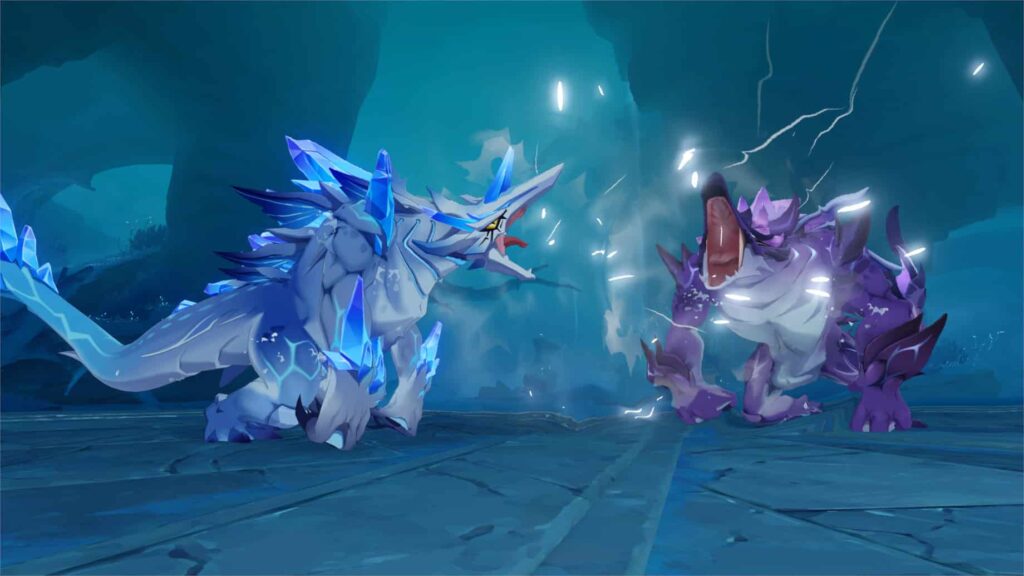
5. Coral Defenders
Location: Dainichi Mikoshi, Enkanomiya.
Rewards: Dragonheir’s False Fin, Shivada Jade, Vajrada Amethyst, Artifact Sets (Lucky Dog, The Exile, Berserker, Prayers to Springtime, Gladiator’s Finale, Wanderer’s Troupe).
Weaknesses: Characters with high energy charge (Raiden, Mona, Venti, etc.) and those with Geo constructs (Zhongli, Albedo, Arataki Itto, etc.).
Special Achievements: Hard Landing.
Boss Type: Normal Boss.
The Coral Defenders consists of two Bathysmal Vishaps that you fight at once – the Rimebiter Bathysmal Vishap and the Bolteater Bathsymal Vishap. One deals Electro damage while the other deals Cryo damage, which is telling from their character design.
They have shared attacks, combo attacks as well as attacks that are exclusive to each creature. At the start of the fight, they’ll start with a Cleansing Shower, so equip a high Energy character to be able to dodge this ability as it is immune to shields. Your Geo constructs will come in handy to block attacks later on when you start fighting back.
Naturally, Pyro would be great to damage both the Cryo and Electro Bathysmals, so add them to your team. My advice: one battery (Raiden), one Geo shield (Zhongli), one Pyro DPS (Diluc), and one Anemo/Pyro support/sub-DPS (Bennett, Sucrose).
4. Maguu Kenki
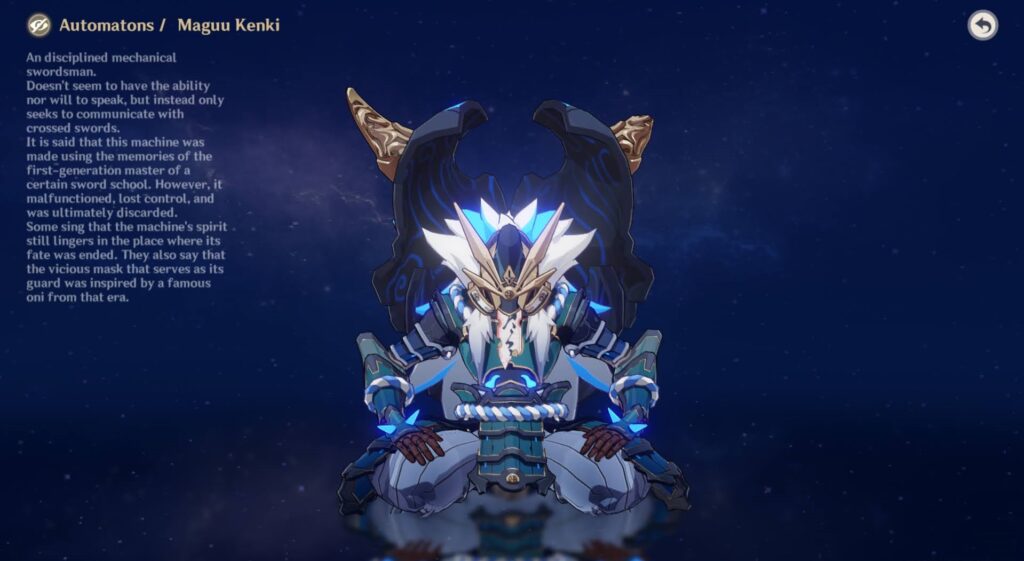
Location: Serpent’s Head, Yashiori Island, Inazuma.
Rewards: Marionette Core, Vayuda Turquoise, Shivada Jade, Artifact Sets (Lucky Dog, Instructor, Berserker, Gladiator’s Finale, Wanderer’s Troupe).
Weaknesses: Melee characters/close-range attacks.
Special Achievements: Puppet Show-Off, If I Run Fast Enough…, In This Solemn Matter, Let No One Interfere!, ‘No Strings Attached, Anymore’.
Boss Type: Normal Boss.
This boss is a mechanical puppet swordsman, which is a pretty cool concept to have. The Maguu Kenki deals a lot of AoE damage and deals mostly Anemo and Cryo damage in a fight. However, as it starts to imbue itself with an element (Cryo or Anemo) when its health pool reaches 75%, it cannot be damaged below that. This makes it invincible until it is done with its first attack.
The Maguu Kenki summons oni masks to either protect it from ranged attacks or to full-on attack players as well. Its attacks can be dodged, and when it is in protective mode, get close to it and use your melee characters to deal damage. Everything about this fight is unique, which is why it deserves a high rank for me amongst the Genshin Impact bosses.
3. La Signora (Narukami Island: Tenshukaku)
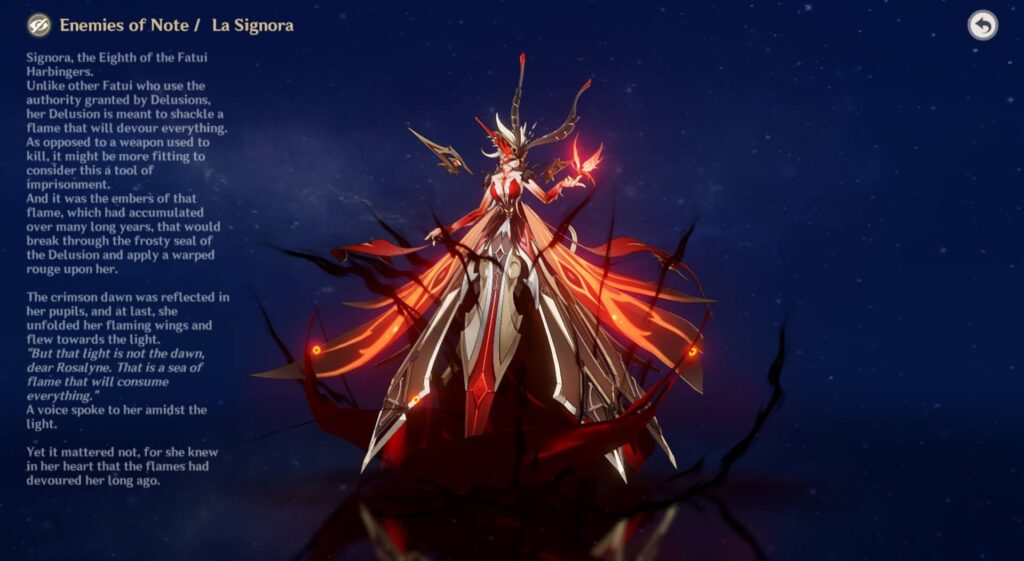
Location: Inazuma City, Narukami Island, Inazuma.
Rewards: Molten Moment, Hellfire Butterfly, Ashen Heart, Shivada Jade, Agnidus Agate, Artifact Sets (Berserker, Instructor, The Exile, Gladiator’s Finale, Wanderer’s Troupe), Dream Solvent, Northlander Billet.
Weaknesses: Pyro attacks in Phase 1, Electro elemental attacks in general.
Special Achievements: ‘Icy Rivers, Crimson Witch’.
Boss Type: Weekly Boss found in Trounce Domain.
If you think Childe is crazy, Signora’s crazier. Signora’s fight has two phases to it, and she changes elements during her fight as well, similar to Childe. In her first phase, she’ll be mainly dealing damage with Cryo attacks in 12 different attack patterns. In this phase, it’s best to use Pyro attacks to fight back against her various icicles and Cryo bursts.
Sheer Cold will be generated, so you’ll have to run to the four Hearts of Flame readily available on the corners of the arena to warm up or die. So far, we’ve seen two Genshin Impact bosses with this effect.
In her second phase, she turns into the Crimson Witch of Embers and uses her Pyro abilities to deal damage instead. Similar to her phase one attacks, she has 12 attack patterns for this phase as well. In this phase, the battlefield expands, and her attacks will have a wider reach. Any Geo constructs will easily be destroyed with her flaming whip attacks as well.
There’s even a point where she will transform into a blazing tornado, and this is your sign to run to the nearest Eye of Frost on the corners of the arena to prevent getting more Blazing Heat damage. Overall, good luck! This fight takes a whole lot of patience and strategizing. Otherwise, it’s instant death for you.
2. Everlasting Lord of Arcane Wisdom
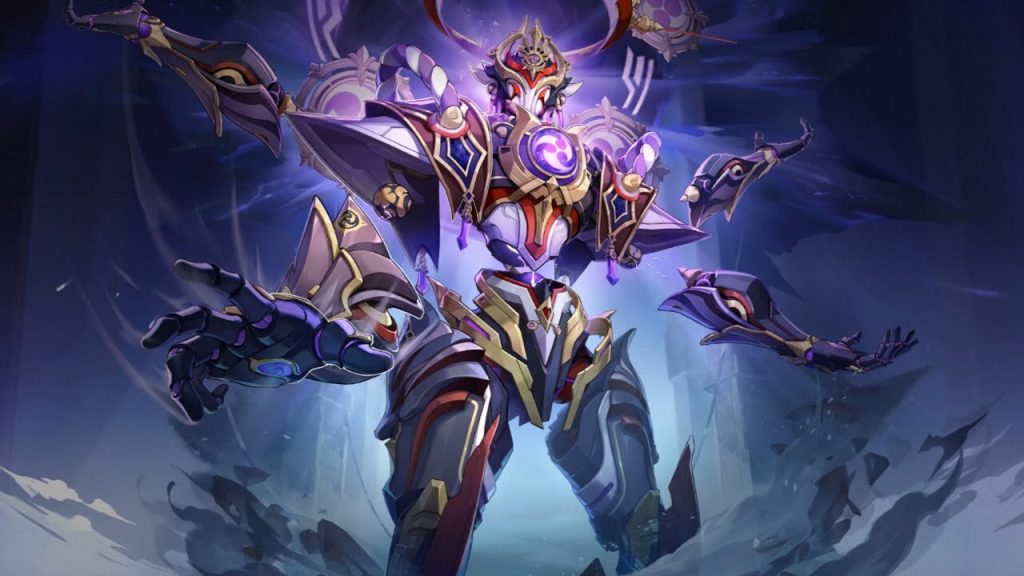
Location: Chinvat Ravine, Avidya Forest, Sumeru.
Rewards: Puppet Strings, Mirror of Mushin, Daka’s Bell, Artifact Sets (Berserker, Instructor, The Exile, Gladiator’s Finale, Wanderer’s Troupe), Vajrada Amethyst, Vayuda Turquoise, Varunada Lazurite, Dream Solvent, Midlander Billets.
Weaknesses: Cryo and Pyro are best.
Special Achievements: It All Comes Tumbling Down, Causality of Birth, and Extinction.
Boss Type: Weekly Boss found in Trounce Domain.
This beast is also known as Scaramouche and is one of the more recent bosses you will have to fight, especially if you’ve been keeping up with the Archon’s storyline. There are two stages to his battle, and there are several things you need to do in order to make it easier.
You would need to work with the Neo Akasha Terminal and Elemental Matrices in order to get through the first stage. The second stage uses the same concept but is harder to execute. So far, he still doesn’t rival Raiden, as she would require perfect dodges, which makes her a pain to defeat.
Scaramouche can also be tanked with a formidable shield, so there’s that weakness to exploit. Bring along Zhongli, our trusted shield provider.
1. Raiden Shogun (End of The Oneiric Euthymia)
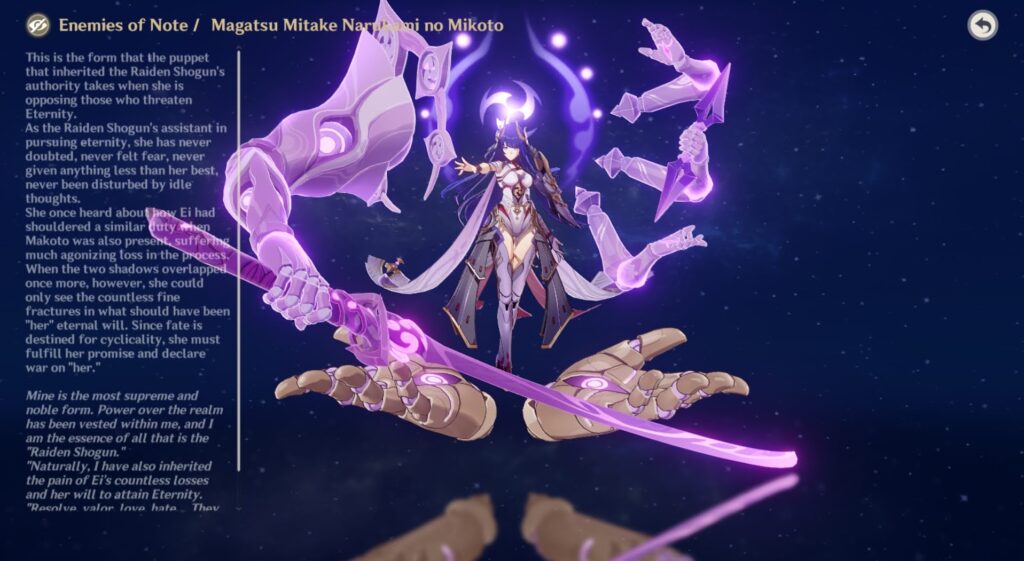
Location: Grand Narukami Shrine, Narukami Island, Inazuma.
Rewards: Mudra of the Malefic General, Tears of the Calamitous God, The Meaning of Aeons, Vajrada Amethyst, Artifact Sets (Berserker, Instructor, The Exile, Gladiator’s Finale, Wanderer’s Troupe), Dream Solvent, Northlander Billets.
Weaknesses: Cryo and Pyro are your best bet.
Special Achievements: Impeccable Judgement.
Boss Type: Weekly Boss found in Trounce Domain.
Also known as Magatsu Mitake Narukami no Mikoto, Raiden’s fight is hands down still one of the hardest and most epic fights there is in Genshin Impact to date. This makes sense since you’re fighting a living, breathing Archon. Raiden will be in two states during this fight, which indirectly splits the battle in two – Magatsu Mitake Narukami no Mikoto and the Baleful Shadowlord.
In the Magatsu Mitake state, she’ll have two stances – The Musou Ishin Stance and the Engulfing Lightning Stance. Her stances will change based on the attacks she’s about to unleash, so in this sense, you can prepare yourself for what’s to come. In this state, she has a total of 19 attack patterns that cover the entire arena, as she has short and long-range attacks.
For the Baleful Shadowlord state, this occurs when she has fully absorbed the Ominous Destiny. Her attacks are more powerful, and she develops a shield that increases her resistance. To break through the shield, use either Cryo or Pyro. In this state, she has 13 attack patterns, all of which are supercharged. It’s normal for you to die a couple of times before reaching this state, so don’t be discouraged.
This ultimate battle is not one you want to miss out on! Her fight is truly the best of the Genshin Impact bosses so far.
Final Thoughts
You’ve reached the end of our list for all of the bosses in Genshin. Hopefully, this ranking will help you prepare yourself for what’s to come with each of the currently available Genshin Impact Bosses. And may miHoYo continue to make more epic boss fights for us to include in this ranking. We’re looking forward to the sprawling worlds that are yet to come and countless boss battles to experience!
If you’re interested in any other Genshin Impact rankings, you might want to give these Genshin Impact Weapons Ranking and Genshin Impact Characters Ranking a shot!