
With the latest update in the Honkai Star Rail universe comes Topaz and Numby! An adorable duo with a unique concept. This is the first character to have a pet that plays a part in battles and their overall build, so you’re probably curious as to how it works. Well, we’re here to give you the details and help you build a great Fire sub-DPS or Support with Topaz and Numby.
Let’s go!
What To Expect From Honkai Star Rail Topaz and Numby

Topaz and Numby is the latest character and little creature to drop in Honkai: Star Rail, with Fire abilities set on the Path of The Hunt. Topaz is a debt collector sent by the Interastral Peace Corporation (IPC) to demand Jarilo-VI pay up. Numby is her tamed Warp Trotter, who follows her everywhere she goes.
Looking deeper into Topaz and Numby’s kit, she is well-suited to be a DPS, sub-DPS, or Support role in your team, depending on what characters you already have, as well as your preferred playstyle. The two present a great blend of follow-up attacks, CRIT damage, and Support for your team.
Honkai Star Rail Topaz and Numby Abilities
Basic Attack: Deficit…
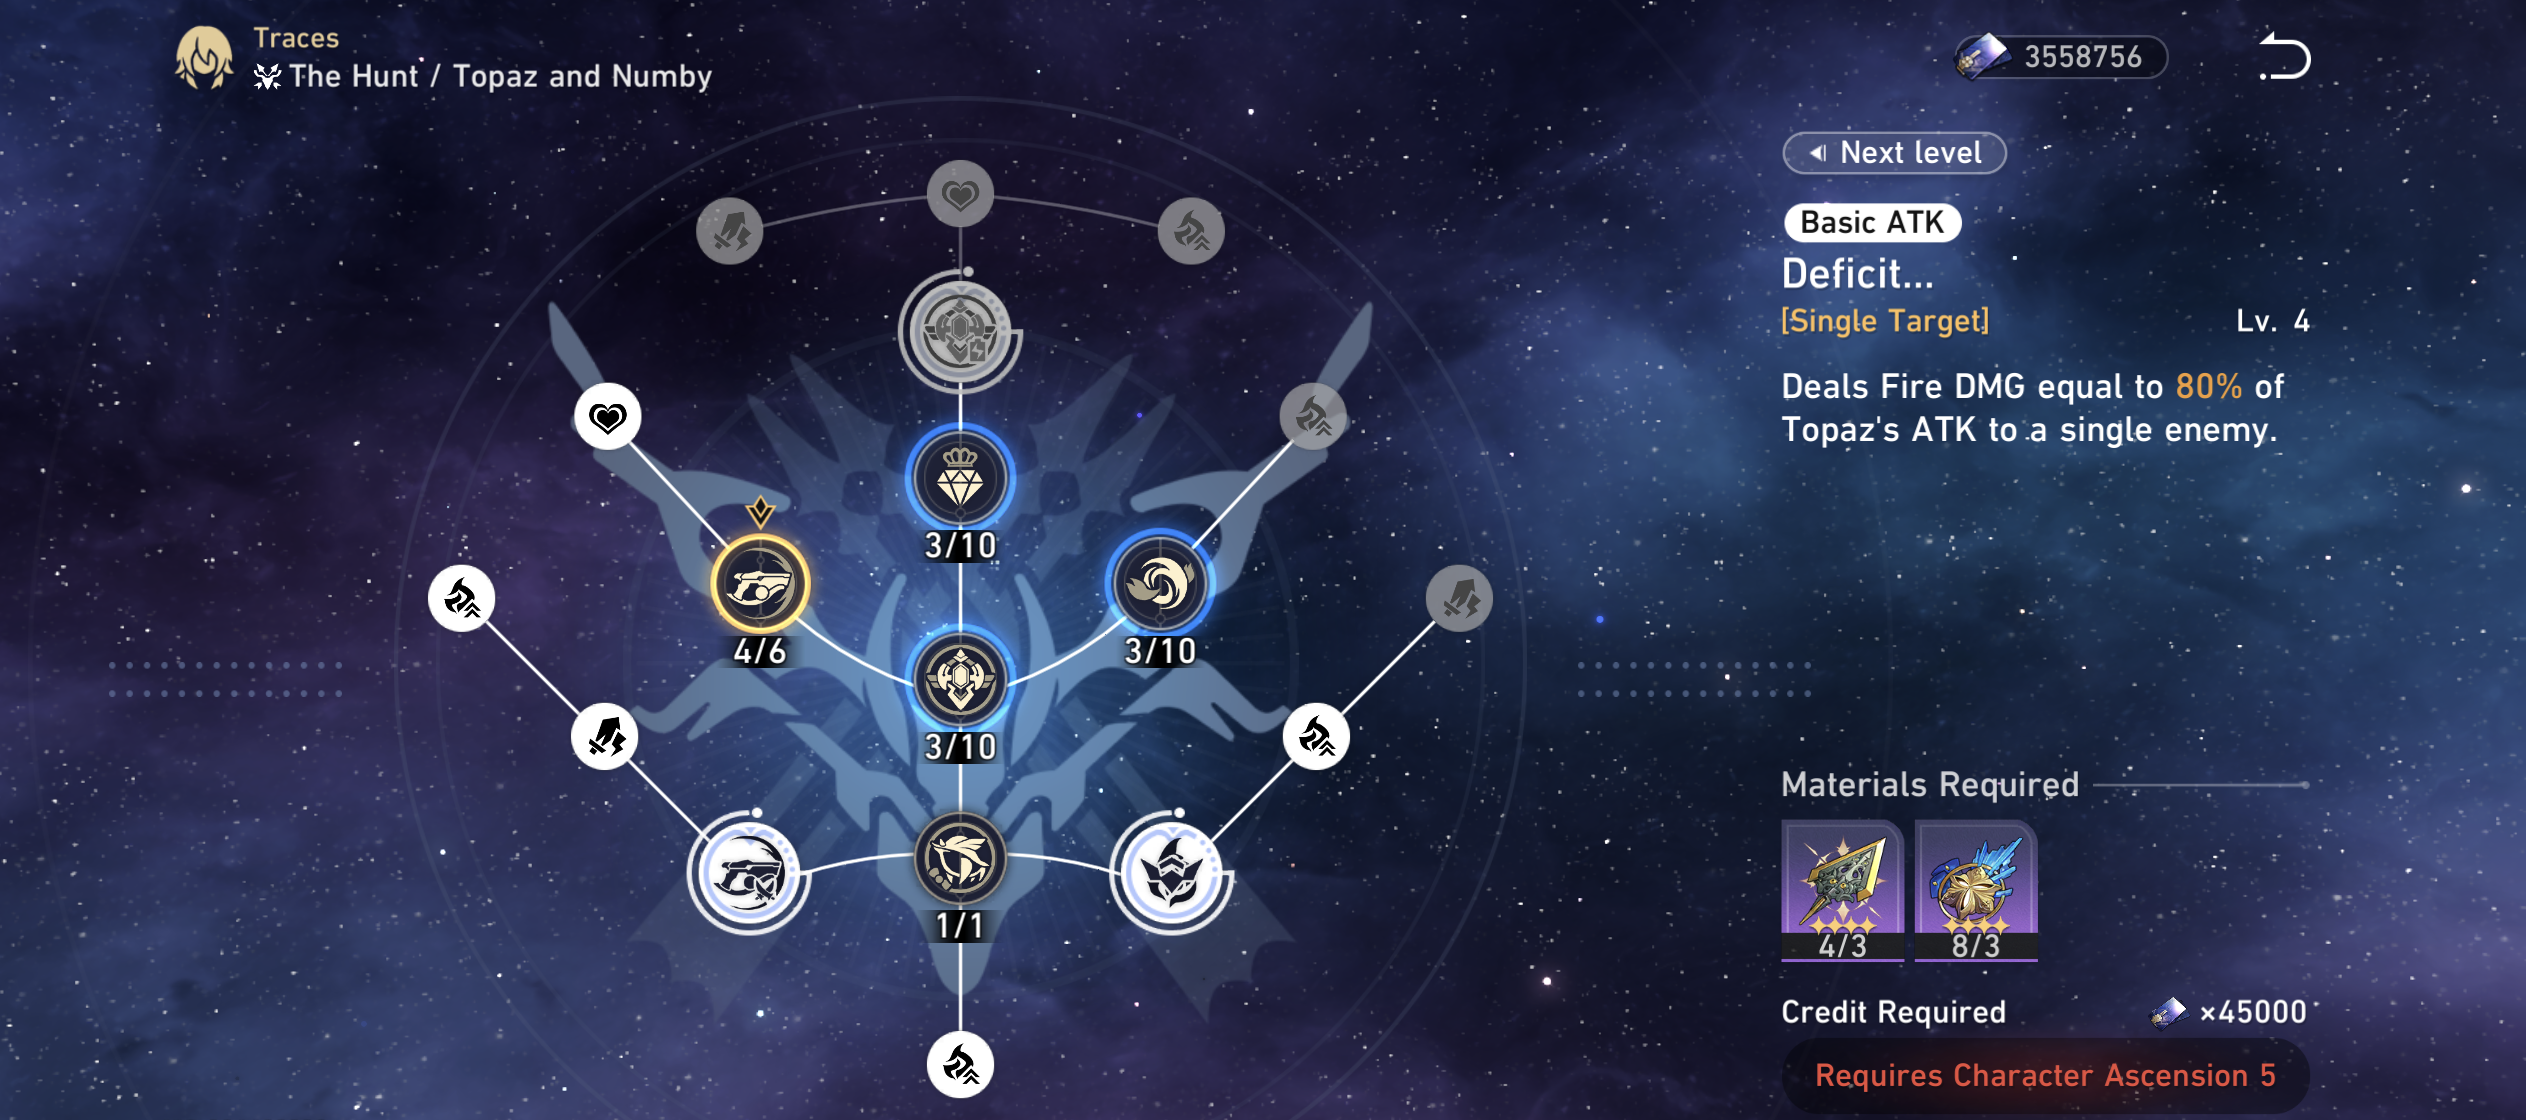
Deals Fire damage equal to 50% of Topaz’s attack to a single enemy.
Skill: Difficulty Paying?
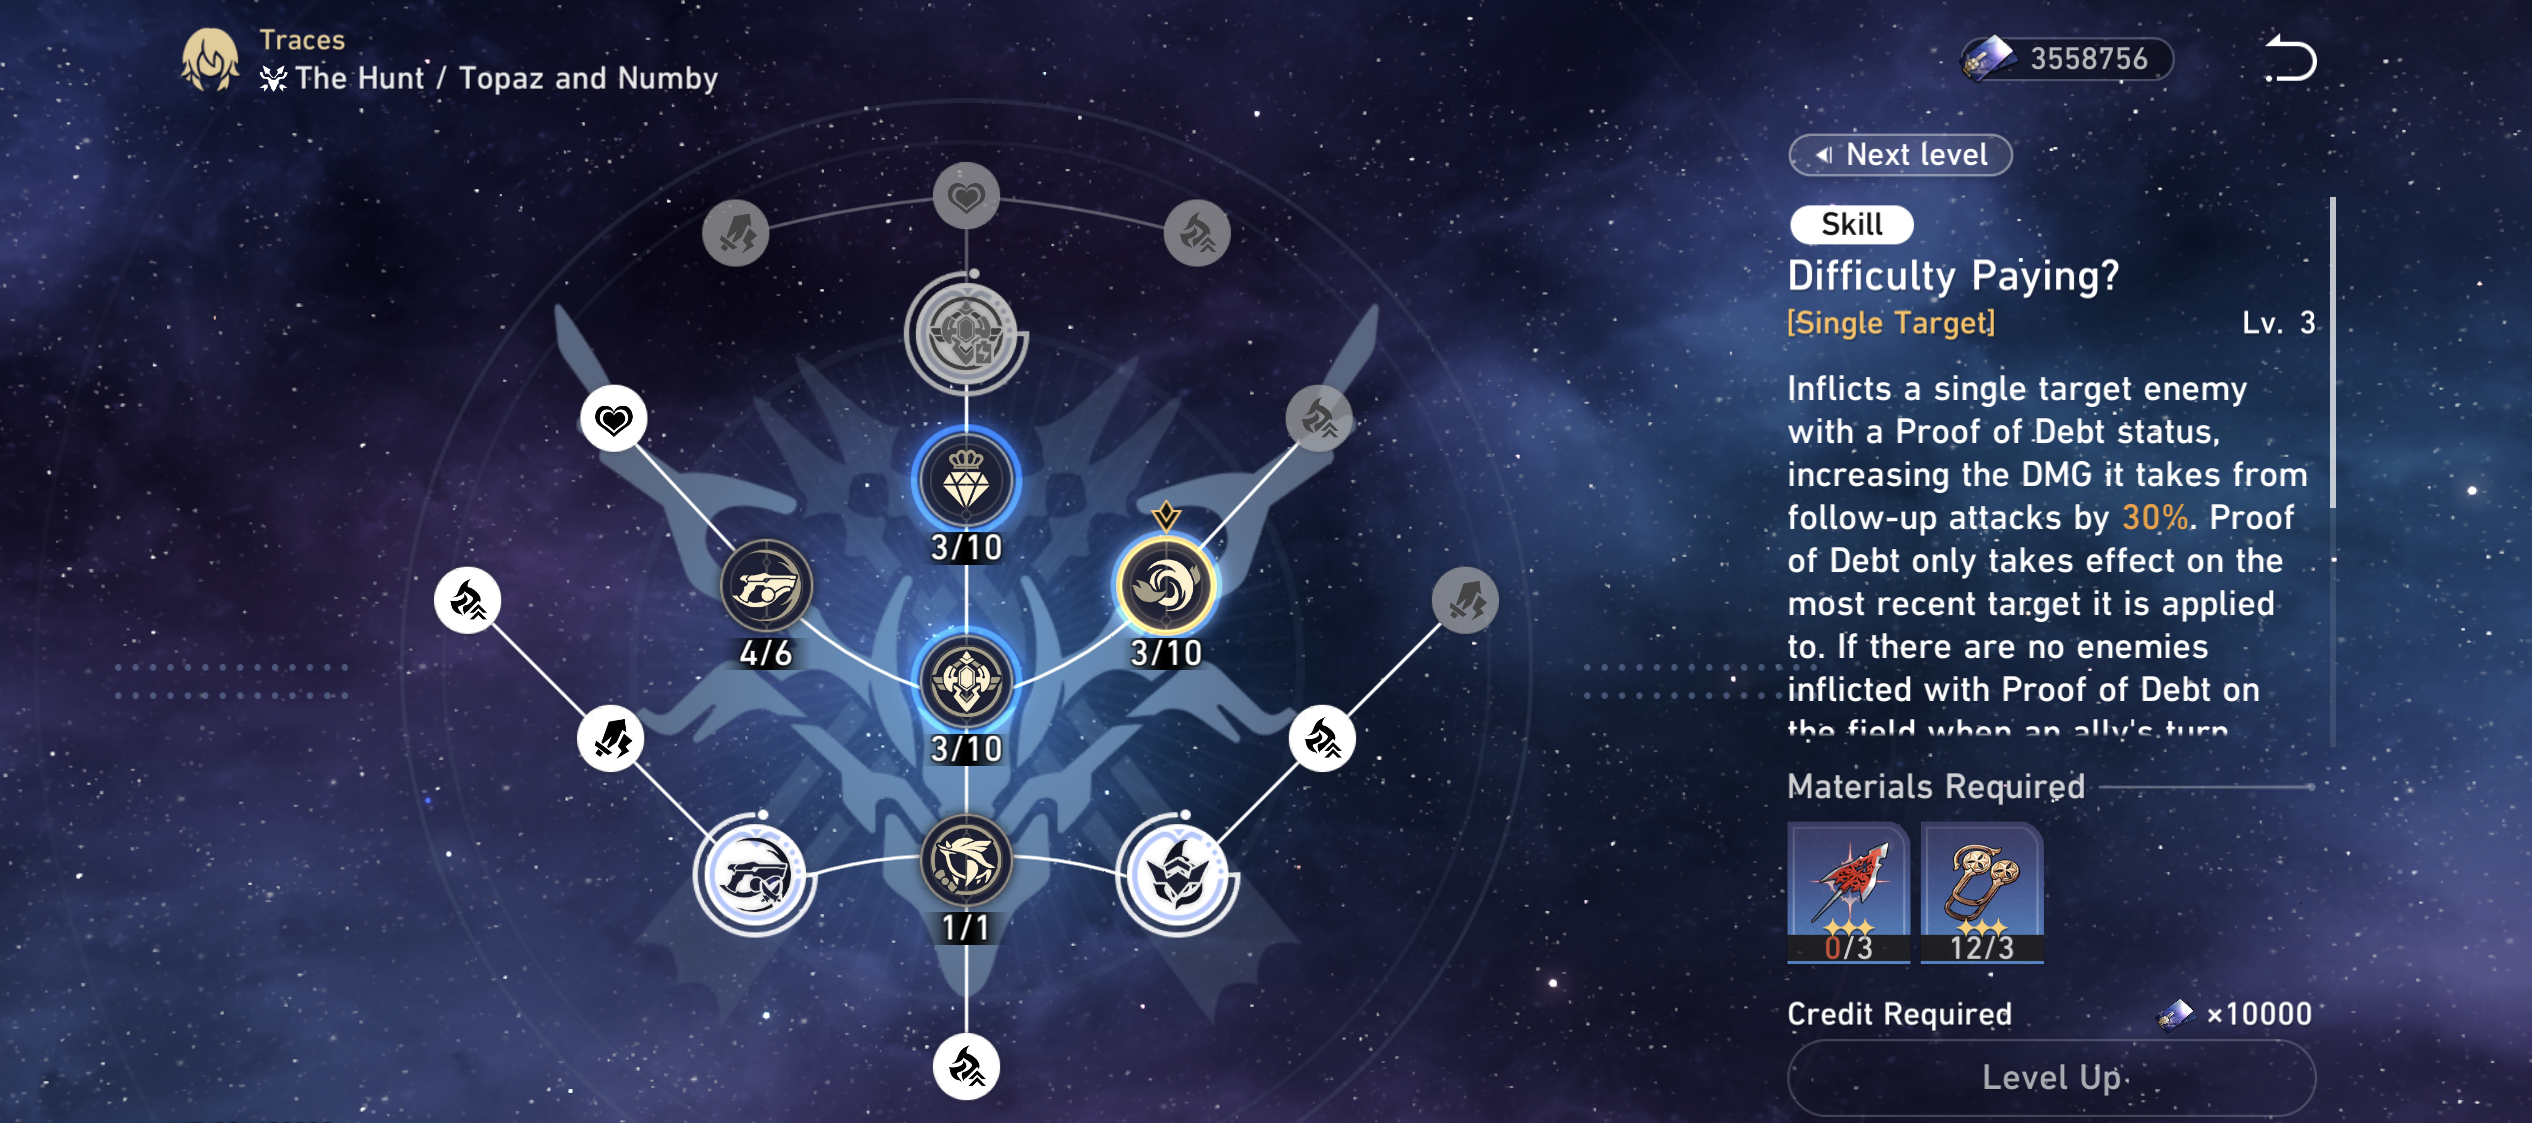
Inflicts the Proof of Debt status on a single enemy target and increases damage received from follow-up attacks by 25%. Proof of Debt will only take effect on its most recent target. If there are no enemies around when Proof of Debt status is active when an ally’s turn starts or takes action, then it will be applied to a random enemy target.
Numby will also deal Fire damage equal to 75% of Topaz’s attack to this target. Utilizing this Skill to deal damage is considered a follow-up attack.
Ultimate: Turn a Profit!
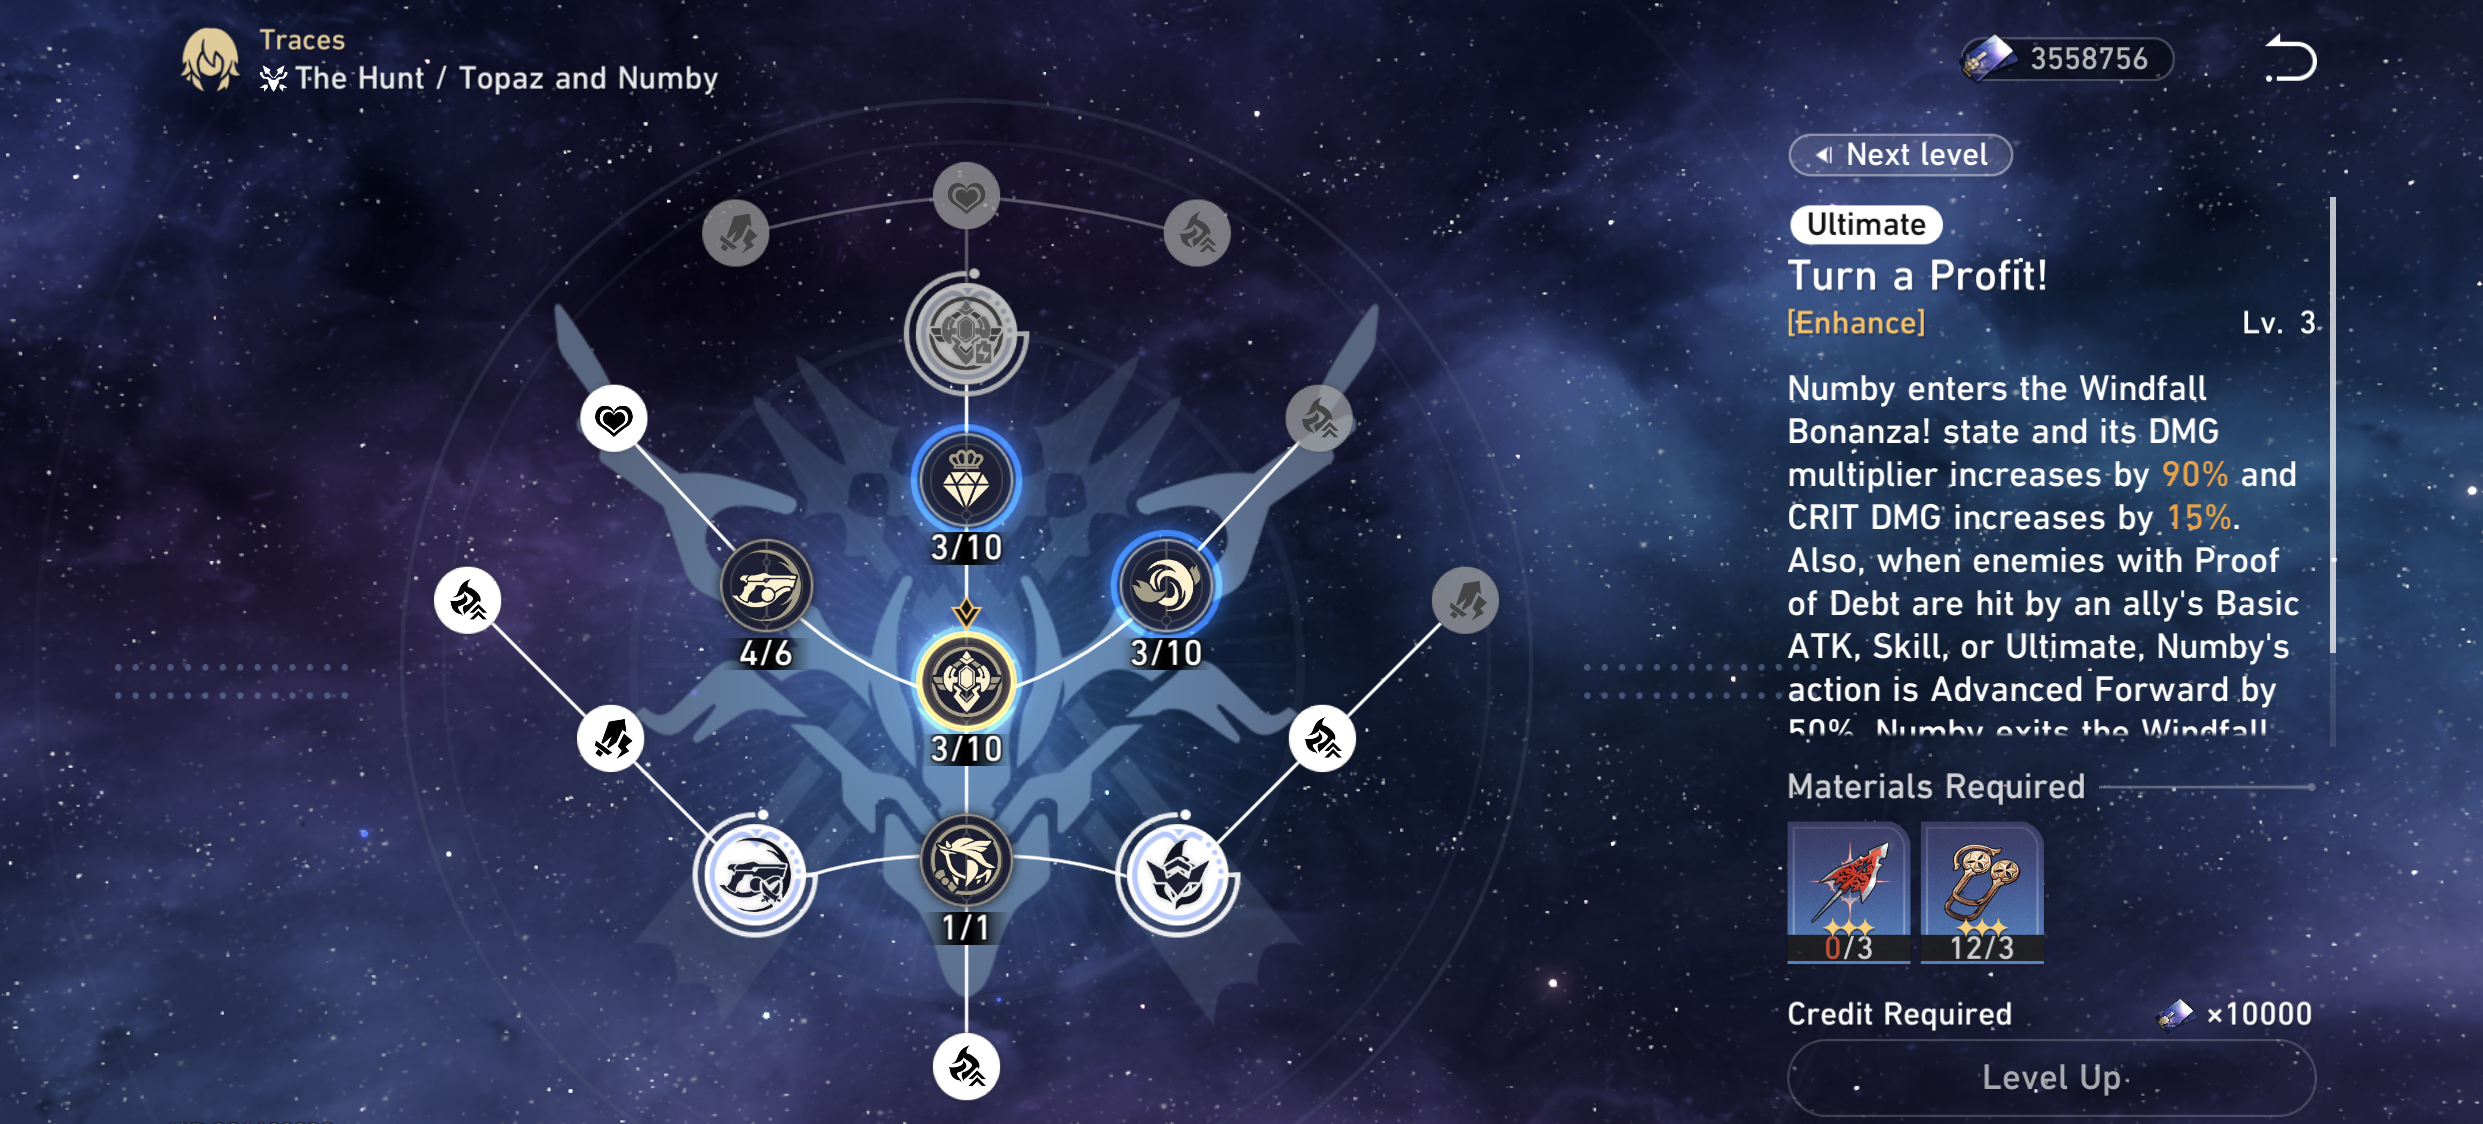
This allows Numby to enter the Windfall Bonanza! State. The damage multiplier increases by 75%, and CRIT damage increases by 12%. When enemies with Proof of Debt get hit by an ally’s Basic Attack, Skill, or Ultimate, Numby’s action will be advanced forward by 50%. Numby will leave this state after inflicting 2 attacks.
Talent: Trotter Market!?
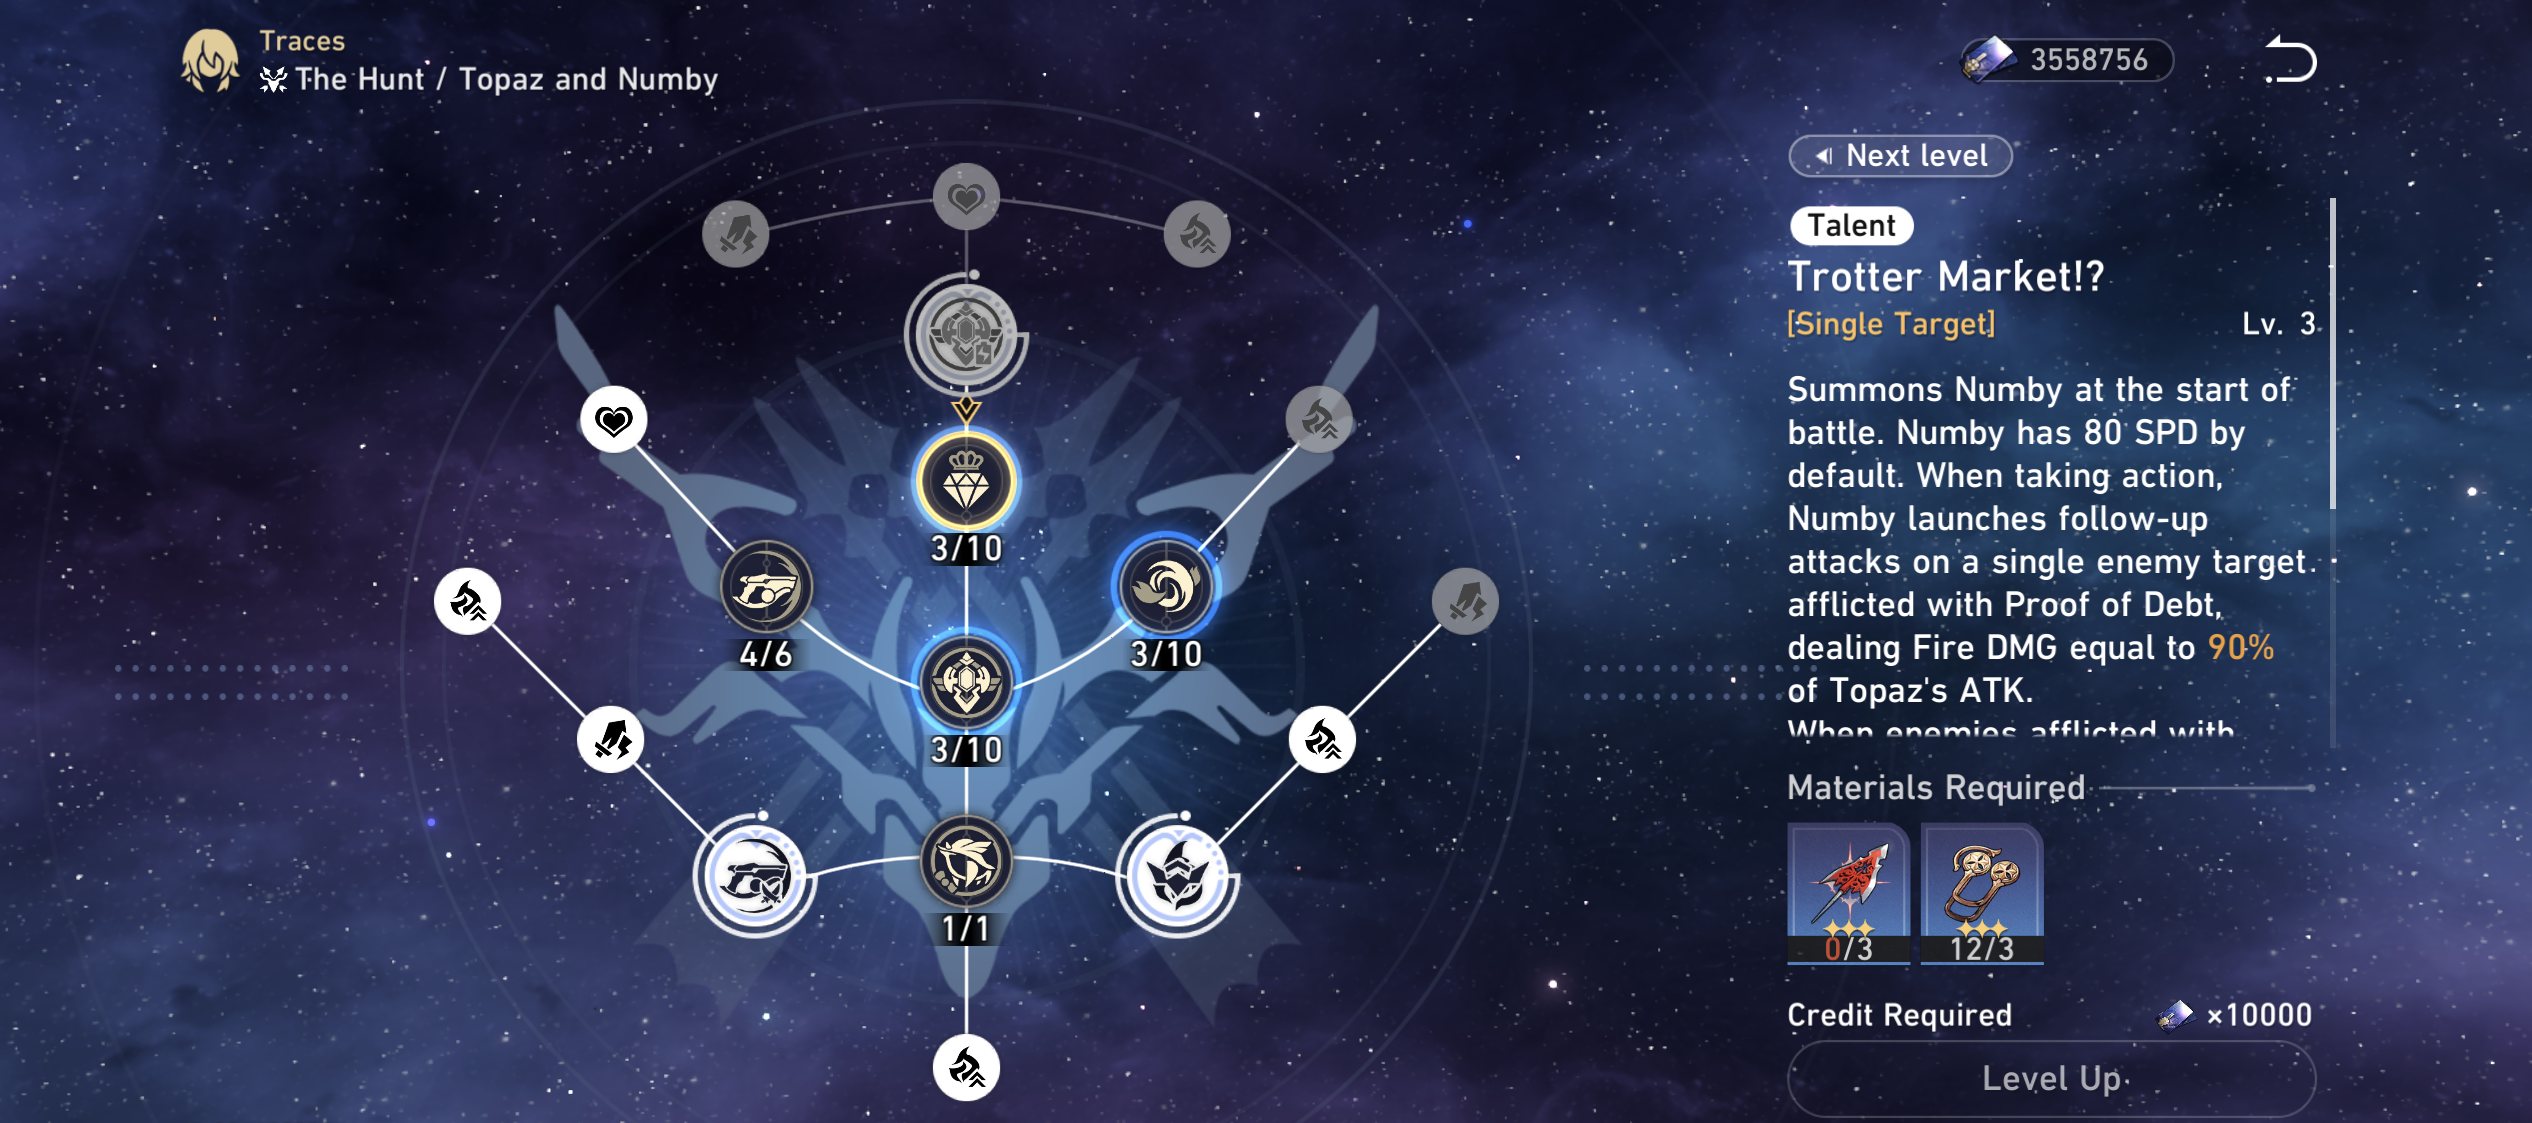
Topaz’s Technique will summon Numby at the beginning of the battle. Numby will have 80 Speed by default. When Topaz takes action, Numby will launch follow-up attacks on a single enemy target that Proof of Debt afflicts. This attack deals Fire damage equal to 75% of Topaz’s attack.
Those afflicted by Proof of Debt will allow Numby’s actions to be advanced forward by 50% when they receive follow-up attacks from allies. This action cannot be triggered during Numby’s own turn. If Topaz is downed, Numby will disappear.
Technique: Explicit Subsidy
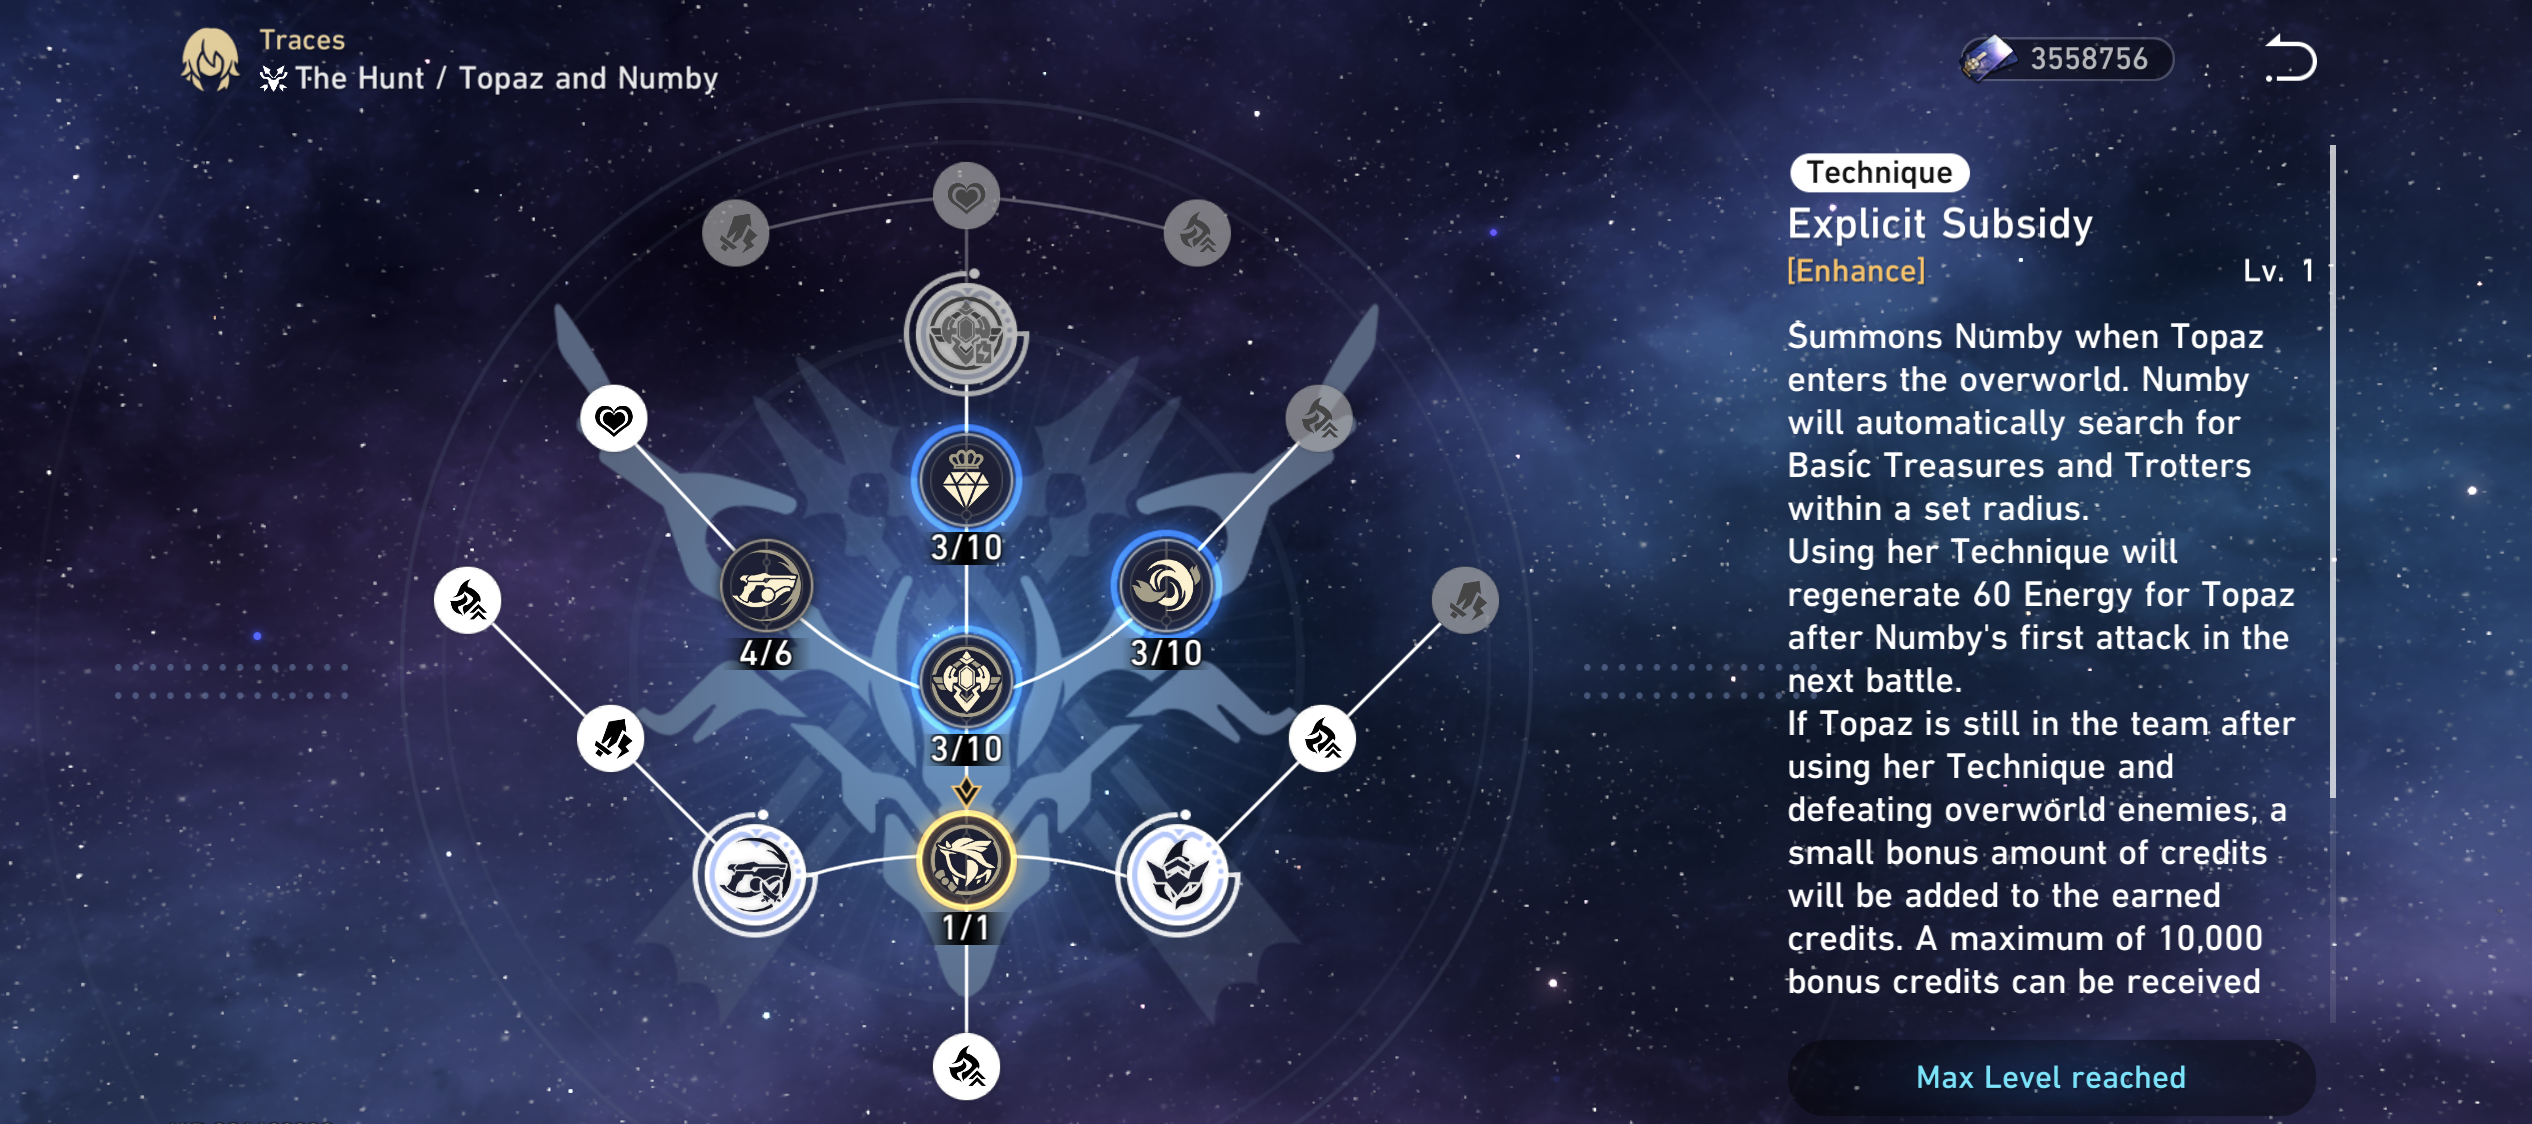
This will summon Numby into the overworld to search for Basic Treasures and Trotters within a set radius. Using Topaz’s Technique regenerates 60 Energy after Numby’s first attack in the next battle. If Topaz is still in the team after using her Technique and defeating enemies, a small bonus amount of Credits will be added to the earned Credits, max 10,000 bonus Credits per day.
After using her Technique and defeating enemies in the Simulated Universe, you will receive an additional amount of Cosmic Fragments with a small chance to obtain 1 random Curio.
Honkai Star Rail Topaz and Numby Light Cones
Worrisome, Blissful
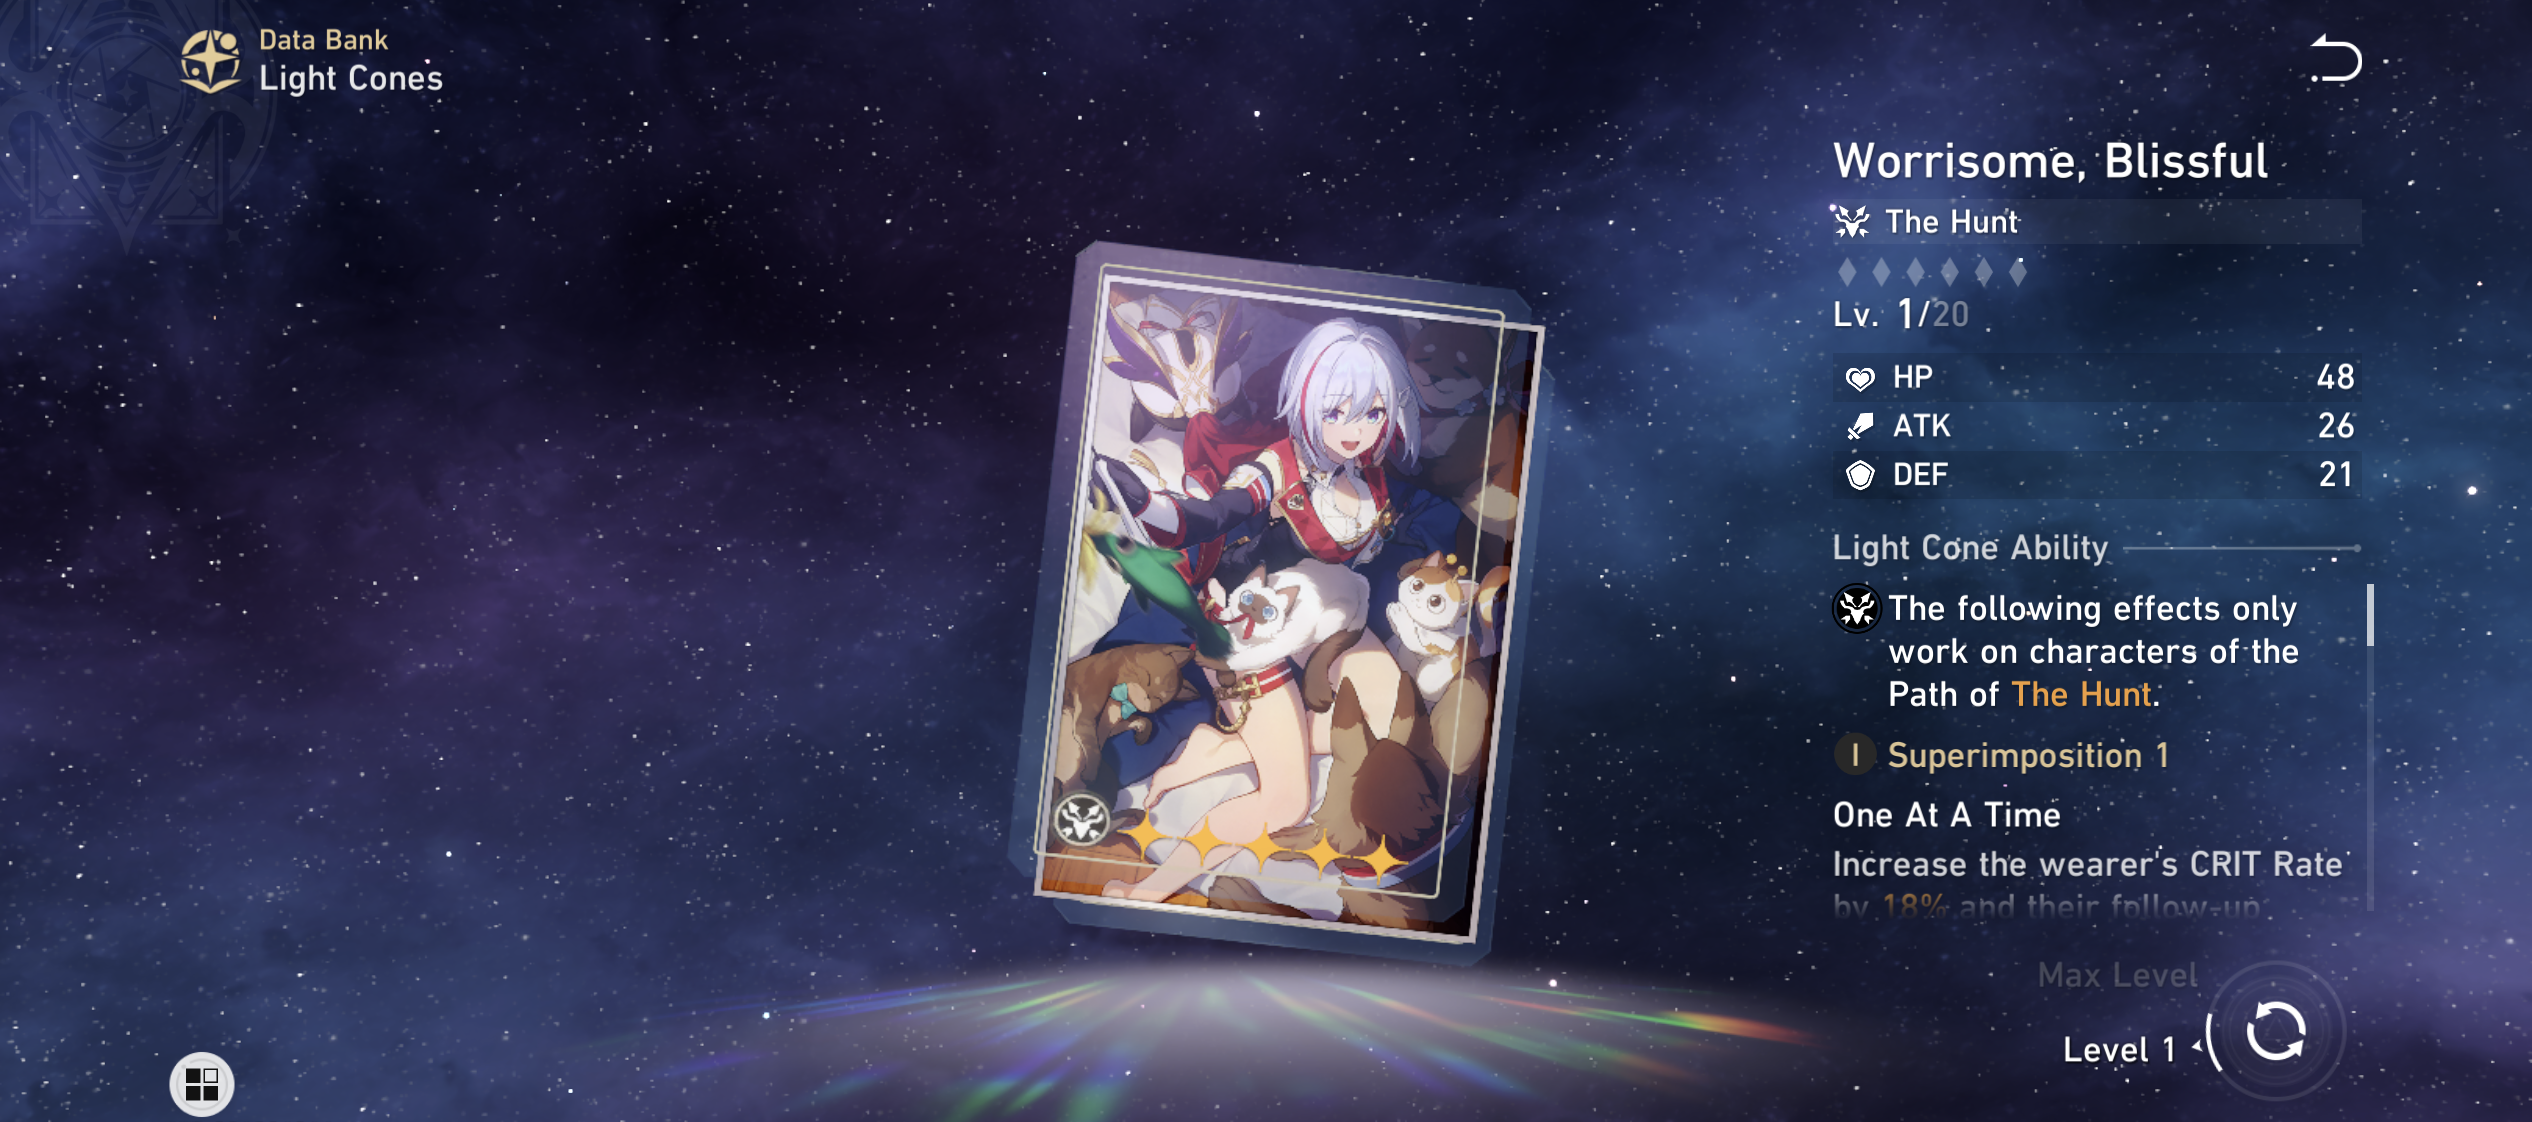
As Topaz’s Signature Light Cone, this is the best choice to equip her with. Worrisome, Blissful increases its wearer’s CRIT Rate by 18-30% and its follow-up attack damage by 30-50%. After its wearer uses a follow-up attack, the Tame state is applied to the enemy target. When allies hit enemy targets afflicted by Tame, every Tame stack increases the CRIT damage dealt by 12-20%. This is stackable up to 2 times.
Topaz’s kit plays around with dishing out CRIT damage and follow-up attack damage to enemy targets, so this is the ideal Light Cone to enhance those two aspects. It is the only Light Cone to combine the two so far in the game.
Cruising in the Stellar Sea
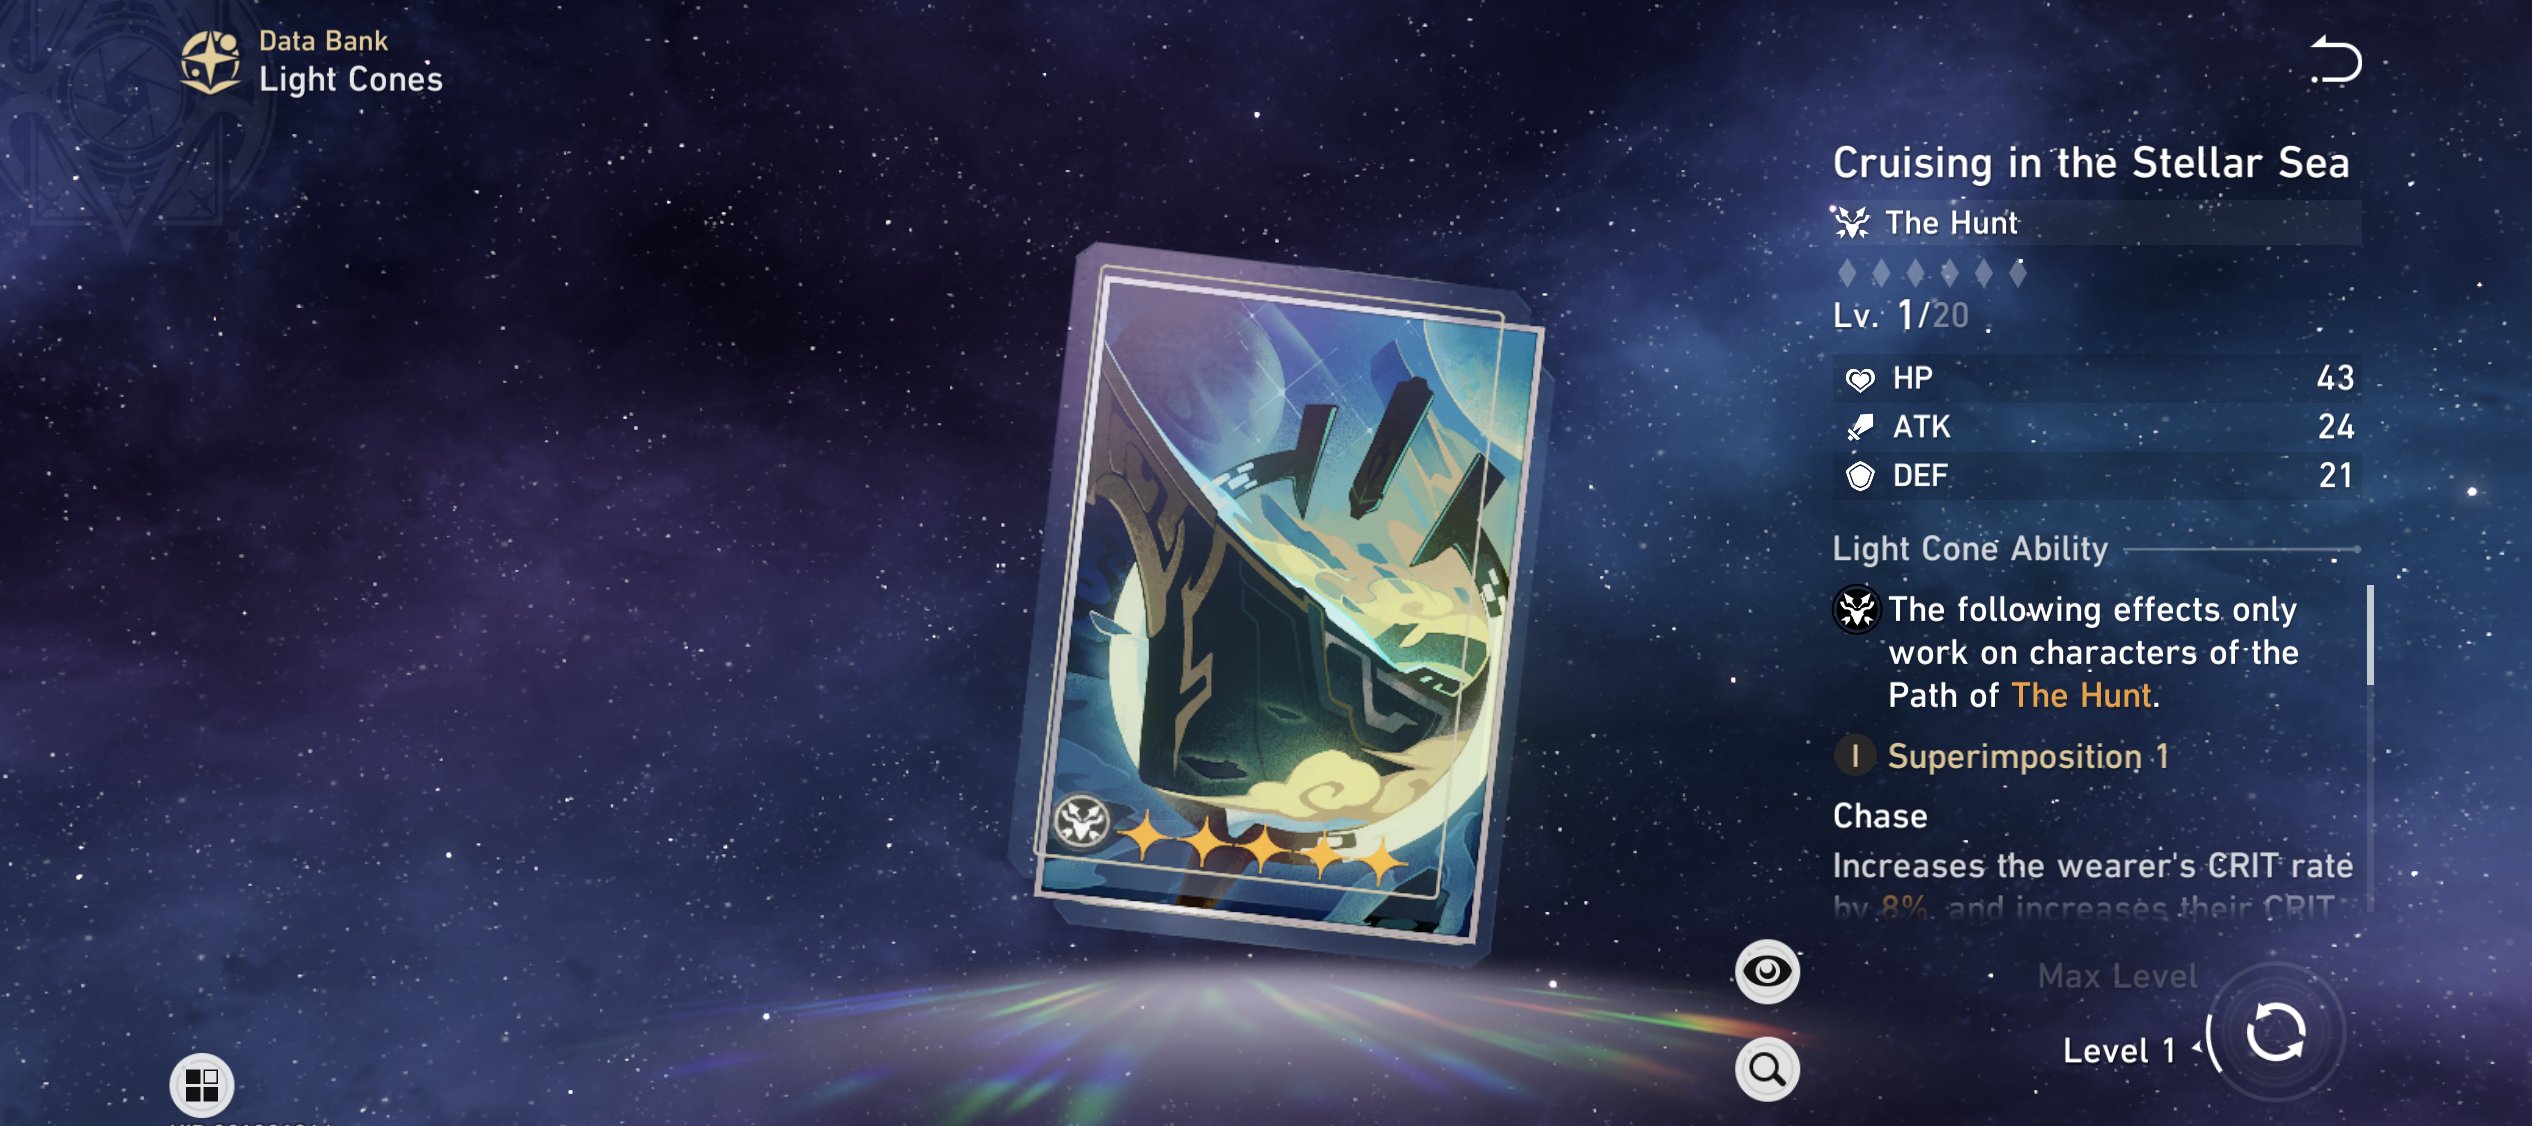
A 5-star Light Cone alternative that is easier to get than Worrisome, Blissful, and works decently with Topaz. You can get this Light Cone from the Herta Store with 8 Herta Bonds. This Light Cone increases its wearer’s CRIT Rate by 8% and increases their CRIT rate against enemies with HP less than or equal to 50% by an extra 8%. When an enemy is defeated by the wearer, their attack is increased by 20% for 2 turns.
This Light Cone will boost up the CRIT damage already inflicted upon through Topaz’s base kit, making her a formidable DPS or sub-DPS depending on your build and team composition.
Swordplay
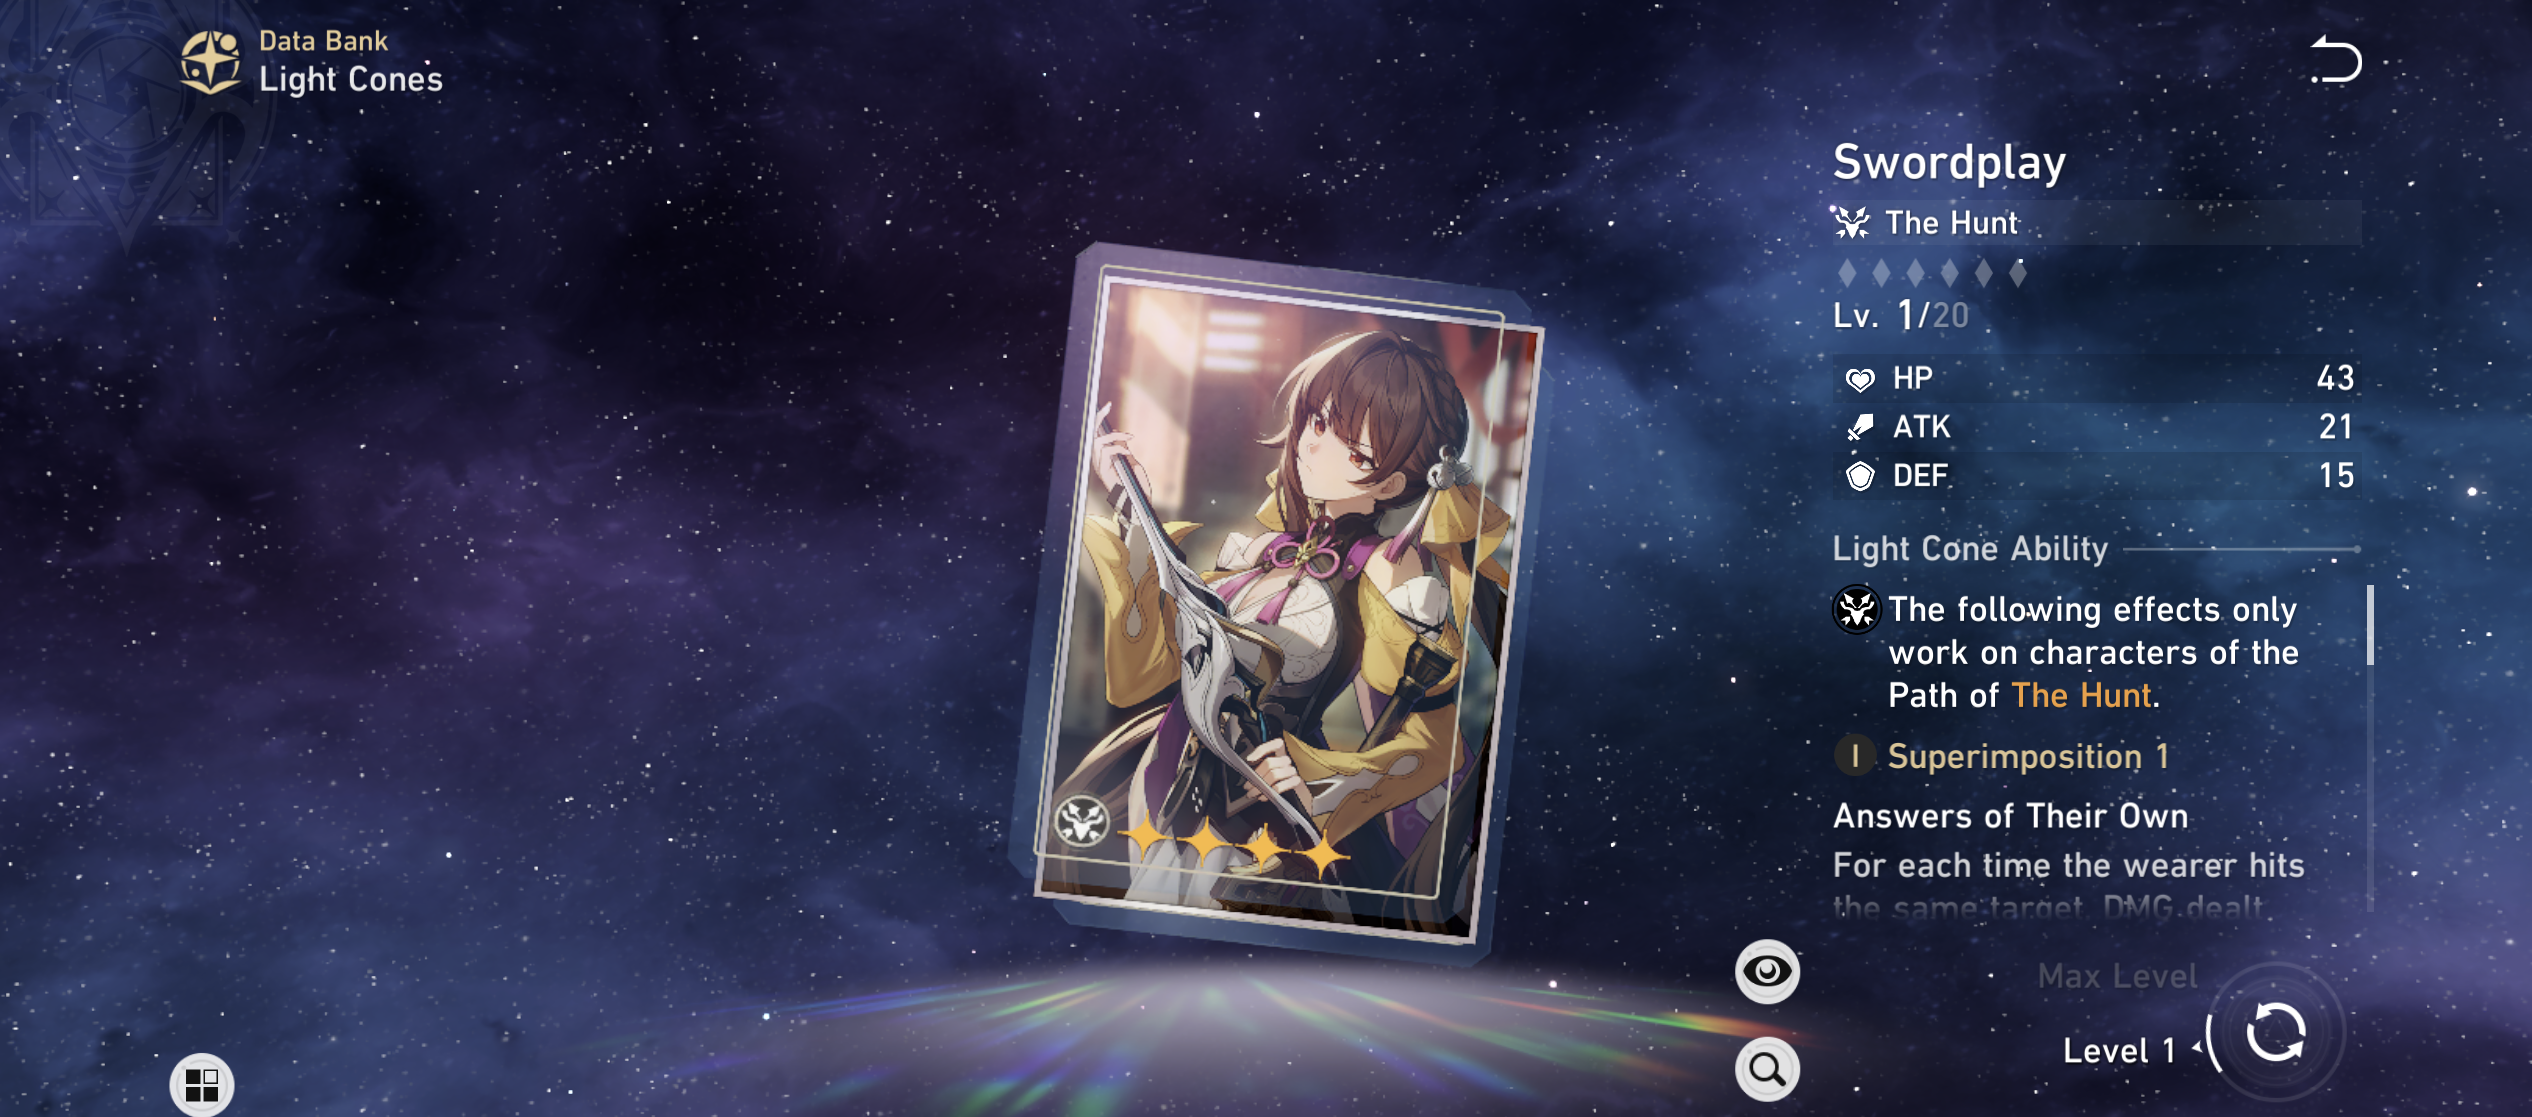
For a 4-star Light Cone option, Swordplay is your best bet. It is easier to get if you actively wish upon the event banners as well. Each time its wearer hits the same target, the damage dealt will increase by 8-16%, stackable up to 5 times. However, this effect will be removed when the wearer changes targets.
Since Numby tends to hit the same target multiple times, this will help you trigger a huge damage bonus to inflict upon your enemies. It stacks up quickly with Topaz and Numby’s skill set.
Return to Darkness

Another viable 4-star Light Cone option, this Light Cone increases its wearer’s CRIT rate by 12-24%. After a CRIT hit, there is a 16-32% fixed chance to dispel 1 buff on the target enemy, but this can only trigger 1 time per attack.
If you are aiming to put Topaz in a Support role, this would be a good Light Cone to equip mainly because it gives them a chance to dispel buffs aside from its high CRIT rate buff advantage.
Honkai Star Rail Topaz and Numby Eidolons
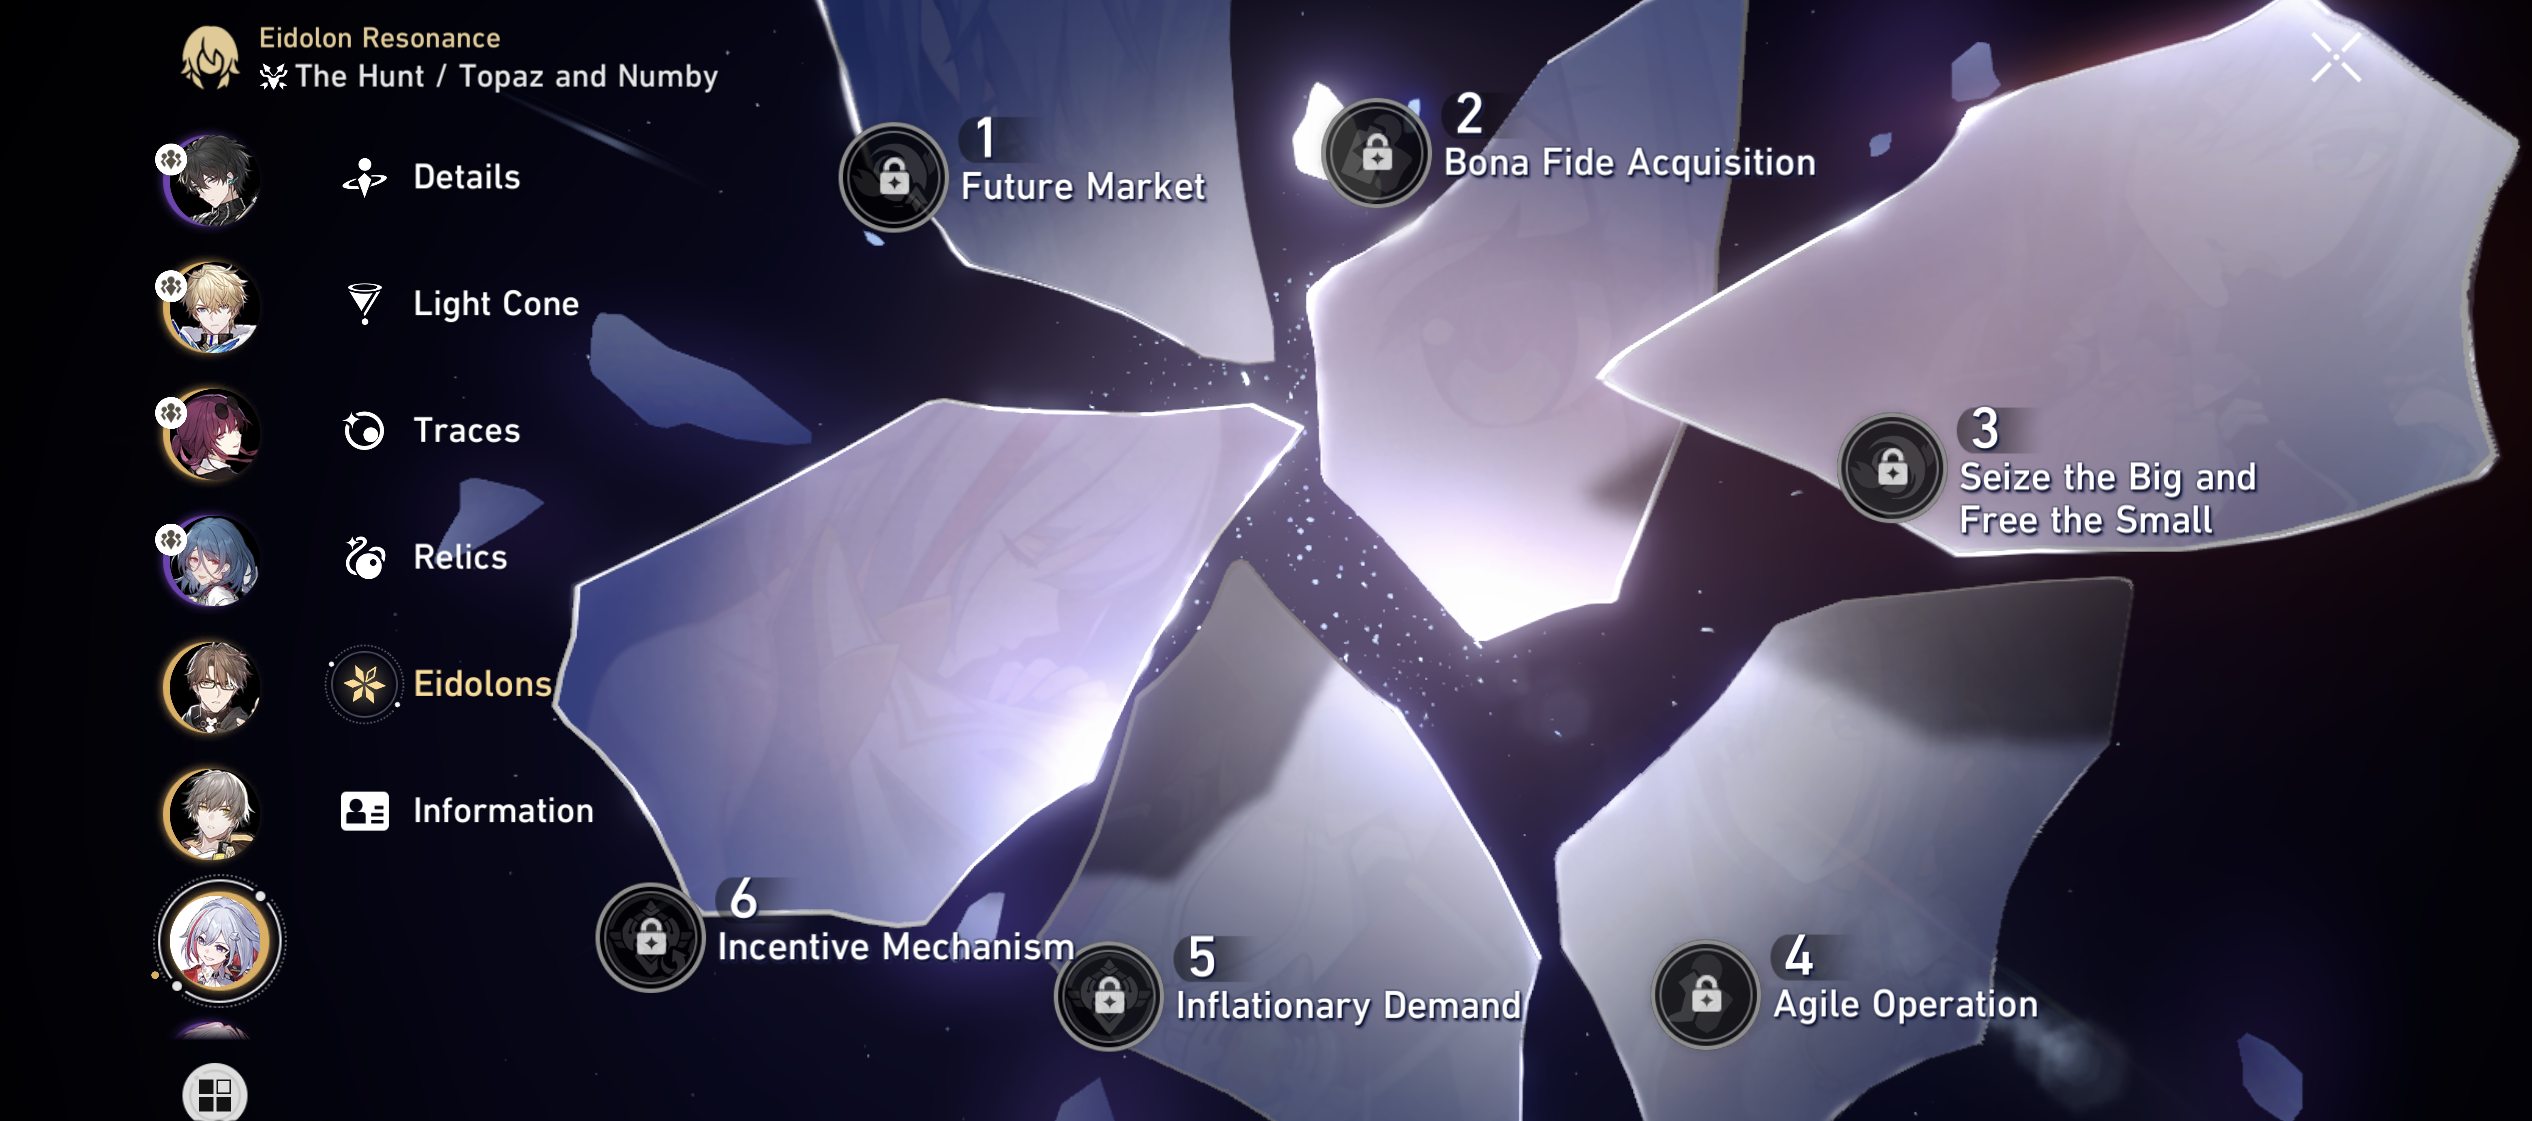
Level 1: Future Market
When enemies that have Proof of Debt inflicted on them receive follow-up attacks, they will enter the Debtor state. This can only happen once in a single attack. The Debtor state will increase the CRIT damage of follow-up attacks by 25%, stackable up to 2 times. When Proof of Debt is removed, the Debtor state will also be removed.
Level 2: Bona Fide Acquisition
After Numby launches an attack, Topaz will regenerate 5 Energy.
Level 3: Seize the Big and Free the Small
Skill Level +2, max level 15, and Basic Attack Level +1, max level 10.
Level 4: Agile Operation
When Numby’s turn begins, Topaz’s action will be advanced forward by 20%.
Level 5: Inflationary Demand
Ultimate Level +2, max level 15, and Talent Level +2, max level 15.
Level 6: Incentive Mechanism
Numby’s attack count during the Windfall Bonanza! state will increase by 1, and its Fire RES PEN will increase by 10% when it attacks.
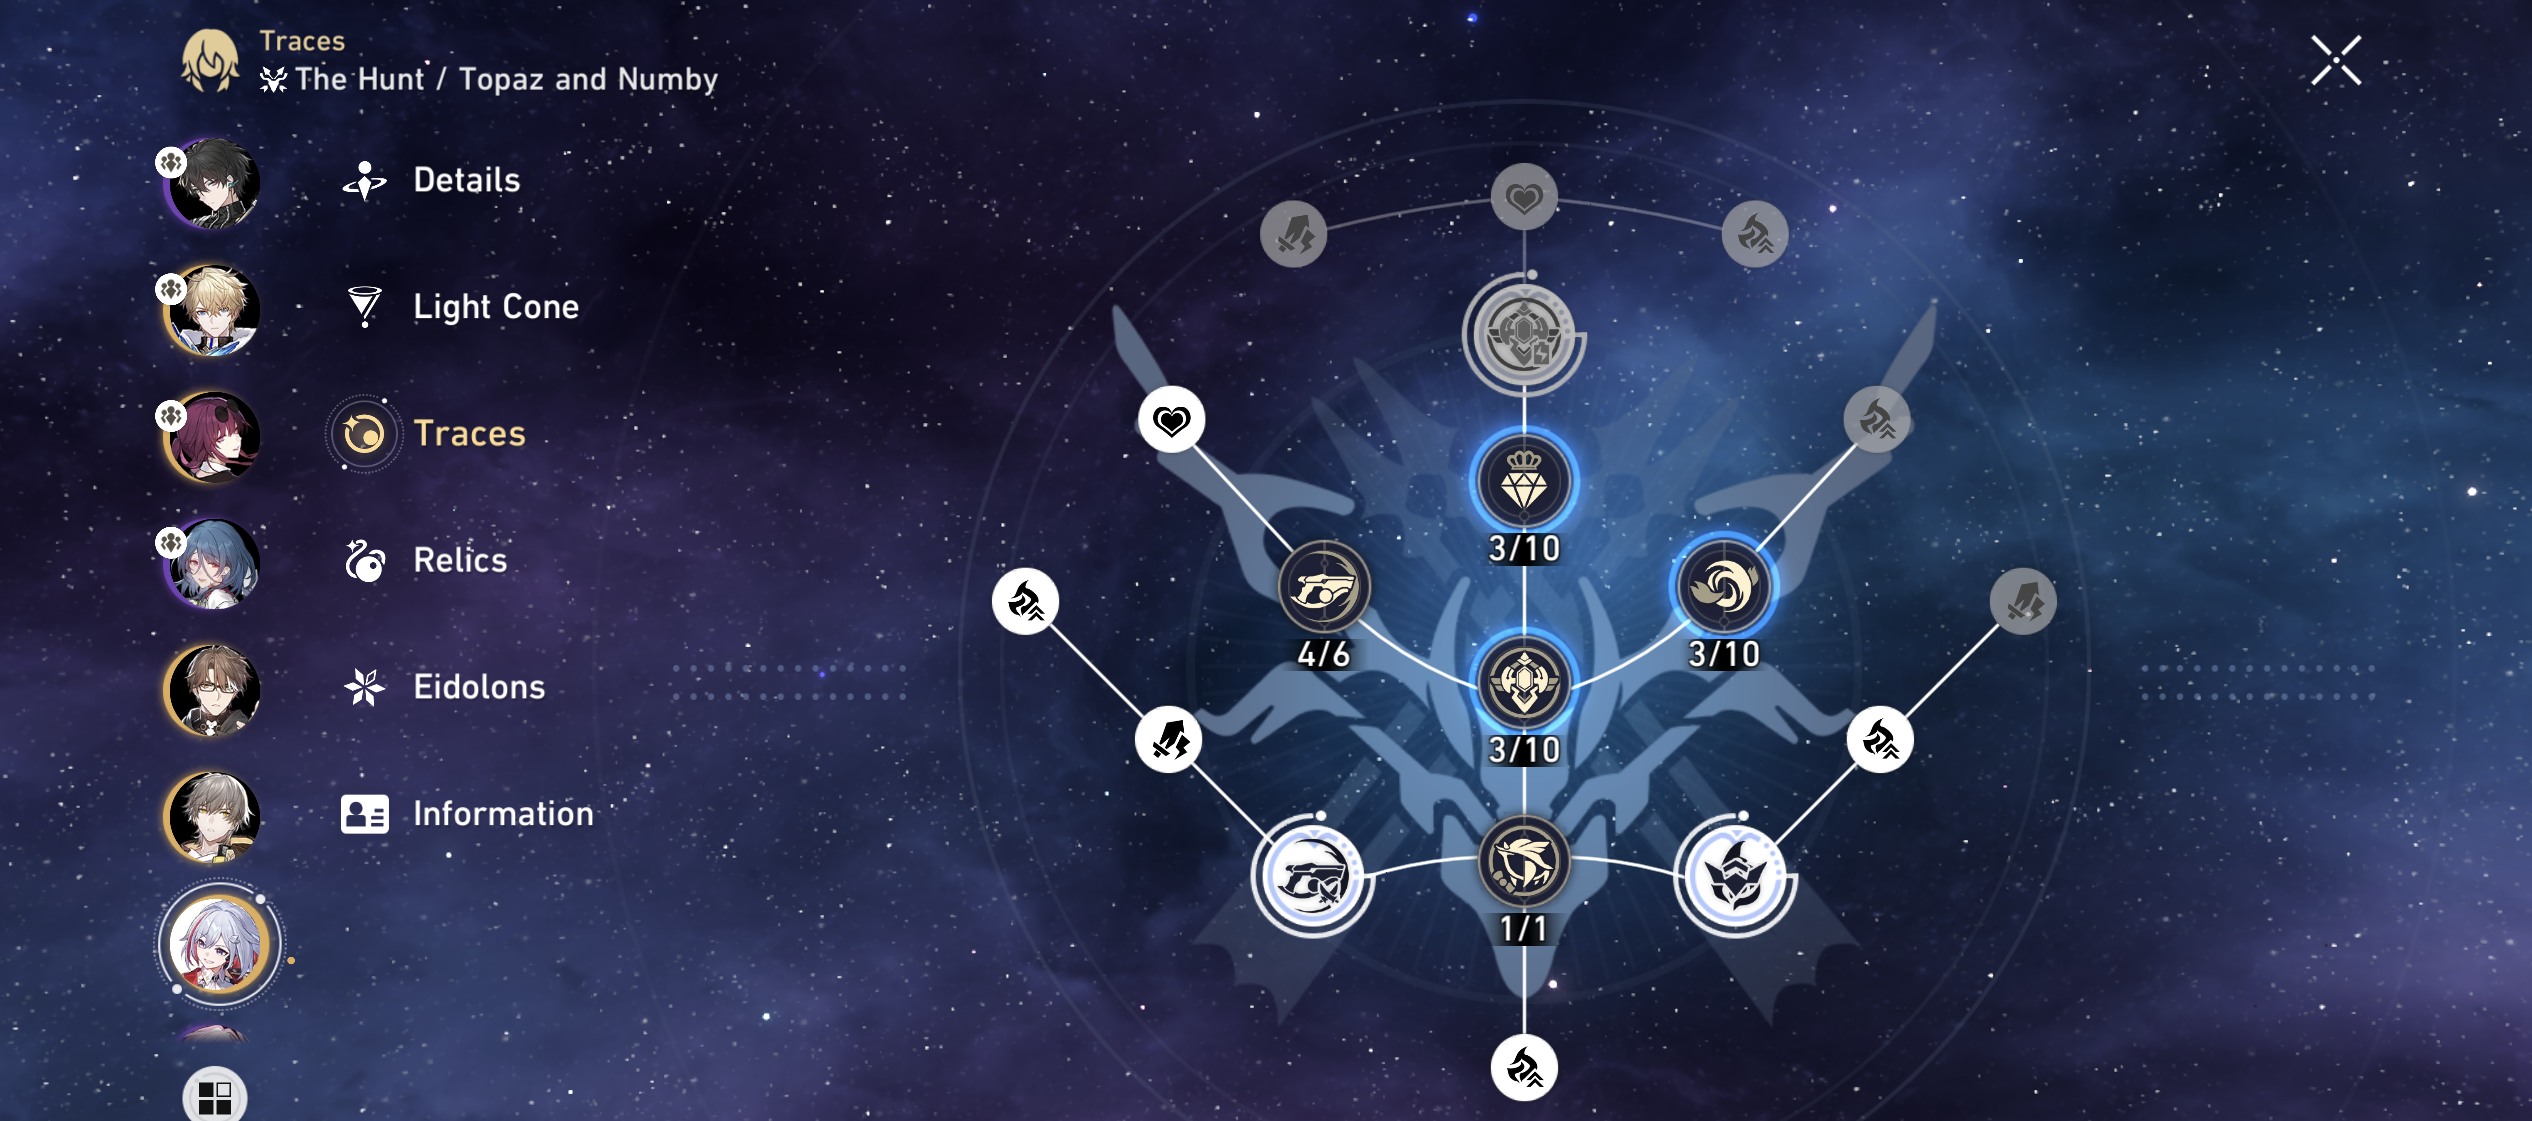
Honkai Star Rail Topaz and Numby Trace Level-Up and Ascension Materials
Trace Level-Up Materials
- Arrow of the Beast Hunter x 15
- Silvermane Badge x 41
- Arrow of the Demon Slayer x 72
- Silvermane Insignia x 56
- Arrow of the Starchaser x 139
- Silvermane Medal x 58
- Regret of Infinite Ochema x 12
- Tracks of Destiny x 11
- 3,000,000 Credits
Firstly, the Arrow of the Beast Hunter can be found by farming the Crimson Calyx: Bud of the Hunt or bought through the Embers Exchange Store, Herta Space Station: World Shop, and Jarilo-VI: World Shop.
Secondly, the Arrow of the Demon Slayer and Arrow of the Starchaser can be obtained through the Crimson Calyx: Bud of the Hunt or created through the Synthesizer. Note that for every Calyx run, you will be using 10 Trailblaze Power.
Thirdly, the Silvermane Badge can be obtained by defeating Silvermane Guards in the Outlying Snow Plains or the Everwinter Shadewalkers in the Corridor of Fading Echoes. It can also be obtained through the Simulated Universe, Assignment Rewards, Synthesizer, Embers Exchange Store, as well as the Jarilo-VI World Shop.
Fourthly, the Silvermane Insignia and the Silvermane Medal can be obtained through the Synthesizer and Simulated Universe, as well as by defeating higher-level Silvermane Guards and Everwinter Shadewalkers.
Fifthly, the Regret of Infinite Ochema can only be obtained through the Echo of War: Scalegorge Waterscape, where you have to fight against Phantylia the Undying. This will require 30 Trailblaze Power each round, and there are only 3 rounds per week. Echo of War chances refreshes every Monday.
Lastly, the Tracks of Destiny can be obtained through the Embers Exchange Store, Simulated Universe Rewards, Nameless Honor Reward, or Event Rewards.
Ascension Materials

|
Level |
Ascension Materials |
|
20 – 30 |
Silvermane Badge x 5
4,000 Credits |
|
30 – 40 |
Silvermane Badge x 10
8,000 Credits |
|
40 – 50 |
Searing Steel Blade x 3
Silvermane Insignia x 6 16,000 Credits |
|
50 – 60 |
Searing Steel Blade x 7
Silvermane Insignia x 9 40,000 Credits |
|
60 – 70 |
Searing Steel Blade x 20
Silvermane Medal x 6 80,000 Credits |
|
70 – 80 |
Searing Steel Blade x 35
Silvermane Medal x 9 160,000 Credits |
The Searing Steel Blade can be obtained by farming the Stagnant Shadow: Shape of Scorch located in Jarilo-VI or through the Synthesizer. You will go up against the Searing Prowler and will use up 30 Trailblaze Power for each round. As for Credits, you can get them through doing everything in the game, but the most effective way is to farm them through the Golden Calyx.
Honkai Star Rail Topaz and Numby Best Relics and Planar Ornaments
Relics
Firesmith of Lava Forging
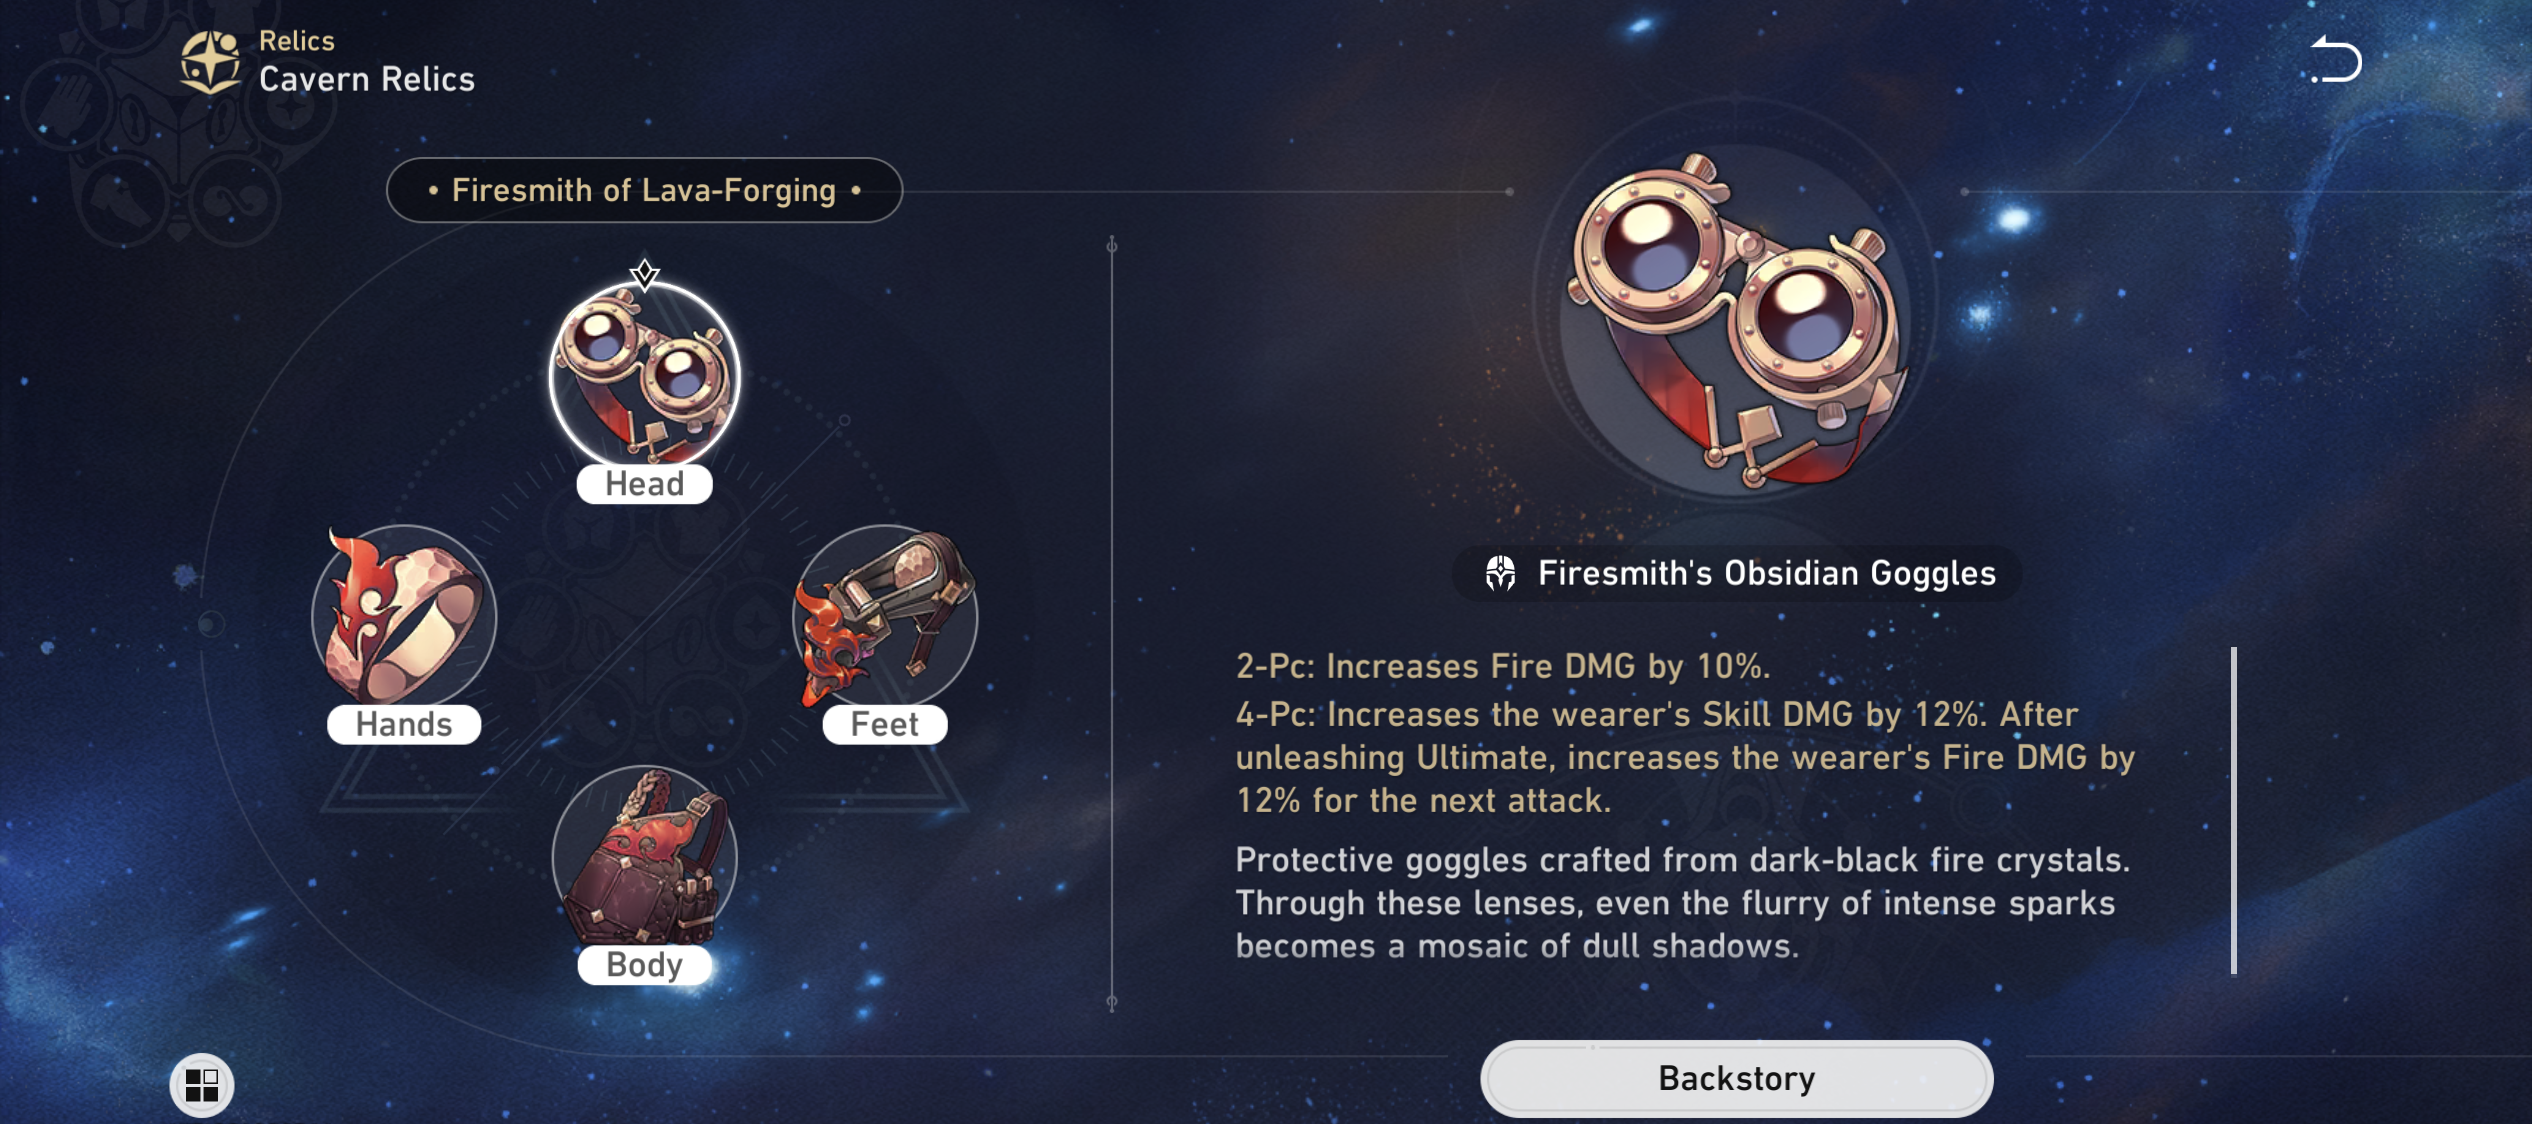
2-piece set: Increases Fire damage by 10%.
4-piece set: Increases its wearer’s Skill damage by 12%. Will increase the wearer’s Fire damage by 12% for their next attack after they use their Ultimate.
Musketeer of Wild Wheat
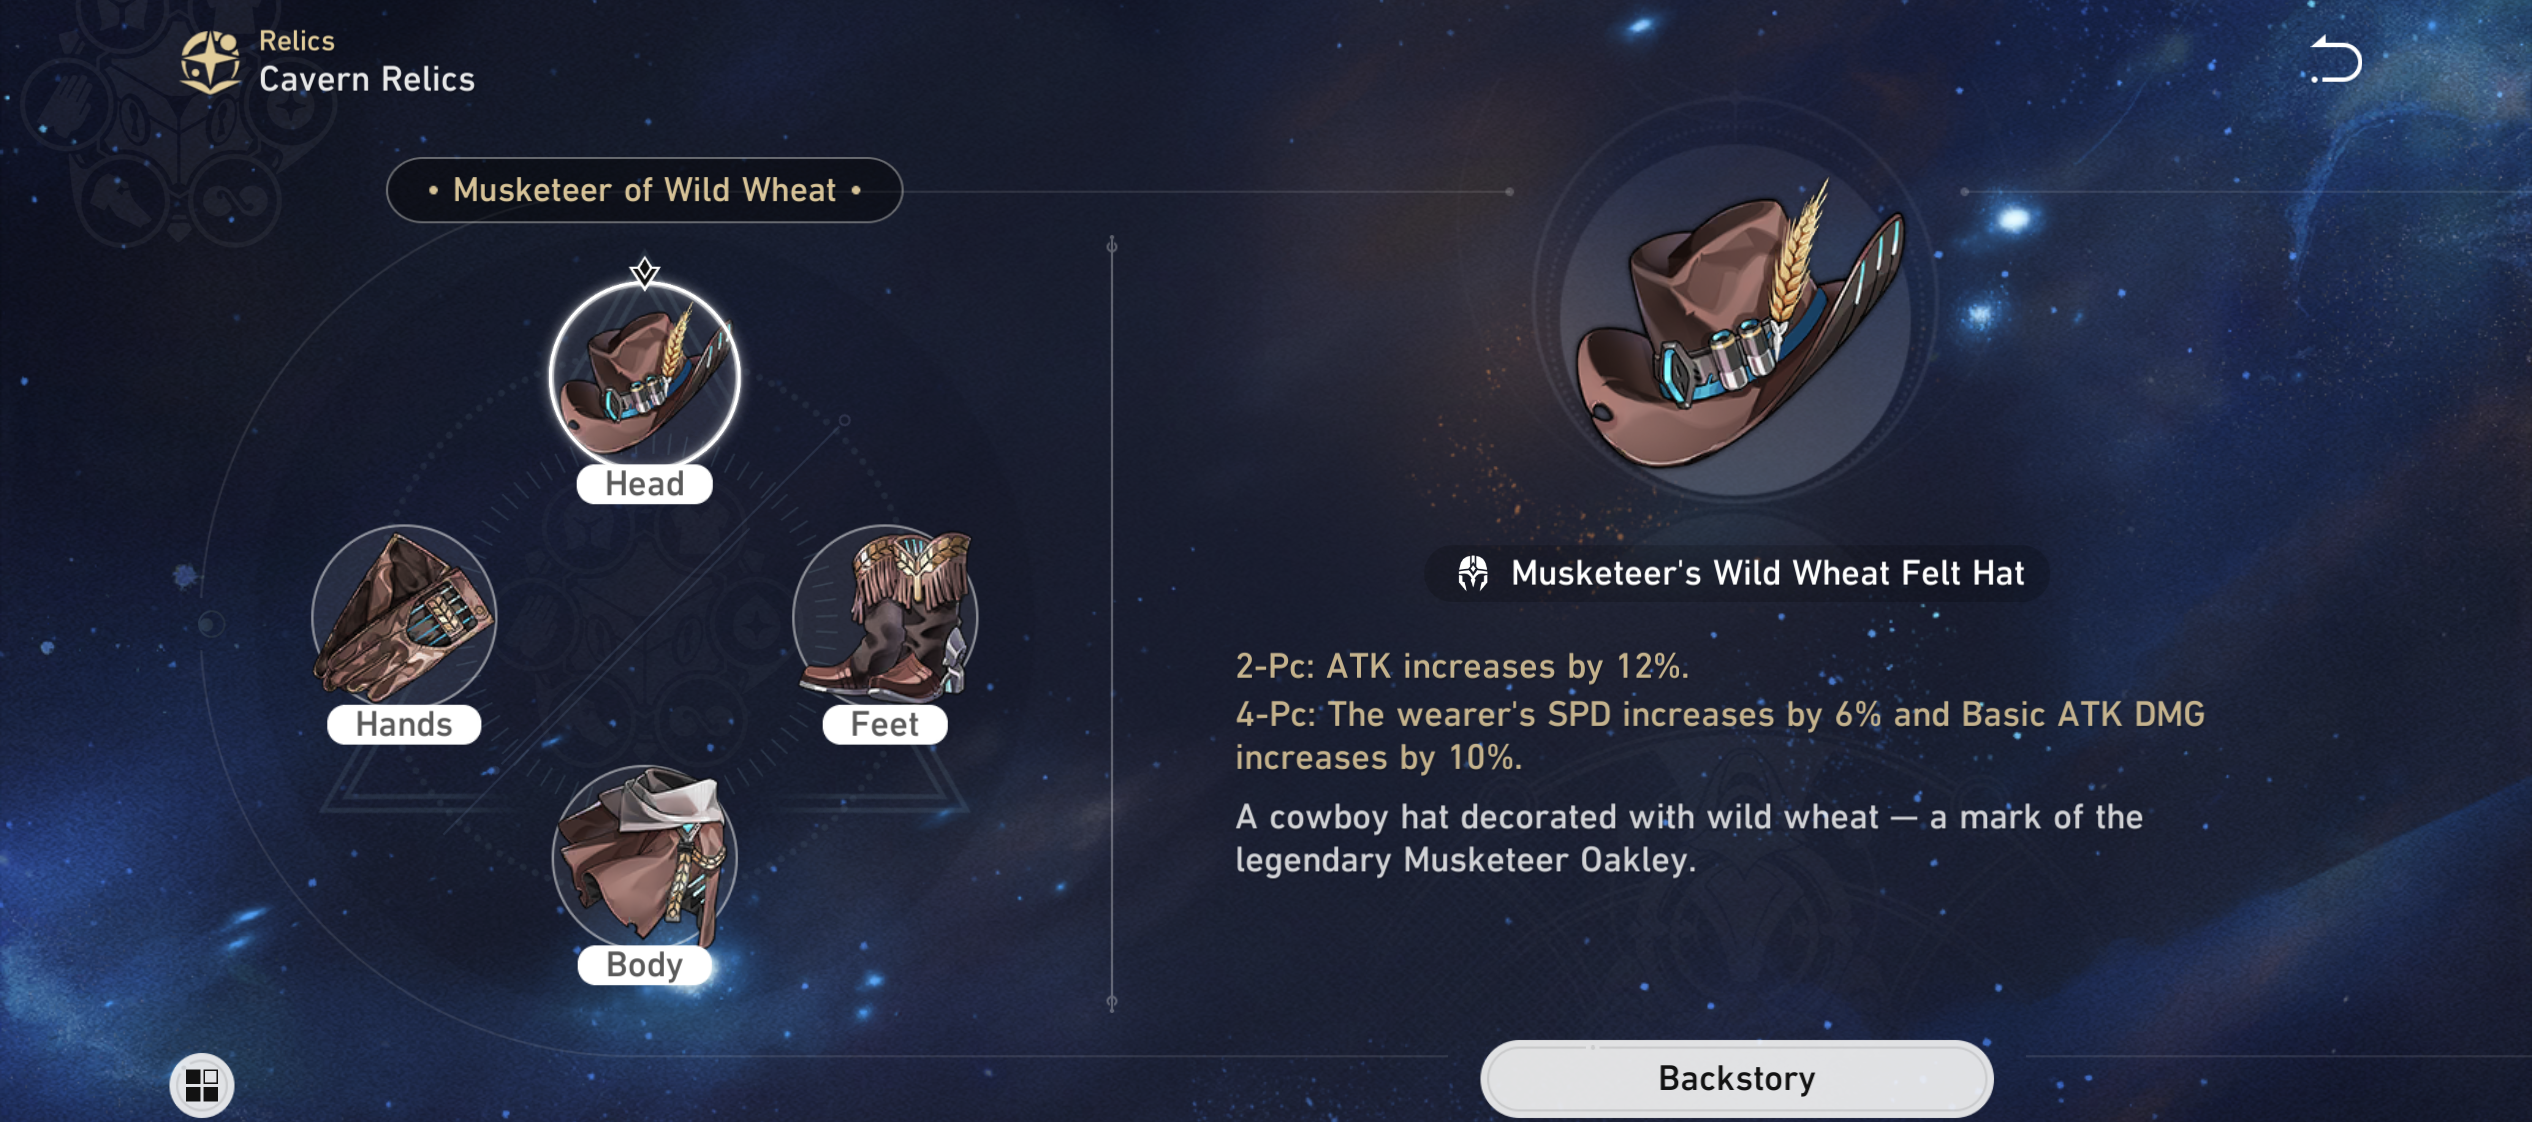
2-piece set: Increases attack by 12%.
4-piece set: Its wearer’s Speed increases by 6% and Basic Attack damage increases by 10%.
A combination of the 2-piece Firesmith of Lava Forging and 2-piece Musketeer of Wild Wheat is the perfect combination for Topaz as it helps increase her overall damage.
Messenger Traversing Hackerspace
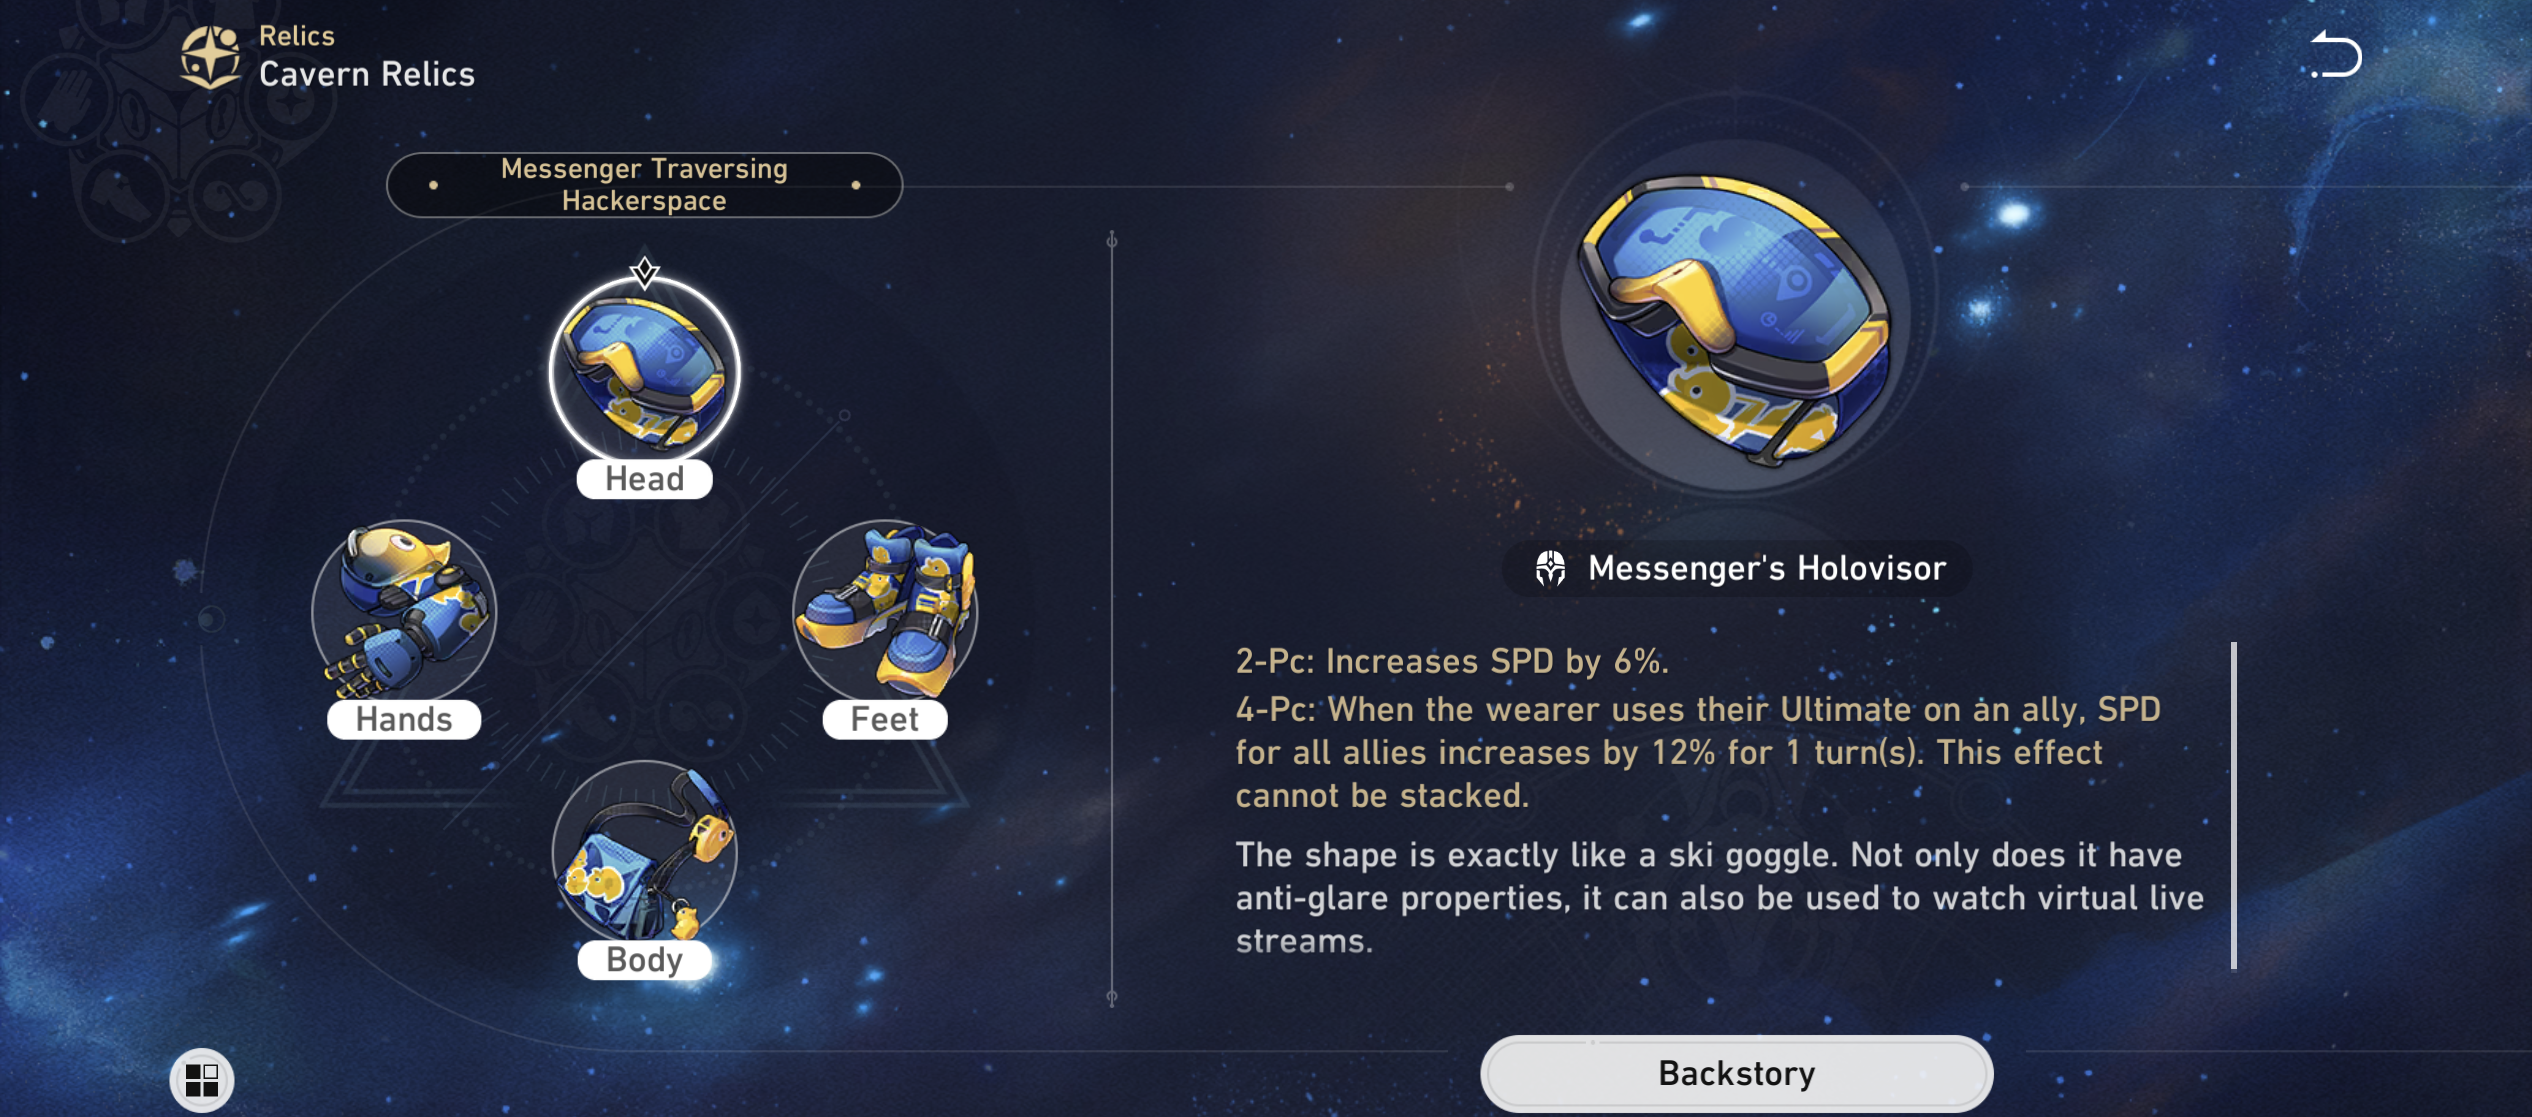
2-piece set: Increases speed by 6%.
4-piece set: When its wearer uses their Ultimate on an ally, the Speed for all allies increases by 12% for 1 turn. This effect is not stackable.
A reasonable alternative is to equip the 4-piece set for Messenger Traversing Hackerspace, especially if you’re building Topaz as a support character. You could also do a combo of the 2-piece Messenger Traversing Hackerspace and 2-piece Firesmith of Lava Forging for a sub-DPS or DPS role.
Planar Ornaments
Inert Salsotto
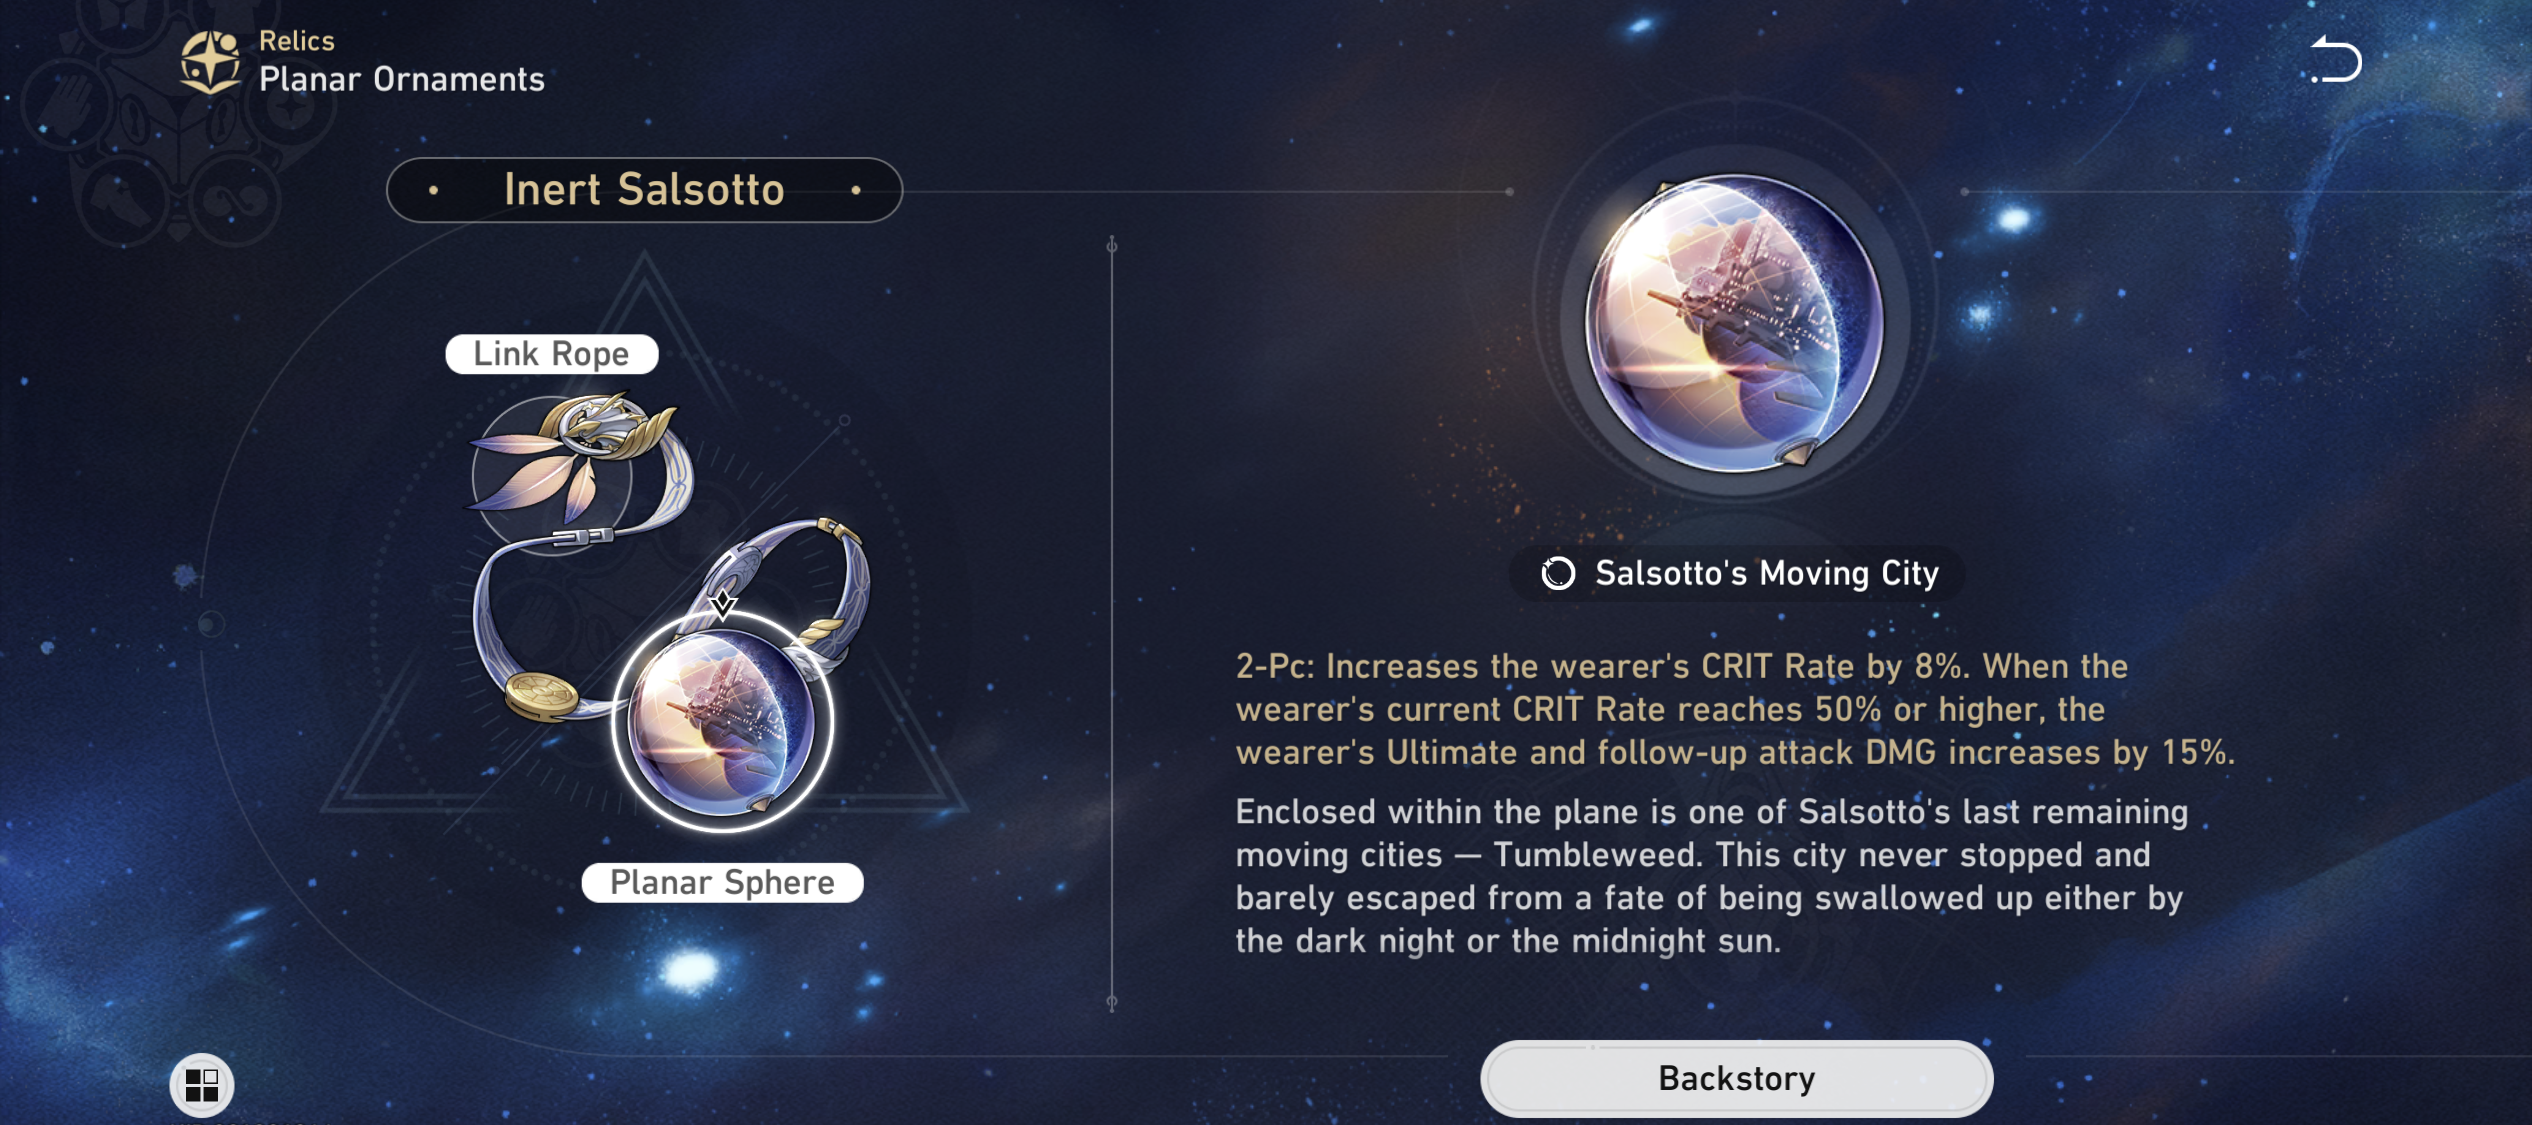
2-piece effect: Increases its wearer’s CRIT Rate by 8%. When the wearer’s CRIT Rate reaches 50% or higher, the wearer’s Ultimate and follow-up attack damage increases by 15%.
This is the best option for Topaz as most of her abilities are considered follow-up attacks which will get buffed.
Space Sealing Station
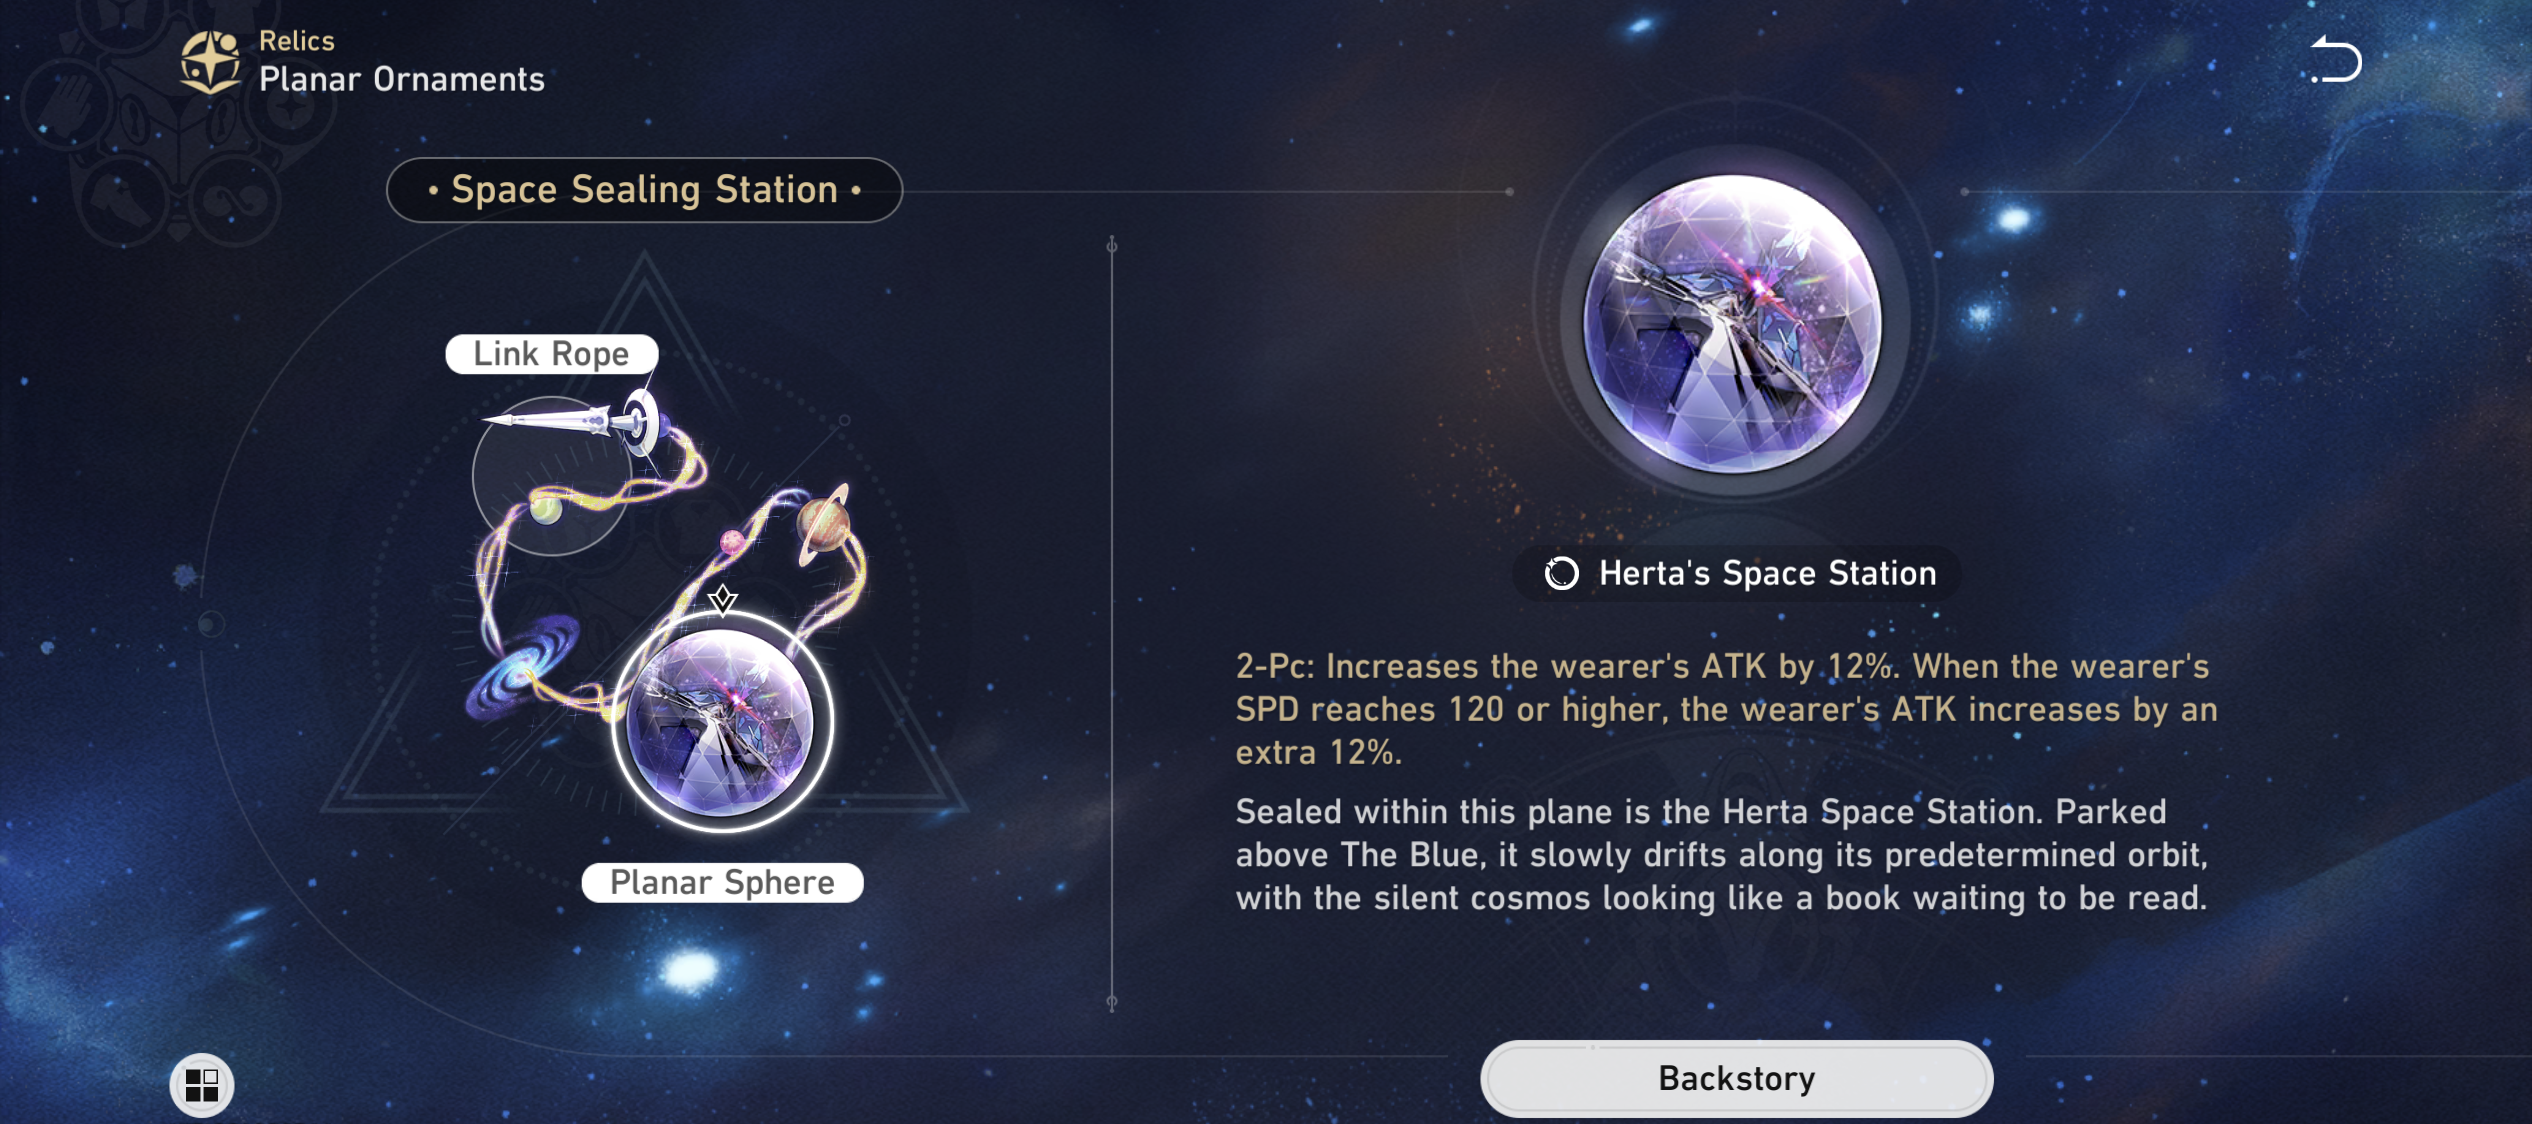
2-piece effect: Increases its wearer’s attack by 12%, and when their speed reaches 120 and above, their attack increases by an extra 12%.
This will only work if Topaz’s speed reaches 120, so you will have to build her to reach that point, or else you won’t get much from it.
Team Compositions
F2P: Asta, March 7th, Natasha
For free-to-play players, Topaz can fill up your DPS role, with Asta as support in providing speed, Fire damage boosts, and attack buffs. March 7th can trigger Numby’s Advanced Forward action as she has some follow-up attack abilities. Natasha is a good healer who will allow your team to last longer and sustain more damage.
Fire Sub-DPS: Himeko, Asta, March 7th
This is for those who are looking to build a Fire-based team. Topaz can fill your sub-DPS role or as a debuff support, with Himeko being the main DPS of your team. Asta can grant speed, Fire damage boosts, and attack buffs, as well as deal Fire damage of her own to enemies.
You could replace March 7th with Gepard if you want tankier support or shield. Either that or replace her with a healer to sustain your team to make them last longer.
Follow-Up Attack Team: Clara, Tingyun, Lynx
If you want to capitalize on the follow-up attack abilities, this would be the ideal team for you. Clara has a follow-up attack that triggers every time she gets hit. This, in turn, triggers Numby’s actions to be advanced forward. Lynx can work as your healer and support as she can place Taunt on Clara, ensuring enemies will continue to attack her, thus triggering the follow-up attack.
Tingyun is a great support in general, as she can boost attacks and damage, ensuring that the amount of damage dealt increases each time.
You’ve reached the end of our Topaz and Numby guide! We’ve got a wide range of Honkai Star Rail guides available on our site for your perusal, like this one on the latest Swarm Disaster Mode linked to the Simulated Universe. Stay tuned for more Honkai Star Rail character guides from us.